
Introduction to Lemon Lush
What is Lemon Lush and why you’ll love it?
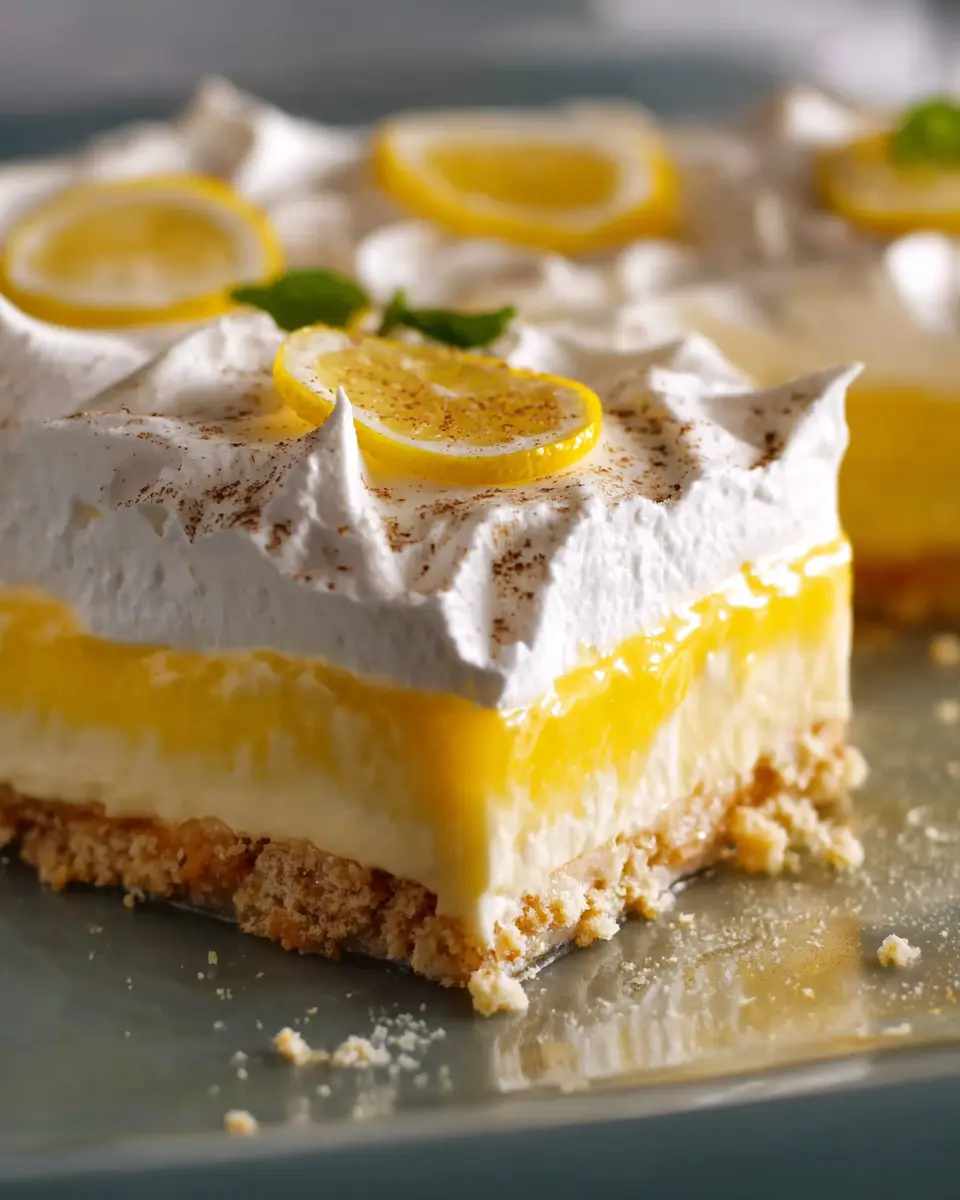
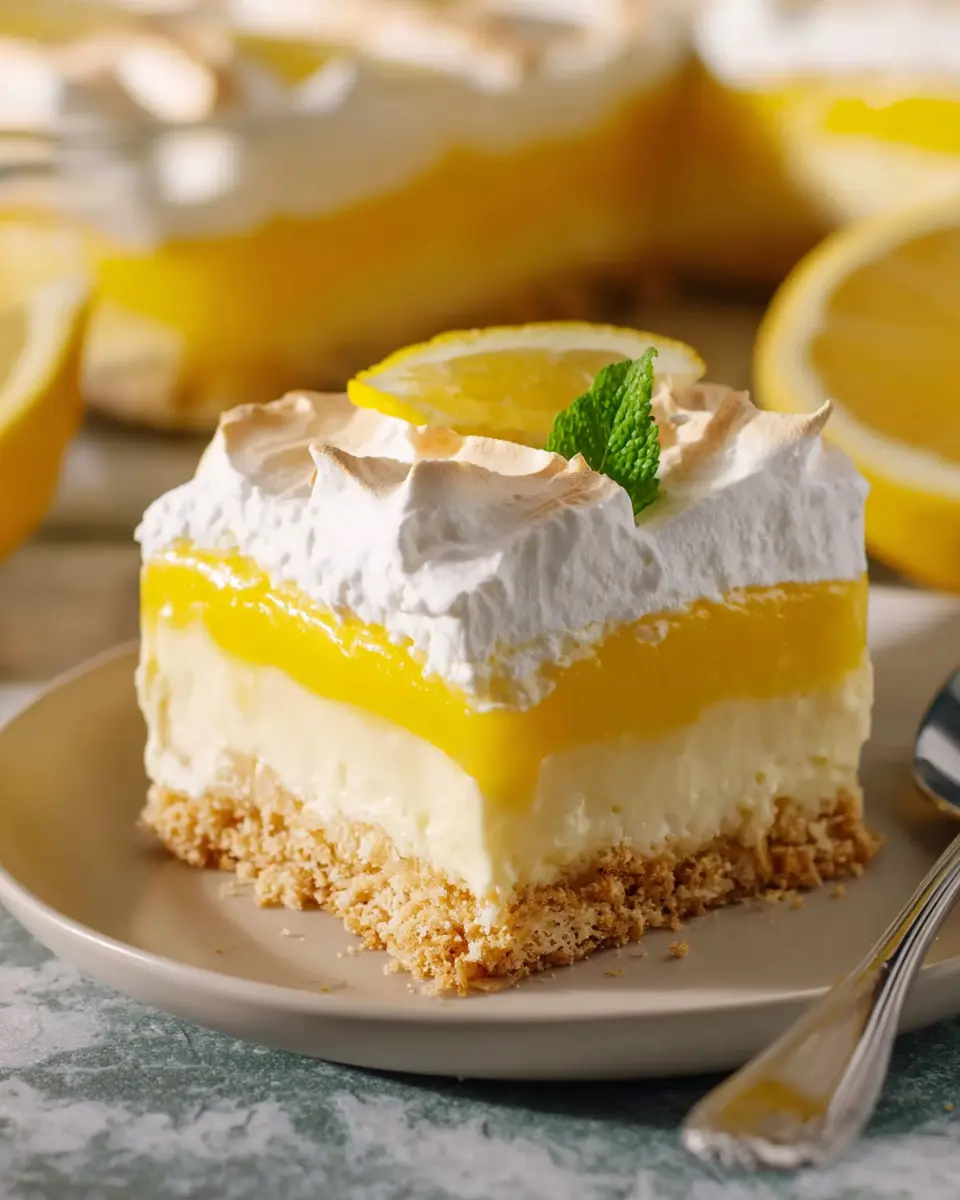
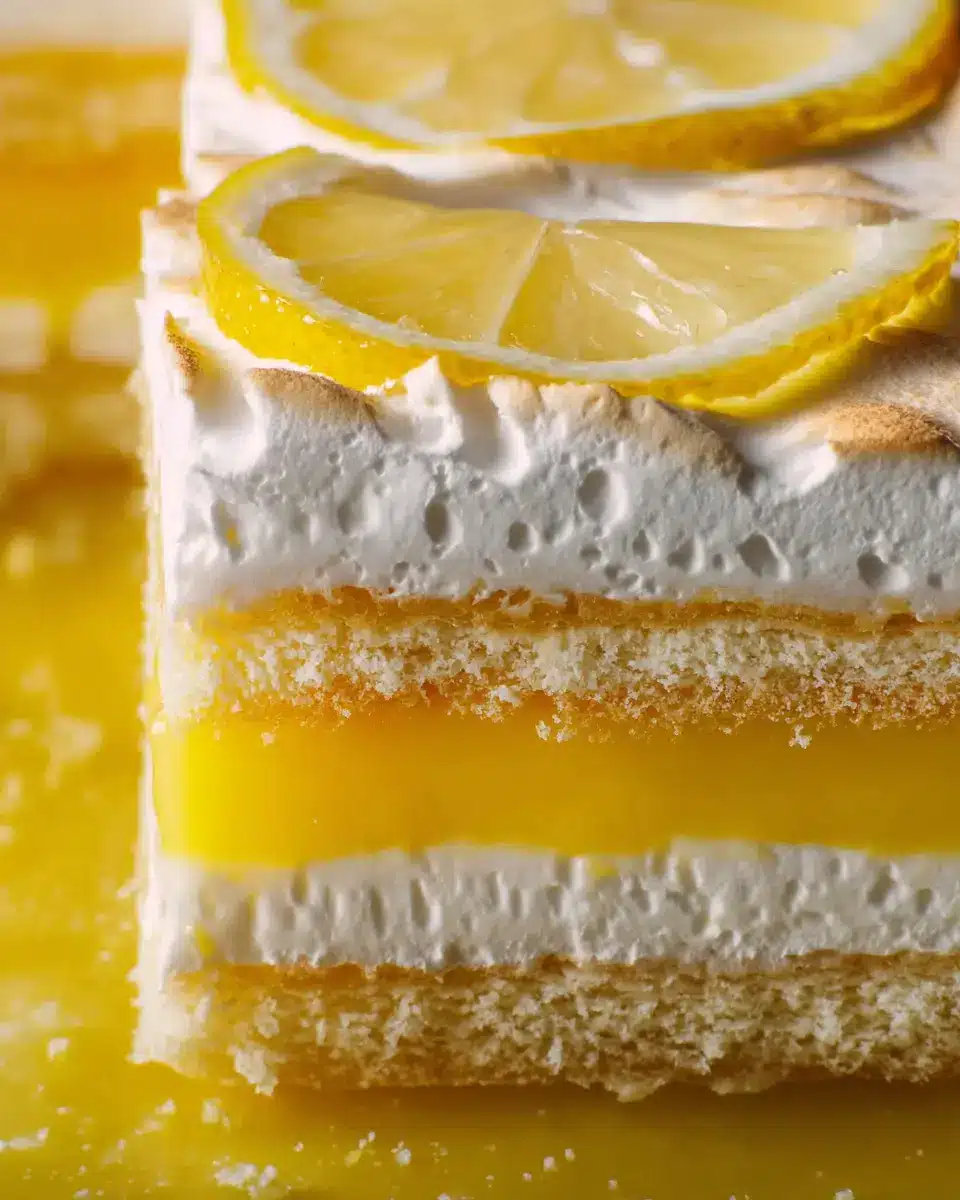
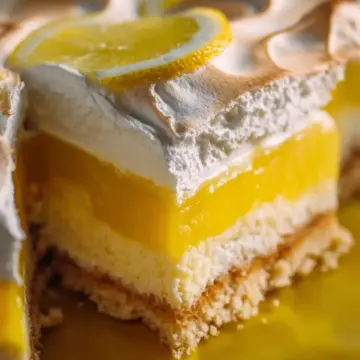
If you’re on the lookout for a dessert that’s as delightful to eat as it is easy to make, look no further than Lemon Lush. This layered dessert combines a buttery crust, a creamy cream cheese layer, and a zesty lemon pudding topping, all crowned with a fluffy whipped topping. Perfect for summer gatherings or just a sweet treat after dinner, this recipe is bound to impress your friends and family, and it may even become your new go-to dessert!
What sets Lemon Lush apart is its refreshing citrus flavor that brightens up any occasion. The tangy lemon pairs beautifully with the creamy elements, creating a dessert that feels indulgent yet light. Plus, since it’s a no-bake treat once the crust is baked, it requires minimal time in the kitchen and maximum enjoyment on your plate. If you appreciate sweets that are both easy to whip up and make a striking presentation, Lemon Lush is calling your name!
For additional tips on dessert layering techniques, check out resources from The Kitchn - they offer excellent insights into creating stunning desserts.
Ingredients for Lemon Lush
Creating your own Lemon Lush is easier than you might think! Gather these simple ingredients to whip up a delightful treat that’s perfect for any occasion.
- Nonstick cooking spray: This is essential to prevent your crust from sticking to the pan, making cleanup a breeze.
- All-purpose flour: You’ll need about 2 cups (240g), plus a little extra for dusting your hands. This forms the crust that serves as the foundation of your dessert.
- Unsalted butter: Use 2 sticks (8 ounces), softened to make mixing easier and to create that lovely crumbly texture.
- Cream cheese: 8 ounces of softened cream cheese adds richness to the filling, creating a luscious mouthfeel.
- Sugar: ⅔ cup (132g) balances the tartness of the lemon while sweetening the cream cheese layer.
- Instant lemon pudding mix: Grab 2 packages (3.4 ounces each) for that signature lemon flavor, making this dessert truly shine.
- Cold milk: Using 3 cups of whole milk will give a creamy texture to your pudding layer, making every bite indulgent.
- Whipped topping: One (8-ounce) container, thawed in the refrigerator, adds a light and airy finish to your Lemon Lush.
Once you have these ingredients ready, you're one step closer to making a refreshing and satisfying dessert that everyone will love! For more delicious ideas, check out Simply Recipes.
Preparing Lemon Lush
Lemon Lush is the perfect dessert to brighten up any gathering. With its delightful layers of creamy lemon goodness, it offers a refreshing twist that's sure to impress your friends and family. Ready to elevate your dessert game? Let’s dive into the steps for preparing this delightful treat!
Preheat the oven and prepare the pan
Start by setting your oven to 350°F. While it heats up, grab a 9x13-inch baking dish and give the bottom a light coat of nonstick cooking spray. This will ensure your crust comes out effortlessly, giving you a beautiful base for your lemon lush.
Make the crust from scratch
Now, let’s focus on that delicious crust! In a large mixing bowl, combine 2 cups of all-purpose flour with 2 sticks of softened unsalted butter. Use a fork to gently mash these ingredients together until they form a crumbly texture. Don't rush this part—it’s crucial for that ideal crust! Once it's ready, pour the mixture into the prepared dish. Use dusted hands (a little more flour can help!) to firmly press the mixture into the bottom, creating an even layer.
Bake and cool the crust layer
Pop your crust into the preheated oven and bake it for 35 to 40 minutes, or until the edges begin to turn a lovely golden brown. Once it’s done, remove it from the oven and let it cool completely. Patience is essential here; cooling the crust for at least 1 hour will prevent it from becoming soggy.
Create the cream cheese layer
While your crust cools, let’s whip up that heavenly cream cheese layer! In a stand mixer or a large bowl with a hand mixer, mix 8 ounces of softened cream cheese with ⅔ cup of sugar on medium speed. Keep mixing for about 2 minutes, ensuring it’s smooth and luscious. Carefully spread this mixture on top of your cooled crust, trying not to disturb your hard-earned crust layer too much!
Prepare the lemon pudding layer
It's time to make the lemony goodness! In a clean bowl, combine two packages of instant lemon pudding mix with 3 cups of cold milk. Blend on medium-low speed for about 2 minutes. You want to achieve an even and smooth consistency. Pour this luscious lemon pudding over your cream cheese layer, creating a beautiful golden layer to tantalize your taste buds.
Add the whipped topping
Spread an 8-ounce container of whipped topping evenly over the lemon pudding layer. This will add a creamy finish that’s just divine. Once you’ve completed this step, cover the dessert and place it in the refrigerator.
Chill and serve
Let your lemon lush chill for at least 2 hours. This will allow all the flavors to meld beautifully, and the layers will set perfectly. When it’s time to serve, slice this refreshing dessert, and get ready for the compliments to roll in!
For more amazing dessert ideas, check out Simply Recipes or explore easy dessert recipes that are sure to please any crowd. Enjoy your lemon lush!
Variations on Lemon Lush
Lemon Lush with a Berry Twist
Elevate your traditional lemon lush by adding a splash of color and flavor with berries! Layer in your favorite fresh or frozen berries—think raspberries, strawberries, or blueberries—on top of the cream cheese mixture before adding the pudding layer. The tartness of the berries complements the lemon perfectly, creating a refreshing and delightful summer dessert. You can even consider using a blend of berries for a vibrant presentation, making your lemon lush not just delicious but also visually stunning.
Gluten-Free Lemon Lush Options
Hosting friends with dietary preferences? No worry! You can easily make a gluten-free version of your lemon lush. Simply swap in gluten-free all-purpose flour for the crust and ensure your pudding mix is also gluten-free. Many brands offer a variety of gluten-free products, allowing you to enjoy a delightful dessert that everyone can savor without compromising taste. With these simple adjustments, your lemon lush will remain a crowd-pleaser, regardless of dietary restrictions. Want more tips on creating gluten-free desserts? Check out this great guide.
Cooking Tips for Lemon Lush
How to get the perfect crust
Achieving a delightful crust is all about texture. Combine your flour and softened butter until crumbly; avoid overmixing. Pressing the mixture firmly into the bottom of your baking dish creates that essential foundation for your lemon lush. Remember, a light dusting of flour on your hands helps prevent sticking, ensuring that your crust maintains its shape during baking.
Ensuring a smooth pudding layer
For a luscious pudding layer, it’s crucial to mix your instant lemon pudding and cold milk thoroughly. Use a clean bowl and mixer; this ensures no leftover cream cheese clumps interfere with the smoothness! Beat on medium-low speed for about two minutes, scraping down the sides halfway through. This technique will help you achieve that silken texture that complements the crust perfectly.
For more tips on perfecting your desserts, check out this helpful guide.
Serving Suggestions for Lemon Lush
Pairing with Fresh Fruit
Elevate your Lemon Lush experience by serving it alongside fresh fruit. Think vibrant berries like strawberries, blueberries, or raspberries for a delightful contrast to the creamy layers. The tartness of the fruit complements the zesty lemon flavor perfectly, offering a refreshing palate cleanser after each slice. Add a sprig of mint on top for a pop of color and a burst of fresh flavor.
Ideal Occasions for Serving Lemon Lush
Lemon Lush is a fantastic treat for various occasions. Whether it’s a summer barbecue, a birthday party, or a cozy dinner with friends, this dessert never fails to impress. It’s also a great option for seasonal celebrations like Easter or Mother’s Day. Its light, refreshing taste makes it perfect for warm weather gatherings, and the no-bake aspect means less time in the kitchen and more time enjoying the moment!
Looking for other delicious dessert ideas? Check out Simply Recipes for inspiration.
Time Breakdown for Lemon Lush
Preparation Time
Get ready to whip up this delightful Lemon Lush in just 30 minutes of prep time. This step involves gathering your ingredients, mixing the crust, and assembling the layers.
Chilling Time
After that, you’ll need to show some patience. The dessert requires at least 2 hours of chilling in the refrigerator to set properly, so plan accordingly!
Total Time
All in all, your total time investment for this refreshing Lemon Lush dessert is about 2 hours and 30 minutes, including chilling. Perfect for a weekend treat or a special gathering!
Helpful Resources for Your Baking Adventure
- Check out the Spruce Eats for more tips on creating the perfect no-bake desserts.
- For essential baking techniques, visit King Arthur Baking and expand your culinary skills!
Enjoy the process, and don't forget to savor every bite!
Nutritional Facts for Lemon Lush
Caloric Breakdown
Indulging in lemon lush can be a delightful experience, and it's handy to know its caloric content. Each serving packs around 426 calories, offering a balanced treat that nests lightly within your daily intake.
Key Nutrients
This vibrant dessert not only tastes fabulous but also provides:
- 28g Fat: A mix of healthy fats from the cream cheese and whipped topping for a satisfying mouthfeel.
- 38g Carbohydrates: Primarily sourced from sugar and flour, giving you a quick energy boost.
- 6g Protein: From cream cheese and whipped topping, contributing to a sense of fullness.
If you're curious about how desserts fit into a balanced diet, check out this guide on healthy indulgence. Remember, moderation is key, and enjoying lemon lush can definitely be part of a balanced lifestyle!
FAQs about Lemon Lush
Can I make Lemon Lush ahead of time?
Absolutely! Lemon Lush is a perfect make-ahead dessert. You can prepare it a day in advance; just be sure to let it chill in the refrigerator for at least two hours. This allows the layers to set beautifully and enhances the flavors.
How do I store leftovers?
If you find yourself with leftover Lemon Lush, store it in an airtight container in the refrigerator. It keeps well for up to two days. Just remember, the longer it sits, the softer the crust may become, but the lemony goodness will still shine through!
Can I substitute ingredients in Lemon Lush?
Definitely! If you're looking to make some tweaks, consider these substitutions:
- Gluten-free option: Swap in a gluten-free all-purpose flour.
- Dairy-free version: Use vegan butter and coconut or almond milk with non-dairy whipped topping.
- Sugar alternatives: For a healthier twist, you can replace sugar with a sweetener like stevia.
Get creative and tailor it to your taste! For more tips on substitutions, check out this informative article.
Conclusion on Lemon Lush
Why you need to try making Lemon Lush!
Lemon Lush is your ultimate go-to dessert for a refreshing and delightful treat. Bursting with citrusy flavors, this layered dessert is easy to prepare and perfect for any gathering. Why not impress your friends with this light and fluffy delight? Trust me, once you try it, you’ll be hooked!
Lemon Lush
Equipment
- 9×13 inch baking dish
- Mixing Bowl
- stand mixer
- Spatula
Ingredients
Crust
- 2 cups all-purpose flour plus more for your hands
- 2 sticks unsalted butter softened
Cream Cheese Layer
- 8 ounces cream cheese softened
- ⅔ cup sugar
Pudding Layer
- 2 packages instant lemon pudding mix
- 3 cups cold milk preferably whole
Topping
- 1 container whipped topping thawed in the refrigerator
Other
- nonstick cooking spray
Instructions
Preparation
- Preheat the oven to 350°F. Spray the bottom of a 9x13-inch baking dish with nonstick cooking spray.
- In a large mixing bowl, combine the flour and softened butter. Use a fork to mash them together until the mixture has a crumbly texture. Pour the crumbly mixture into the prepared baking dish. Dust your hands with a little flour, then firmly press the mixture into the bottom of the baking dish to create the crust layer.
- Bake the crust until the edges start to turn golden, 35 to 40 minutes. Allow the crust to cool completely, at least 1 hour, before moving to the next step.
- In the bowl of a stand mixer, combine the softened cream cheese and sugar. Mix on medium speed until smooth, about 2 minutes, using a spatula to scrape the bowl halfway through. Spread the cream cheese mixture over the cooled crust.
- In a clean mixer bowl, combine the pudding mix and milk. Mix on medium-low speed until well combined and smooth, about 2 minutes, using the spatula to scrape down the sides halfway through. Pour the mixture evenly over the cream cheese layer.
- Spread the thawed whipped topping evenly on top of the pudding layer. Cover and chill the dessert in the refrigerator until firm, at least 2 hours, then slice and enjoy.
Leave a Reply