
Introduction to Japanese Katsu Bowls
Why are Japanese Katsu Bowls a fantastic meal choice?
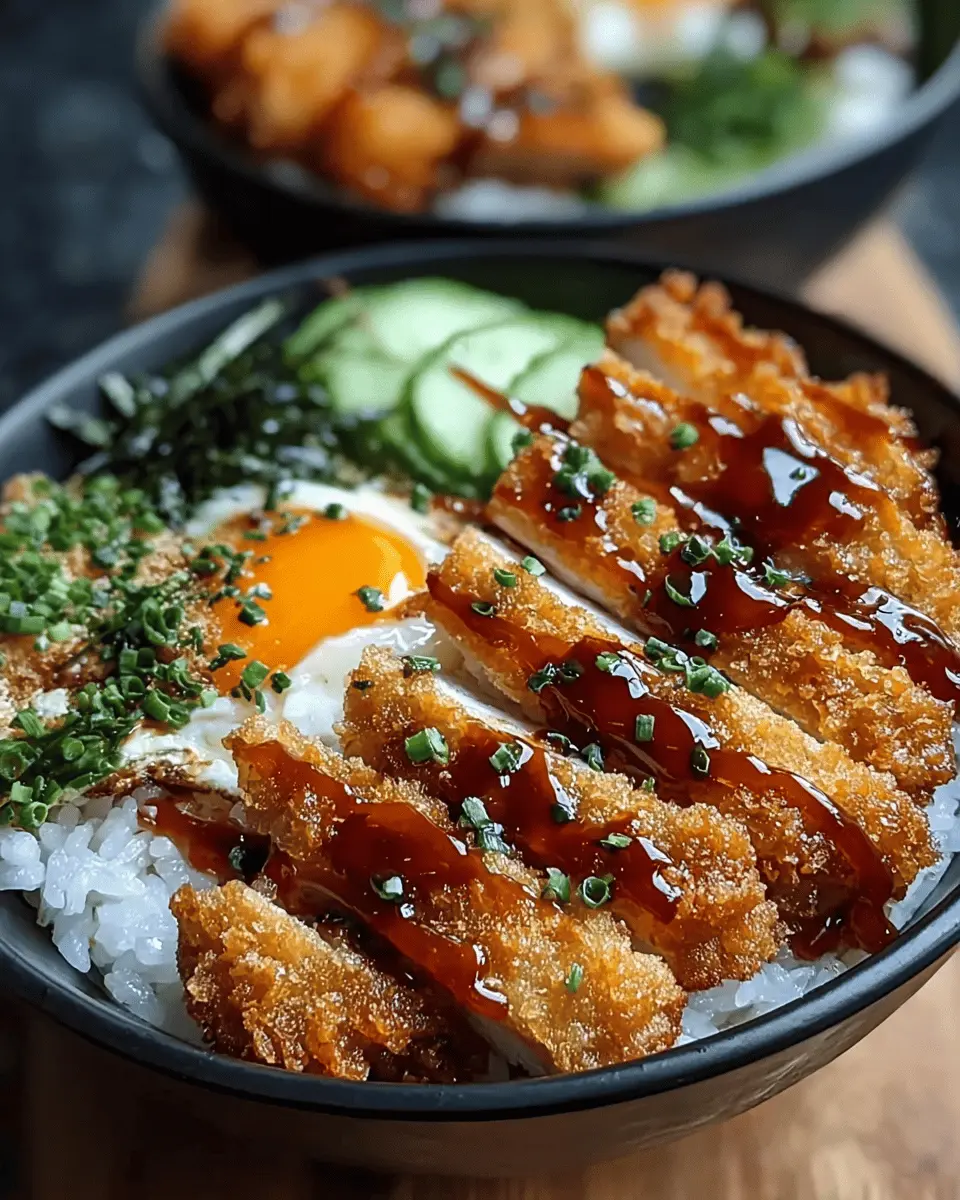
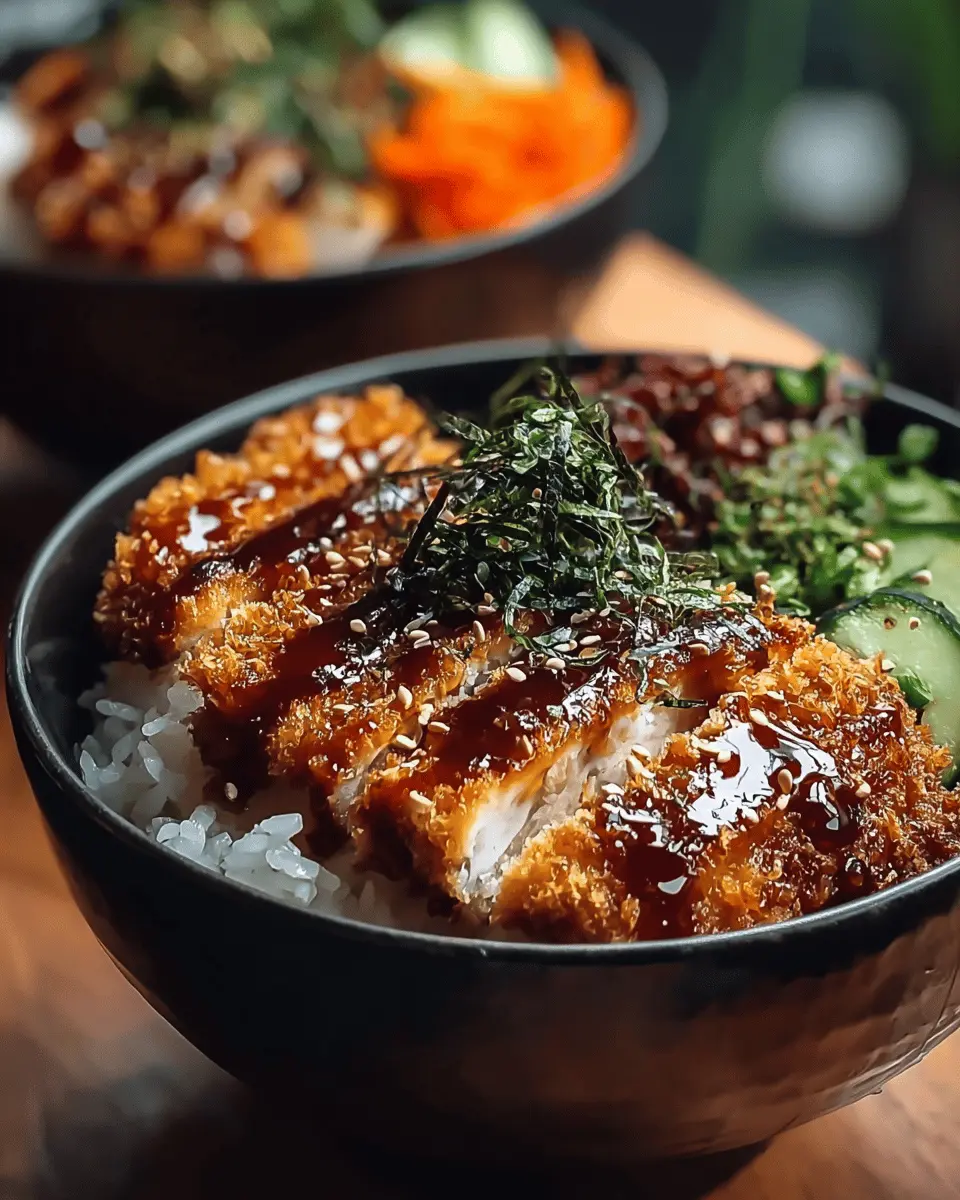
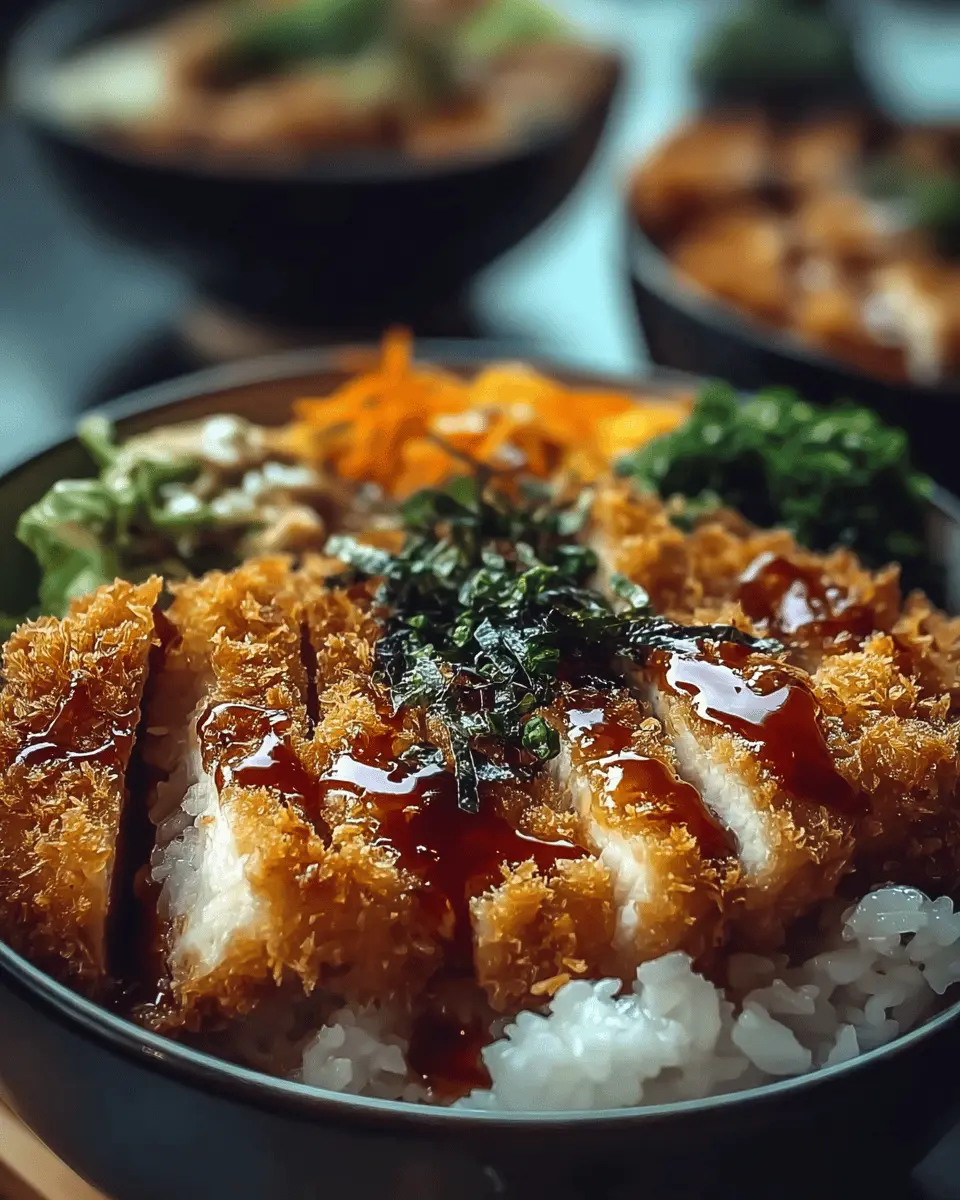
When you think of comfort food, Japanese Katsu Bowls are hard to beat. This delightful dish combines crispy, golden-breaded chicken (or beef, if you prefer) with fluffy short-grain rice, vibrant vegetables, and a drizzle of rich tonkatsu sauce. It's a balance of textures and flavors that can satisfy even the strongest cravings.
What makes Katsu Bowls particularly appealing is their versatility. You can easily switch up ingredients to cater to your taste and nutritional needs. Want more veggies? Add colorful stir-fried bell peppers or snap peas. Craving a spicy kick? A dash of chili oil can transform your bowl into a fiery delight.
Additionally, preparing Japanese Katsu Bowls at home is not only fun but allows you to control what goes into your meal. According to a study by the USDA, cooking at home can also help you eat healthier since you can manage portion sizes and ingredient quality.
Whether you're meal-prepping for the week or whipping up a quick dinner after a long workday, Japanese Katsu Bowls promise satisfaction and nourishment, making them a fantastic meal choice for busy young professionals. Curious to give it a try? Let’s dive into the recipe!
Ingredients for Japanese Katsu Bowls
Creating delicious Japanese Katsu Bowls at home is a wonderful way to indulge your taste buds! To whip up this comforting dish, you'll need flavorful ingredients that come together beautifully. Here’s what you’ll need:
- Protein: Start with 2 boneless chicken breasts or substitute with pork loin for a different twist. Season them with salt and pepper to enhance the flavor.
- Breading Essentials: You’ll require 1 cup of all-purpose flour, 2 large eggs, and 1 cup of panko breadcrumbs. The panko gives that irresistible crunch that makes katsu so special.
- Frying: Use vegetable oil for frying; it helps achieve that golden-brown perfection!
- Rice Base: Prepare 2 cups of Japanese short-grain rice and 2 ½ cups of water, then season it with a mixture of rice vinegar, sugar, and salt.
- Toppings: Don’t forget the crunchy shredded cabbage, green onions, sesame seeds for garnish, and a drizzle of tonkatsu sauce for an explosion of flavor!
If you're looking for more inspiration, check out resources like Just One Cookbook for in-depth techniques and tips on Japanese cooking. Enjoy your culinary adventure!
Step-by-step Preparation of Japanese Katsu Bowls
Making Japanese Katsu Bowls at home is an exciting culinary adventure, and with this step-by-step guide, you'll be able to dish up a perfectly crispy katsu in no time. Let’s dive into the details!
Rinse and soak the rice
Begin with prepping the rice, as it forms the base of your bowl. Rinse 2 cups of Japanese short-grain rice under cold water—this process is crucial as it removes excess starch and helps the rice achieve that delightful sticky texture. Continue rinsing until the water runs clear, indicating that the rice is clean. Next, transfer the rinsed rice to a saucepan, add 2 ½ cups of water, and let it soak for 30 minutes. This soaking break is essential for ensuring your rice turns out fluffy and perfect. If you're unsure about the marination times, check this guide from Japan Centre.
Prepare the tonkatsu sauce
While the rice is soaking, let’s whip up a delicious homemade tonkatsu sauce! Combine ¼ cup of tonkatsu sauce with 1 tablespoon soy sauce, 1 teaspoon Worcestershire sauce, and 1 teaspoon ketchup in a bowl. Stir it together and taste—you might decide you want to add a dash more of Worcestershire for that irresistible tang. This sauce will bring your Katsu Bowls to life, elevating them from ordinary to extraordinary.
Prepare the chicken and breading station
With the sauce ready, it’s time to turn your attention to the protein. Take 2 boneless chicken breasts and pound them to an even thickness of about ½ inch for uniform cooking. Season both sides with salt and pepper to bring out the flavor. Set up a breading station: arrange 1 cup of all-purpose flour, 2 large beaten eggs, and 1 cup of panko breadcrumbs in shallow bowls. Dredge each chicken breast in flour, dip into the eggs, and finally coat with panko breadcrumbs. This triple-layer breading is what creates that delightful crunch!
Fry the chicken
Now, the fun begins! Heat a generous amount of vegetable oil in a skillet over medium heat. Once hot (you can test it by dropping in a breadcrumb; it should sizzle), carefully place the breaded chicken in the pan. Fry each piece for 4-5 minutes per side or until golden brown and fully cooked. This step is crucial—if the oil isn’t hot enough, your chicken might absorb too much oil and lose that crispiness. Remember to drain the fried chicken on paper towels to absorb excess oil before slicing.
Assemble your Katsu Bowl
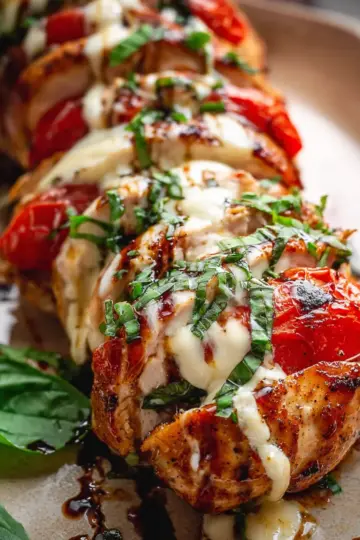
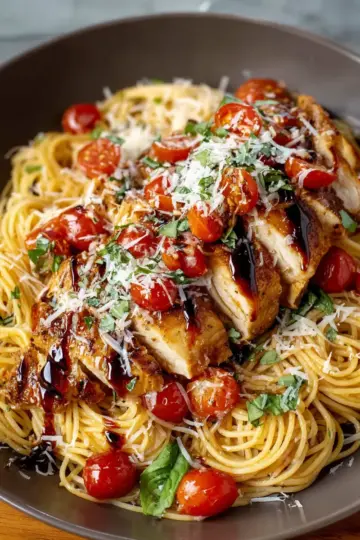
Finally, it’s time to assemble your Japanese Katsu Bowls! Start by serving a generous portion of the fluffy rice at the base of your bowl. Slice the crispy chicken and place it beautifully on top of the rice alongside 1 cup of shredded cabbage. Don’t forget to sprinkle some sliced green onions and sesame seeds for that extra burst of flavor and color. A drizzle of your homemade tonkatsu sauce ties everything together beautifully. If you’re feeling fancy, add a small serving of pickled ginger on the side.
And there you have it—a sumptuous bowl of Japanese Katsu ready to be enjoyed! Whether you’re hosting friends or enjoying a quiet dinner, this dish is sure to impress. Happy cooking!
Variations of Japanese Katsu Bowls
Substituting Chicken for Pork or Beef
When you're craving a comforting bowl of Japanese Katsu Bowls, you don't have to stick to just chicken. Feel free to explore other proteins! Pork loin offers a classic taste, while beef can add a heartier flavor profile. Just remember to adjust your cooking times slightly—a thicker cut may need more time to fry to perfection. Which option quenches your hunger?
Vegetarian and Vegan Options for Katsu Bowls
If you're looking for a plant-based spin on Japanese Katsu Bowls, you’ve got tasty alternatives! Consider using sliced eggplant, tofu, or even tempeh as your main ingredient. Coat them in the same flour, egg, and panko mixture for that satisfying crunch. The flavor profiles are equally delightful when paired with fresh veggies and your usual sauces. Have you tried a katsu bowl with crispy jackfruit yet? It's a game-changer!
For more ideas on alternative proteins, check out resources like The Kitchn or Minimalist Baker.
Cooking Tips and Notes for Japanese Katsu Bowls
Creating Japanese Katsu Bowls at home is such a delightful experience! Here are some handy tips to elevate your dish:
-
Frying Temperature: Always ensure your oil is hot enough before adding the chicken. This helps achieve that perfect crispy coating without being greasy. A good rule of thumb? Test a breadcrumb; it should sizzle on contact!
-
Bread Crumb Alternatives: If you can’t find panko breadcrumbs, regular breadcrumbs work too, but the texture won’t be quite the same. For a unique twist, consider crushing some cornflakes for crunch.
-
Custom Sauce: Tailor the tonkatsu sauce to match your taste. Love a hint of sweetness? Add more ketchup or sugar. Prefer a tangy kick? Increase the Worcestershire sauce.
Feel free to explore more about the flavors of katsu here! Enjoy your cooking adventure!
Serving Suggestions for Japanese Katsu Bowls
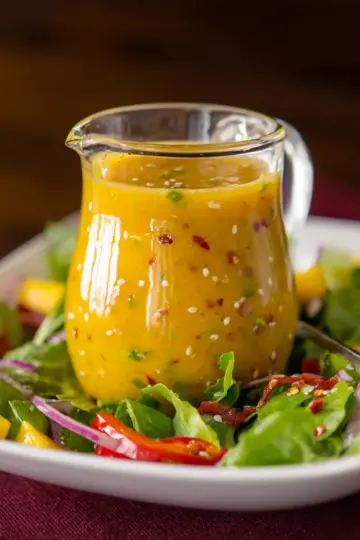
When serving your delightful Japanese Katsu Bowls, consider adding some refreshing sides to create a balanced meal. A simple cucumber salad dressed in rice vinegar and sesame oil pairs perfectly, offering a crunchy contrast to the crispy katsu.
For an extra flavor boost, serve with a bowl of miso soup—a comforting addition that's classic in Japanese cuisine. Don’t forget to sprinkle on some toasted sesame seeds for an appealing finish.
Feeling adventurous? Add fresh seasonal fruits like sliced mango or strawberries for a unique twist. Your friends and family will surely rave about your Japanese Katsu Bowls!
Time Breakdown for Japanese Katsu Bowls
Preparation Time
Getting your ingredients ready takes about 30 minutes. This includes rinsing the rice, soaking, and setting up your breading station. Don’t forget to season your chicken well!
Cooking Time
The frying process and cooking the rice will take approximately 30 minutes. Multi-tasking during this time can help make everything flow smoothly, so feel free to keep an eye on both the rice and the chicken.
Total Time
In total, you'll spend around 1 hour preparing and cooking your delicious Japanese Katsu Bowls. Trust me, this tasty meal is well worth the time!
For more tips on cooking rice perfectly, check out this guide that delves into the nuances of Japanese rice cooking. Ready to dig in and enjoy your Katsu experience?
Nutritional Facts for Japanese Katsu Bowls
When it comes to delicious and satisfying meals, Japanese Katsu Bowls hit the mark. Here's a quick breakdown of the nutritional facts:
Calories
One serving of a traditional katsu bowl contains approximately 600-700 calories. This can vary based on portion size and the cooking method used.
Protein
Packed with protein, a serving of katsu provides about 30-40 grams, making it a great choice for muscle recovery and energy.
Sodium
While it contributes to flavor, keep in mind that katsu bowls can have a sodium content of around 800-1000 mg per serving. Be sure to adjust sauce quantities to suit your dietary needs!
For more insights on Japanese cuisine and its nutritional benefits, check out Nutrition Data or USDA FoodData Central. Eating mindfully doesn’t mean sacrificing flavor, and Japanese Katsu Bowls are a perfect example of balance. Enjoy!
FAQs about Japanese Katsu Bowls
Can I make Katsu Bowls in advance?
Absolutely! You can prepare many elements of Japanese Katsu Bowls ahead of time. For instance, you can cook the rice and store it in the refrigerator for up to three days. The chicken can also be breaded and refrigerated before frying, though it's best to fry it fresh for maximum crispiness. Just remember, once fried, the katsu is best enjoyed immediately for that perfect crunch.
What sides pair well with Katsu Bowls?
While the katsu itself is hearty, consider serving it with refreshing sides to balance the meal. Some popular options include:
- Miso Soup: A warm and comforting classic.
- Pickled Vegetables: A great way to add zest and acidity.
- Edamame: Light, protein-packed, and fun to eat!
These sides complement your Katsu Bowls beautifully and enhance your dining experience.
Are there any gluten-free options for Katsu Bowls?
Yes, you can make gluten-free Katsu Bowls! Use gluten-free flour and panko breadcrumbs to substitute the traditional options. This way, you can still enjoy the deliciousness of katsu without compromising your dietary needs. Just be sure to check the labels on any sauces like tonkatsu or soy sauce, as some may contain gluten.
Conclusion on Japanese Katsu Bowls
Japanese Katsu Bowls offer a delightful blend of flavors and textures, making them a perfect comfort meal. Whether you choose chicken or beef, the crispy katsu paired with fluffy rice is sure to impress. Give this recipe a try, and enjoy a taste of Japan in your home!
Japanese Katsu Bowls: Easy and Indulgent Comfort Food at Home
Equipment
- Pan
- Skillet
- Saucepan
- Mixing Bowl
- meat mallet
Ingredients
Panko Chicken
- 2 pieces boneless chicken breasts or pork loin, if preferred
- salt to taste
- pepper to taste
- 1 cup all-purpose flour
- 2 large eggs beaten
- 1 cup panko breadcrumbs
- vegetable oil for frying
Rice and Seasoning
- 2 cups Japanese short-grain rice
- 2.5 cups water
- 1 tablespoon rice vinegar
- 1 tablespoon sugar
- 0.5 teaspoon salt
Tonkatsu Sauce
- 0.25 cup tonkatsu sauce or store-bought
- 1 tablespoon soy sauce
- 1 teaspoon Worcestershire sauce
- 1 teaspoon ketchup
Garnishes
- 1 cup shredded cabbage
- 2 pieces green onions sliced
- sesame seeds for garnish
- pickled ginger optional
Instructions
Preparation
- Rinse the rice under cold water until the water runs clear.
- Transfer the rinsed rice to a saucepan, add water, and soak for 30 minutes.
- Cover and bring to a boil, then reduce heat and simmer for 15 minutes without lifting the lid.
- Turn off the heat and let the rice sit, covered, for another 10 minutes.
- Mix rice vinegar, sugar, and salt in a bowl until dissolved, then fold into the rice gently.
Cooking Chicken
- Pound chicken breasts to an even thickness of about ½ inch and season with salt and pepper.
- Set up a breading station with flour, beaten eggs, and panko breadcrumbs.
- Dredge chicken in flour, dip in eggs, and coat with panko.
- Heat vegetable oil in a skillet and fry chicken for 4-5 minutes on each side until golden brown and cooked through.
- Drain on paper towels and let rest before slicing.
Sauce and Serve
- Combine tonkatsu sauce, soy sauce, Worcestershire sauce, and ketchup in a bowl and mix well.
- Serve rice on a plate, top with sliced katsu, shredded cabbage, green onions, and sesame seeds. Drizzle with sauce and garnish with pickled ginger if desired.
Leave a Reply