
Introduction to Pumpkin Patch Dirt Cups
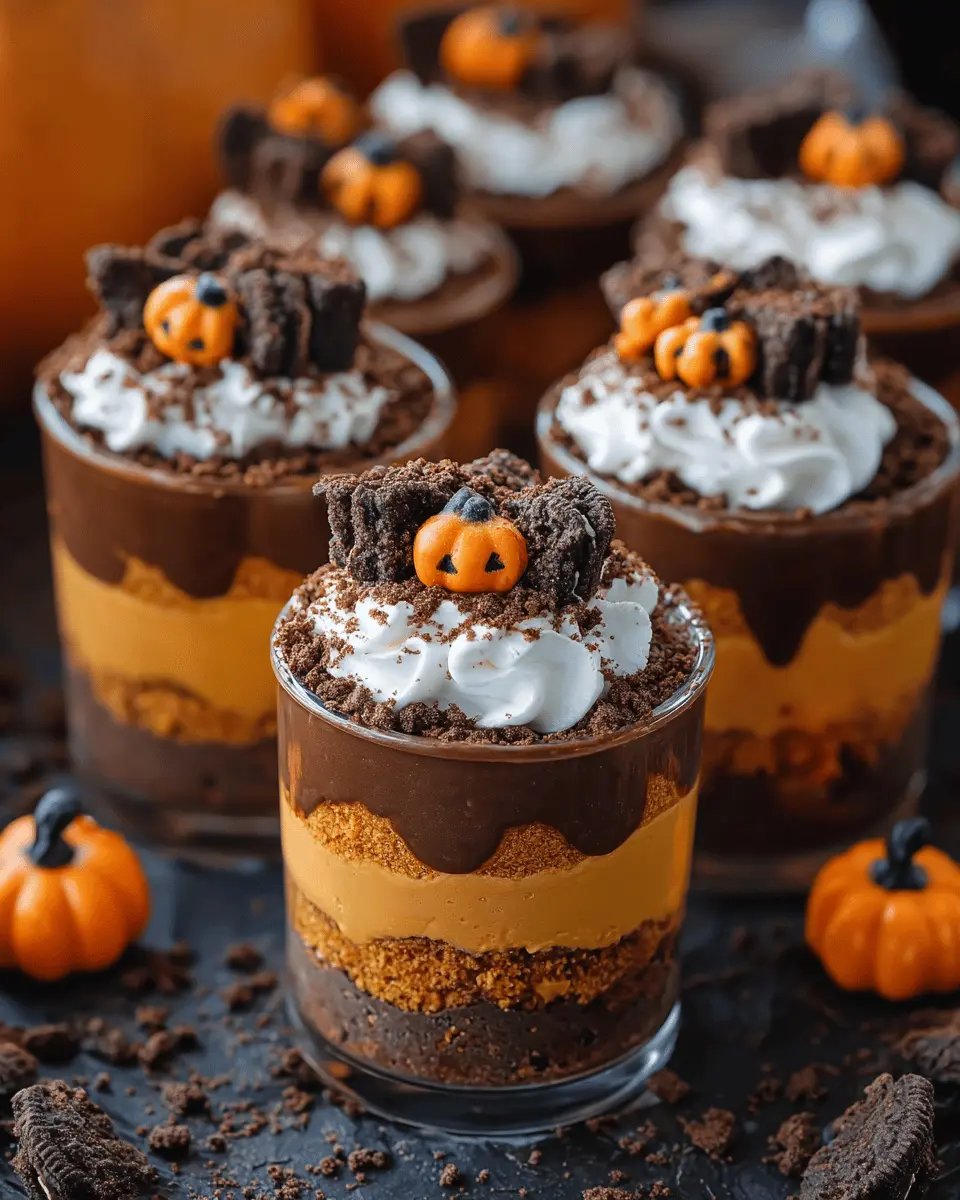
As the crisp autumn air sets in, there's something wonderfully nostalgic about enjoying seasonal treats that evoke childhood memories. Pumpkin Patch Dirt Cups perfectly capture that fall spirit, combining delicious flavors with a playful presentation. These delightful desserts are not just visually appealing, but they are also incredibly easy to make, ensuring everyone can join in on the fun—whether you're hosting a festive gathering or just looking for a cozy night in.
Why Pumpkin Patch Dirt Cups Are Perfect for Fall?
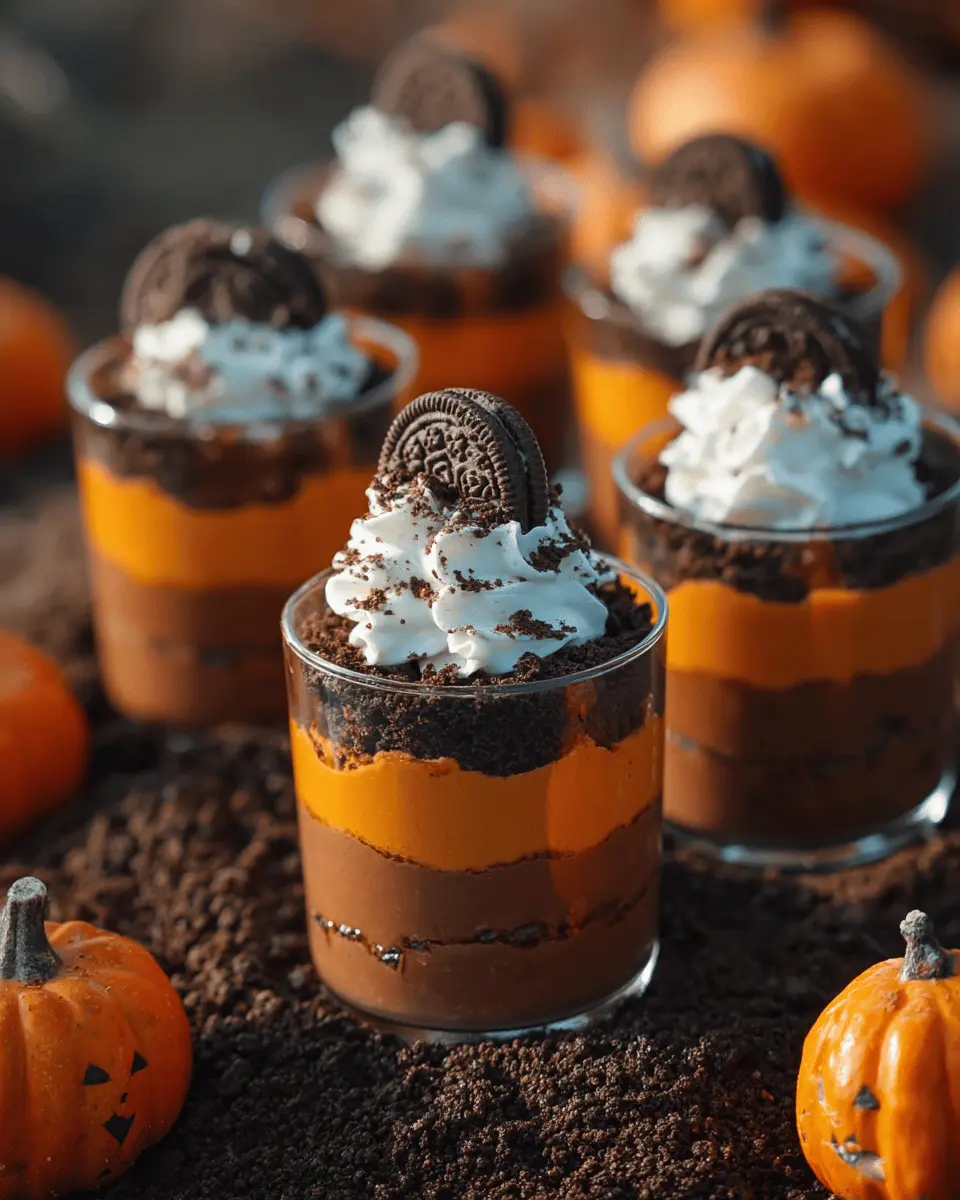
Imagine gathering with friends and family around a warm fire, sipping hot cider, and sharing stories while indulging in sweet treats. Pumpkin Patch Dirt Cups add an element of creativity to your fall festivities. With their whimsical design, featuring layers of chocolate pudding and crushed Oreos mimicking dirt, topped with candy pumpkins, they are sure to delight guests of all ages.
Plus, the recipe is adaptable! You can easily explore variations or substitute ingredients to accommodate dietary preferences. Want to make it gluten-free? Swap out the Oreos for a suitable alternative. These cups are not just treats; they’re a canvas for your creativity. Dive into this recipe and let your imagination run wild this fall!
For more fall themes, check out this pumpkin dessert guide.
Ingredients for Pumpkin Patch Dirt Cups
Creating delightful Pumpkin Patch Dirt Cups is a fun and easy dessert perfect for fall gatherings or Halloween celebrations. The ingredients are simple to find and promise a delicious, playful outcome.
What You'll Need:
- Instant chocolate pudding mix: One package (3.9 ounces) gives that rich chocolate flavor reminiscent of soil.
- Cold milk: You’ll need 2 cups to transform the pudding mix into that velvety texture we crave.
- Crushed Oreo cookies: Grab a package (14.3 ounces) for that authentic “dirt” layer! You can even DIY your crushed Oreos if you're feeling adventurous.
- Whipped topping: An 8-ounce container, thawed, provides a light and creamy component that balances the dessert.
- Pumpkin-shaped candies: Get eight pieces to add fun and color to your cups.
- Clear plastic cups: Eight small cups let you present these treats beautifully.
- Pretzel sticks: Four pretzel sticks become adorable pumpkin stems, adding a crunchy twist.
With these ingredients, you’re all set to impress your friends and family. Ready to dive into the instructions? Let’s make some adorable Pumpkin Patch Dirt Cups!
Preparing Pumpkin Patch Dirt Cups
Making Pumpkin Patch Dirt Cups is not just about the fun presentation; it's also a delightful dessert that captures the essence of fall. The process is simple, making it a great activity to enjoy with friends or family. Let’s dive into the steps to make these charming little cups!
Gather Your Ingredients
Before you start mixing and layering, gather all your ingredients to streamline the process. Here’s what you’ll need:
- 1 package (3.9 ounces) instant chocolate pudding mix
- 2 cups cold milk
- 1 package (14.3 ounces) Oreo cookies, crushed
- 1 container (8 ounces) whipped topping, thawed
- 8 small pumpkin-shaped candies
- 8 small clear plastic cups
- 4 pretzel sticks
Having everything on hand will not only save you time but also keep the kitchen organized while you whip up these festive treats. Another tip? Get creative by using flavors like vanilla pudding or adding some spices for that extra autumn flair!
Prepare the Chocolate Pudding
Start by making the chocolate pudding, which forms the luscious filling of your Pumpkin Patch Dirt Cups. In a large bowl, combine the instant chocolate pudding mix with the cold milk. Using a whisk, beat the mixture until it thickens. This should take about 2-3 minutes. Don’t forget to chill it in the fridge for about 5 minutes; this step ensures your pudding has the perfect consistency for layering.
Fold in the Whipped Topping
Once your pudding is ready and chilled, it’s time to give it a fluffy texture. Gently fold in the thawed whipped topping until everything is combined smoothly. This process adds a lightness to the pudding, making it a delightful contrast to the “dirt” layer of crushed Oreos. You want to be careful here—gentle folding preserves the airiness of the topping, ensuring these cups are as delightful as they look.
Layer the Crushed Oreos
Let’s talk about the stars of our dirt cups—the Oreos! Start by crushing them; you can use a rolling pin or a food processor. Set aside a portion of the crushed Oreos for the final topping. In each small clear plastic cup, place a generous layer of crushed Oreos at the bottom. This layer will resemble the soil in a pumpkin patch.
Assemble the Dirt Cups
Now comes the fun part! Spoon the chocolate pudding mixture over the Oreo layer in each cup, filling them about three-quarters of the way. Next, sprinkle the remaining crushed Oreos generously on top to give that authentic “dirt” appearance. Finally, complete the look by placing a pumpkin-shaped candy and a pretzel stick in each cup to serve as a cute pumpkin and stem.
And there you have it! Your Pumpkin Patch Dirt Cups are primed and ready to impress at any autumn gathering. Enjoy!
Variations on Pumpkin Patch Dirt Cups
Gluten-Free Option
Craving those delightful Pumpkin Patch Dirt Cups but have gluten sensitivities? No problem! Simply swap out the classic Oreo cookies for gluten-free chocolate cookies. Brands like Glutino or Schar have delicious options that still deliver that “dirt” look and taste. Be sure to check the labels on your pudding mix and whipped topping as well; many are naturally gluten-free, making it easy to adapt this treat.
Vegan Adaptation
Want to enjoy your Pumpkin Patch Dirt Cups without animal products? It’s easier than you think! Use a plant-based milk like almond or coconut instead of regular milk. For the pudding mix, look for a vegan-friendly instant mix, and substitute whipped topping with coconut whipped cream. These simple swaps mean everyone can enjoy this festive dessert, perfect for gatherings with friends or family. For more vegan alternatives, check sources like VegNews for inspiration on plant-based treats!
Cooking Tips and Notes for Pumpkin Patch Dirt Cups
Creating delightful Pumpkin Patch Dirt Cups is a fantastic way to celebrate autumn! Here are some helpful tips to elevate your dessert experience.
-
Consistent Texture: When preparing the pudding mixture, ensure it's whipped well to avoid lumps. A smooth mix will enrich the texture of your cups, making every bite heavenly.
-
Crushed Oreos: Aim for a blend of fine and chunky crushed Oreos. This variation will give your “dirt” an interesting texture that mimics real soil! Techniques like using a food processor can speed up the crushing process.
-
Seasonal Variations: Consider adding seasonal spices like cinnamon or nutmeg to your pudding for an extra twist. You could also explore alternatives to candies by adding sprinkles or gummy worms for a whimsical take.
-
Making Ahead: These cups can be prepped a day in advance. Just cover them with plastic wrap after assembly to keep the freshness and flavor intact. Don’t forget to add your candy pumpkins right before serving for optimal presentation!
Enjoy this fun and festive treat that’s as enjoyable to make as it is to eat! For more creative ideas, check out tips on fall-themed desserts.

Serving Suggestions for Pumpkin Patch Dirt Cups
When it comes to sharing your delightful Pumpkin Patch Dirt Cups, presentation can elevate the experience. Here are some friendly serving suggestions to impress your guests.
-
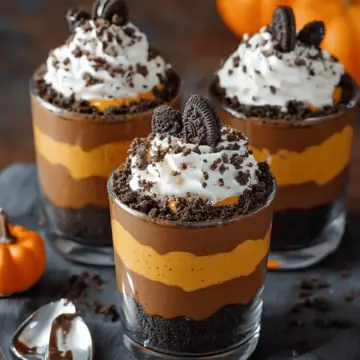
Layered Look: Consider adding extra layers by alternating crushed Oreo cookies and the pudding mixture to create a visually appealing treat. This gives a fun "layered" dirt effect that is as delicious as it is attractive.
-
Garnishing Options: Enhance each cup with additional decorations. Try sprinkling some green edible grass or mini candy corn around the pumpkin candy for a festive touch.
-
Spoon Selection: Offer small spoons for easy sharing! It adds a casual, friendly vibe to your gathering.
If you're planning a party, don’t forget to check out this guide on hosting fun-themed gatherings for additional tips. Your friends will love these charming little cups, making them the star of your pumpkin-themed fall festivities!
Time Breakdown for Pumpkin Patch Dirt Cups
Preparation Time
You'll need about 10 minutes to whip up these delightful Pumpkin Patch Dirt Cups. This includes mixing the pudding and folding in that fluffy whipped topping.
Chill Time
Patience is key! Let the cups chill in the fridge for 5 minutes after mixing. This brief wait helps everything set perfectly, giving you that creamy texture we all love.
Total Time
In just 15 minutes, you can have delicious Pumpkin Patch Dirt Cups ready to impress your friends and family during fall gatherings! With minimal effort, you can enjoy this whimsical dessert that brings holiday cheer to the table.
If you're seeking more fun fall-inspired desserts, check out this great resource on seasonal recipes for even more ideas to try!
Nutritional Facts for Pumpkin Patch Dirt Cups
When you're creating delightful Pumpkin Patch Dirt Cups, it’s always a good idea to consider their nutritional profile. Here’s a quick breakdown to help you enjoy every layer guilt-free.
Calories
One serving of these charming cups contains approximately 220 calories. They’re decadent yet manageable for an occasional treat.
Sugar
With around 15 grams of sugar per cup, the sweetness comes primarily from the chocolate pudding and crushed Oreos. Moderation is key, but trust us, this dessert is worth the indulgence!
Protein
Each serving packs about 4 grams of protein, thanks to the milk and whipped topping. While not a protein powerhouse, it adds a little something to balance out the sweetness.
These Pumpkin Patch Dirt Cups can be a fun element at any gathering, especially for those who appreciate a playful twist on dessert! If you're curious for more, check out this nutrition guide from the Academy of Nutrition and Dietetics for tips on maintaining a balanced diet while enjoying your favorite treats.
FAQs about Pumpkin Patch Dirt Cups
Can I make Dirt Cups a day in advance?
Absolutely! Preparing your Pumpkin Patch Dirt Cups a day ahead not only saves you time but also allows the flavors to meld beautifully. Just make sure to cover them tightly with plastic wrap in the fridge to keep them fresh. When it's time to serve, add the pretzel sticks and candy pumpkins for that delightful finishing touch.
What can I use instead of Oreos?
If you're looking for an alternative to Oreos, you're in luck! Graham crackers or chocolate sandwich cookies can work wonderfully. You can even try gluten-free options if needed. The key is to maintain that crispy texture, so feel free to get creative!
How do I store leftover Dirt Cups?
Leftover Pumpkin Patch Dirt Cups can be stored in the fridge, covered, for up to two days. Just remember to hold off on adding any garnishes until you're ready to enjoy them again; this ensures they stay fresh and maintain their appeal. For more storage tips, check out resources like Food Safety.gov.
These simple answers can help you create the perfect dessert for your next gathering without any added stress!
Conclusion on Pumpkin Patch Dirt Cups
In conclusion, Pumpkin Patch Dirt Cups are a delightful treat that marries the fun of dessert-making with a touch of seasonal charm. Perfect for gatherings, these cups bring smiles to both kids and adults alike. So, gather your ingredients and create your own sweet pumpkin patch today!
Not only are they easy to make, but they also offer a fantastic opportunity to get creative with presentations. For more delightful fall recipes, consider checking out Food Network or Allrecipes for inspiration. Happy crafting!
Pumpkin Patch Dirt Cups: Easy and Indulgent Fall Treats for All
Equipment
- Bowl
- Whisk
- plastic cups
Ingredients
- 1 package (3.9 ounces) instant chocolate pudding mix
- 2 cups cold milk
- 1 package (14.3 ounces) Oreo cookies, crushed
- 1 container (8 ounces) whipped topping, thawed
- 8 pieces pumpkin-shaped candies
- 8 small clear plastic cups
- 4 sticks pretzel sticks
Instructions
- In a large bowl, beat the chocolate pudding mix and cold milk together with a whisk until thickened. Chill for 5 minutes.
- Gently fold in the whipped topping with the thickened pudding until fully combined.
- Place a layer of crushed Oreos at the bottom of each plastic cup.
- Spoon the pudding mixture over the Oreo layer in each cup, filling about three-quarters of the way full.
- Top the cups with remaining crushed Oreos to resemble 'dirt.'
- Stick a candy pumpkin and a piece of pretzel stick in each cup for a pumpkin stem.
Leave a Reply