
Introduction to Artisan Pizza Dough
Making your own artisan pizza dough is one of the most rewarding culinary experiences you can have in your kitchen. The joy of pulling a fresh, bubbly, and crispy crust out of the oven is simply unbeatable. But why should you choose homemade artisan pizza over delivery or store-bought options?
For starters, homemade pizza dough allows you to control the ingredients, ensuring freshness and quality. You can experiment with different types of flour and even add herbs or spices to the mix, tailoring the flavor profile to your taste. Plus, creating your own pizza from scratch can feel like a fun and creative outlet after a long day at work.
Did you know that making pizza at home can also save you money? Home cooking is often more cost-effective than ordering out, especially when you can whip up multiple pizzas in one go. Whether you're hosting friends or enjoying a cozy night in, there’s something special about sharing a meal that you’ve crafted yourself.
Need a little more inspiration? Check out articles from reputable sources like Serious Eats for techniques and tips that elevate your artisan pizza-making game. Before diving into our artisan pizza dough recipe, let's explore the simple yet essential ingredients that will lead you to pizza perfection.
Ingredients for Artisan Pizza Dough
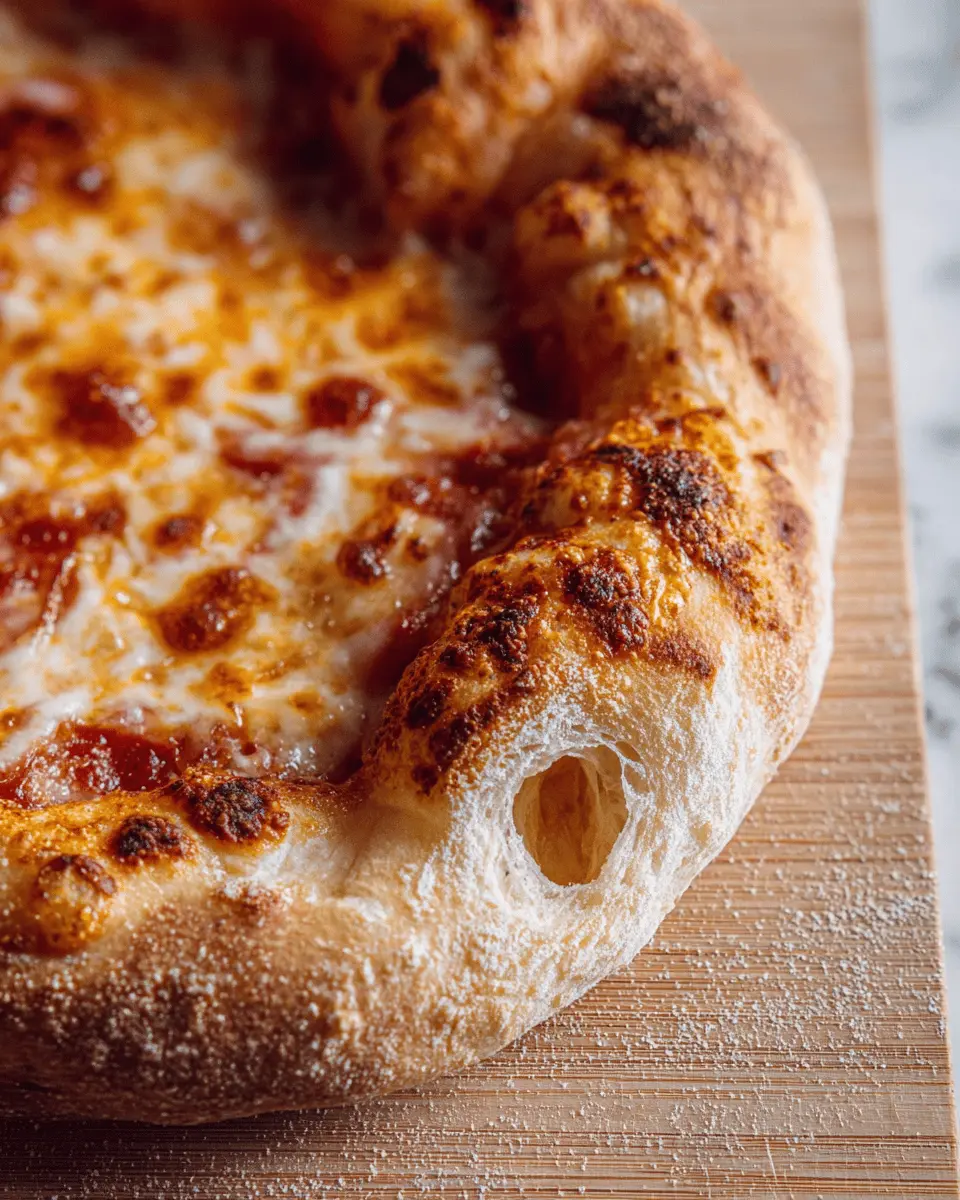
Creating the perfect artisan pizza dough starts with quality ingredients. Here’s what you need to achieve that delightful, crispy, chewy, and bubbly crust everyone loves.
- 500g (3 ¾ cups plus 2 tbsp) all-purpose flour: The foundation of your dough. Using high-quality flour provides strength and structure.
- 375g (1 ½ cups water plus 2 tbsp) warm water: Temperature is key! Warm water (around 100°F) helps activate the yeast more effectively.
- 1g (¼ tsp) active dry yeast: This little powerhouse is essential for rising, creating those beautiful air pockets in your crust.
- 10g (1 ½ tsp) fine salt: Not just for flavor, salt also strengthens the gluten, helping your dough develop a great texture.
When you select your ingredients, consider checking out King Arthur Baking for some excellent baking tips and flour recommendations. This simple list packs all the elements you need for a delightful pizza night—don’t forget to have fun experimenting with flavors!
Step-by-step Preparation of Artisan Pizza Dough
Mix and rest the dough
To kick off this delightful journey of creating artisan pizza dough, gather your ingredients: 500g of all-purpose flour, 375g of warm water (reserve a tablespoon), 1g of active dry yeast, and 10g of fine salt. In a large mixing bowl, combine the flour with all but one tablespoon of the water. Stir until the mixture is just combined; don’t worry about it being perfectly smooth at this stage. Cover the bowl with a cloth and allow it to rest for about 20 minutes. This autolyse process hydrates the flour and starts the gluten development, setting a solid foundation for your dough.
Incorporate salt and yeast
While your dough rests, dissolve the yeast in the reserved tablespoon of warm water. Once the initial resting time is up, sprinkle the salt over the surface of your dough. Pour the yeast mixture over the dough, then use your wet hands to fold the dough over itself. You can achieve this by pulling sections of the dough from the edge toward the center. Repeat this until you create a shaggy mixture. Cover the bowl again and let the dough rest for about an hour. This brief period is key, as it increases the dough's flavor and structure.
Develop the gluten structure
After your dough has rested, it’s time to develop the gluten. Lightly wet your hands and stretch a section of the dough, folding it toward the center. Rotate the bowl and repeat this process four to five times. The goal here is to create a well-formed ball. Place this ball in a lightly greased bowl, seam-side down, and cover it. Let it rise for 5 to 6 hours, or until it has doubled in volume. This slow fermentation process results in a crispy, chewy, and bubbly crust that you’re sure to love.
Shape and rest the dough
Once your dough has risen beautifully, gently turn it out onto a floured surface and cut it in half (you'll get two pizza bases!). For each piece, stretch and fold the dough over itself until it forms a smooth ball. Place it seam-side down, allowing it to rest on a greased plate. Lightly oil the tops, cover, and let them rest for about an hour at room temperature. If you decide not to use the dough right away, wrap it tightly in plastic and refrigerate for up to two days.
Prepare for baking
When you're ready to bake, preheat your oven to 500°F (or as high as it will go). If you have a pizza stone or steel, place that on the oven's middle rack. Let it heat for at least 45 minutes. While waiting, lightly flour a pizza peel or grease a cast iron pan. This is the moment you’ve been waiting for! Shape your dough into a 12-inch round, add your favorite sauces and toppings, and slide it onto your hot stone or into your pan. Bake until the crust is golden and bubbly, then enjoy the fruits of your labor.
Now, you’ve successfully prepared artisan pizza dough, ready to be transformed into a gourmet pizza masterpiece! If you're looking for more pizza inspiration, check out resources like Serious Eats or The Kitchn. Happy pizza making!
Variations of Artisan Pizza Dough
Whole Wheat Artisan Pizza Dough
For a heartier alternative, try making whole wheat artisan pizza dough. Simply substitute part or all of the all-purpose flour with whole wheat flour. Whole wheat flour enhances the nutritional profile of your pizza while lending a nutty flavor. Keep in mind that whole wheat dough might require a touch more water due to its thirstier nature. For a delightful twist, mix in some seeds like flax or chia to amplify texture and health benefits.
Gluten-Free Artisan Pizza Dough
If you're embracing a gluten-free lifestyle, crafting a delicious gluten-free artisan pizza dough can be just as satisfying! Use a blend of gluten-free flours, like almond flour, brown rice flour, or gluten-free all-purpose flour. Don’t forget to incorporate xanthan gum, as it mimics gluten's elasticity, helping your dough rise and maintain its shape. A gluten-free pizza can still be crispy and bubbly—perfect for those Friday night pizza cravings! For detailed preparation tips, check out resources like the Gluten Intolerance Group that offer great insights and recipes.
Cooking Tips and Notes for Artisan Pizza Dough
Crafting the perfect artisan pizza dough is a rewarding experience! Here are some helpful tips to elevate your pizza-making game.
-
Hydration Matters: The moisture content impacts your dough's texture. For a crispy, chewy crust, ensure not to skimp on the water when mixing your ingredients.
-
Temperature is Key: A warmer environment supports yeast activity. Try placing your dough in a slightly warm spot, or even near an oven set to low while it rises.
-
Patience Pays Off: Allow for a longer fermentation process—you can even let the dough cold-proof in the fridge for up to 48 hours. This deepens flavor and improves texture.
Remember, practice makes perfect! Each attempt will get you closer to pizza perfection. For more insights on dough fermentation, check out this informative article.

Serving Suggestions for Homemade Artisan Pizza
Creating artisan pizza dough opens up a world of delicious possibilities! Here are some serving suggestions to elevate your homemade pizza experience:
- Classic Margherita: Opt for a simple topping of fresh mozzarella, sliced tomatoes, and basil for a refreshing bite.
- Mediterranean Delight: Top with olive oil, feta cheese, Kalamata olives, and roasted red peppers for a burst of flavor.
- BBQ Chicken Twist: Use chicken ham, BBQ sauce, red onions, and a sprinkle of cilantro to create a fan favorite.
- Veggie Extravaganza: Load up with seasonal vegetables like zucchini, bell peppers, and spinach, adding a drizzle of balsamic glaze for sweetness.
Pair your pizza with a refreshing sparkling water or herbal iced tea for a delightful meal. Happy pizza-making!
Time Breakdown for Artisan Pizza Dough
Preparation time
The initial prep for artisan pizza dough takes about 20 minutes. This includes mixing your ingredients and letting the dough rest to develop flavor. It's a great time to gather your toppings or plan your pizza night!
Rising time
Expect a total rising time of 6 hours, with the first rise taking about 1 hour and the second resting period for the shaped dough being around 1 hour. This allows the yeast to work its magic, creating that delightful texture.
Baking time
For baking, your pizza will spend just 5–20 minutes in the oven, depending on your method. A quick bake at high heat ensures that perfect, crispy, and bubbly crust that makes every pizza night a hit.
For those curious about the art of pizza-making, check out Serious Eats for some great tips on mastering pizza dough!
Nutritional Facts for Artisan Pizza Dough
Calories per Serving
A single serving of this delicious artisan pizza dough contains approximately 228 calories. This makes it a great option for those indulging in a homemade pizza night without going overboard on calories.
Protein Content
Each serving provides around 6.5g of protein, contributing to both satisfaction and muscle health. It's a fantastic way to enjoy your pizza while still getting some nutritional benefits. For more detailed nutritional breakdowns, you might find resources like the USDA’s FoodData Central helpful.
Crafting your own artisan pizza dough at home not only offers a delightful culinary experience, but it also allows you to control the ingredients you use. Whether you’re going for classic Margherita or something more adventurous with toppings, knowing the nutritional facts can enhance your pizza night!
FAQs about Artisan Pizza Dough
Can I make the dough in advance?
Absolutely! You can prepare artisan pizza dough in advance and store it in your refrigerator for up to two days. After the initial rise, just wrap the dough tightly in plastic wrap or place it in an airtight container. This gives the dough time to develop flavor, making your pizza even more delicious.
What makes artisan pizza dough different?
Artisan pizza dough distinguishes itself through its simple yet high-quality ingredients and long fermentation time. This method results in a crust that’s crispy on the outside, chewy on the inside, and packed with flavorful bubbles. Unlike traditional pizza dough, the hydration level is often higher, which contributes to its unique texture.
How can I store leftover pizza dough?
To store leftover dough, simply wrap it tightly in plastic wrap or place it in a sealed container and refrigerate. You can also freeze it for longer storage—just make sure to do so after the first rise. When you're ready to use it, simply thaw it in the fridge overnight before allowing it to come to room temperature.
For more tips on pizza-making, check out resources like Serious Eats or King Arthur Baking.
Conclusion on Artisan Pizza Dough
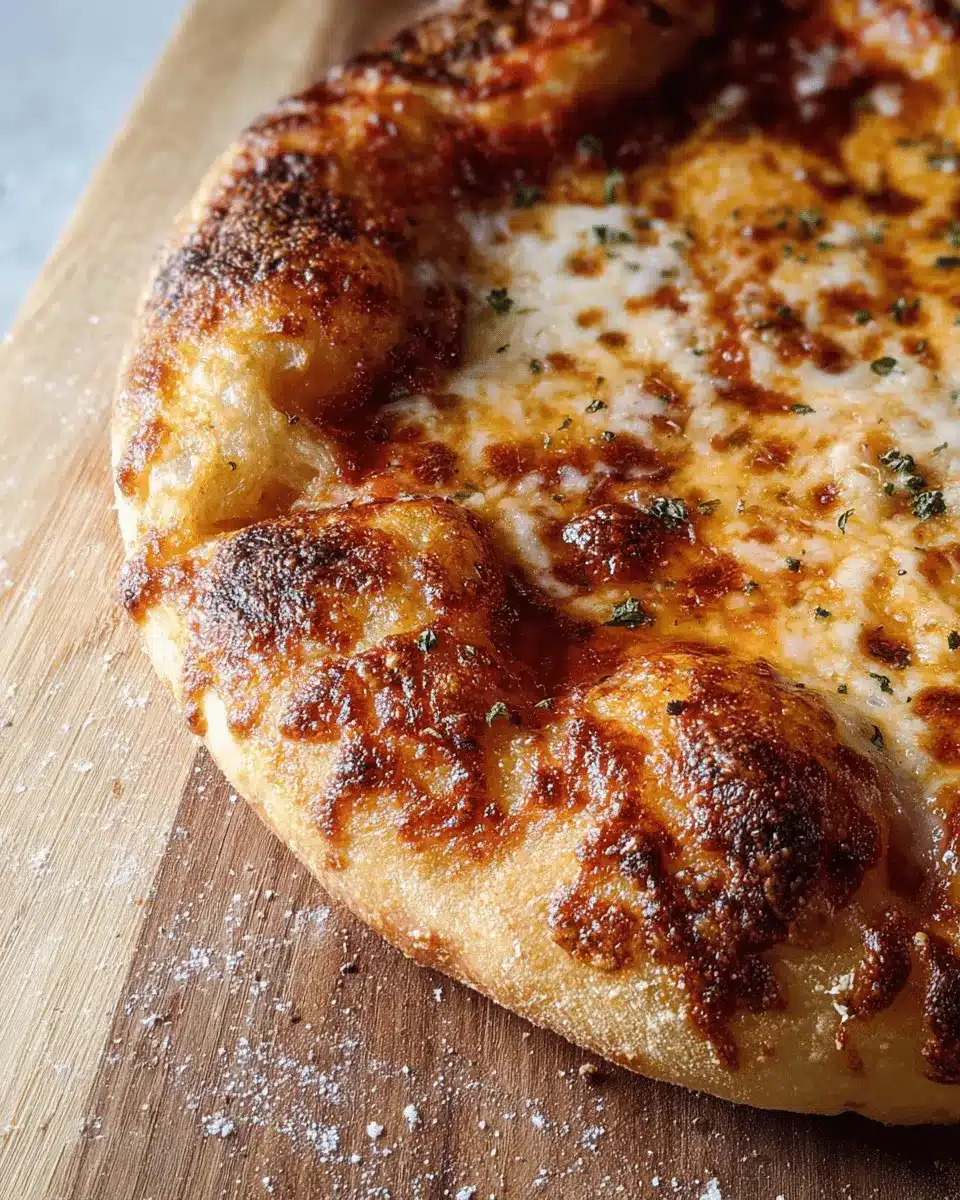
Making artisan pizza dough at home can transform your pizza nights. By using simple ingredients and a hands-on approach, you can achieve a delightful, crispy, chewy, and bubbly crust. So gather your friends, fire up that oven, and enjoy crafting pizzas tailored to your taste!

artisan pizza dough- crispy, chewy, bubbly crust
Equipment
- Large Bowl
- pizza steel or stone
- Pizza Peel
- Cast Iron Pan
Ingredients
- 500 g all-purpose flour
- 375 g warm water divided
- 1 g active dry yeast
- 10 g fine salt
Instructions
- Mix flour and all but 1 tablespoon of the water in a large bowl until just combined, then cover and set aside for 20 minutes to rest. Sprinkle yeast over remaining warm water and set aside to dissolve.
- Sprinkle salt over the surface of the dough. Stir yeast mixture and pour over dough. Fold the dough: lightly wet your hand, reach under the dough, and stretch a section of it over the top. Repeat until the center of the dough is covered. Then, using your thumb and fingers as pincers, squeeze and pinch off 5-6 chunks of dough. Wet your hand to minimize sticking. Fold the dough over itself a few times. Repeat pinching and folding until the yeast and salt are fully mixed and a shaggy dough is formed. Cover the bowl and lest rest about an hour.
- Fold the dough one time to develop the gluten: lightly wet your hand, reach underneath the dough and stretch up a section of the dough, then fold it over the center. Rotate the bowl and fold four to five more times, or until the dough has tightened into a ball. Take the entire ball of dough and invert it into a clean, lightly greased bowl, so the seam is down and the top is smooth. Cover and let rise until doubled in volume, 5-6 hours.
- Turn the dough out onto a floured work surface and cut in half. Working with one piece of dough at a time, shape into a ball as follows. Stretch out a quarter of the dough just until you feel resistance, then fold it back over the center. Repeat stretching and folding the remaining three edges until the center is covered and a loose ball is formed. Turn the ball over so the seam is down and place it on an un-floured area. Cup your hands around the dough and gently pull it towards you, dragging the bottom along the counter to create a bit of tension. Rotate the ball 90 degrees and drag it a few inches towards you again. Repeat rotating and gently dragging until the top of the dough tightens up and the ball is round.
- Transfer to a greased plate and repeat with remaining dough. Lightly oil the tops, cover and let rest at room temperature for about an hour. Preheat oven at this time. If not using right away, cover tightly with plastic wrap and refrigerate until ready (for up to 2 days).
- Place pizza steel, stone, or inverted baking sheet on the middle rack of the oven and preheat to 500°F (or as high as it will go). Let oven heat up for at least 45 minutes. Generously flour a pizza peel and set aside. Alternatively, lightly grease a cast iron pan with olive oil and set aside.
- Place one dough ball on a floured surface and flatten the middle into a large disk, leaving a thick 1-inch lip. Pick up the disk, and holding the thick edge, use gravity to gently shape the dough into a 12-inch circle. Lay on prepared pizza peel and adjust shape into a circle. Jiggle the peel to make sure the dough isn’t sticking, and add more flour if it is. Alternatively, shape the dough to the size of your prepared cast iron pan, then place it inside.
- Add sauce and toppings to pizza dough, leaving the 1-inch perimeter empty. Slide pizza onto the hot steel and bake for 5 minutes. Turn on the broiler and broil for 2-4 minutes, or until cheese is melted and crust is golden and blistered. If using the cast iron pan, bake for 15-20 minutes and broil for the last few minutes to get spots of char. Repeat with remaining pizza dough and toppings.


Leave a Reply