
Introduction to Classic Cannoli Squares
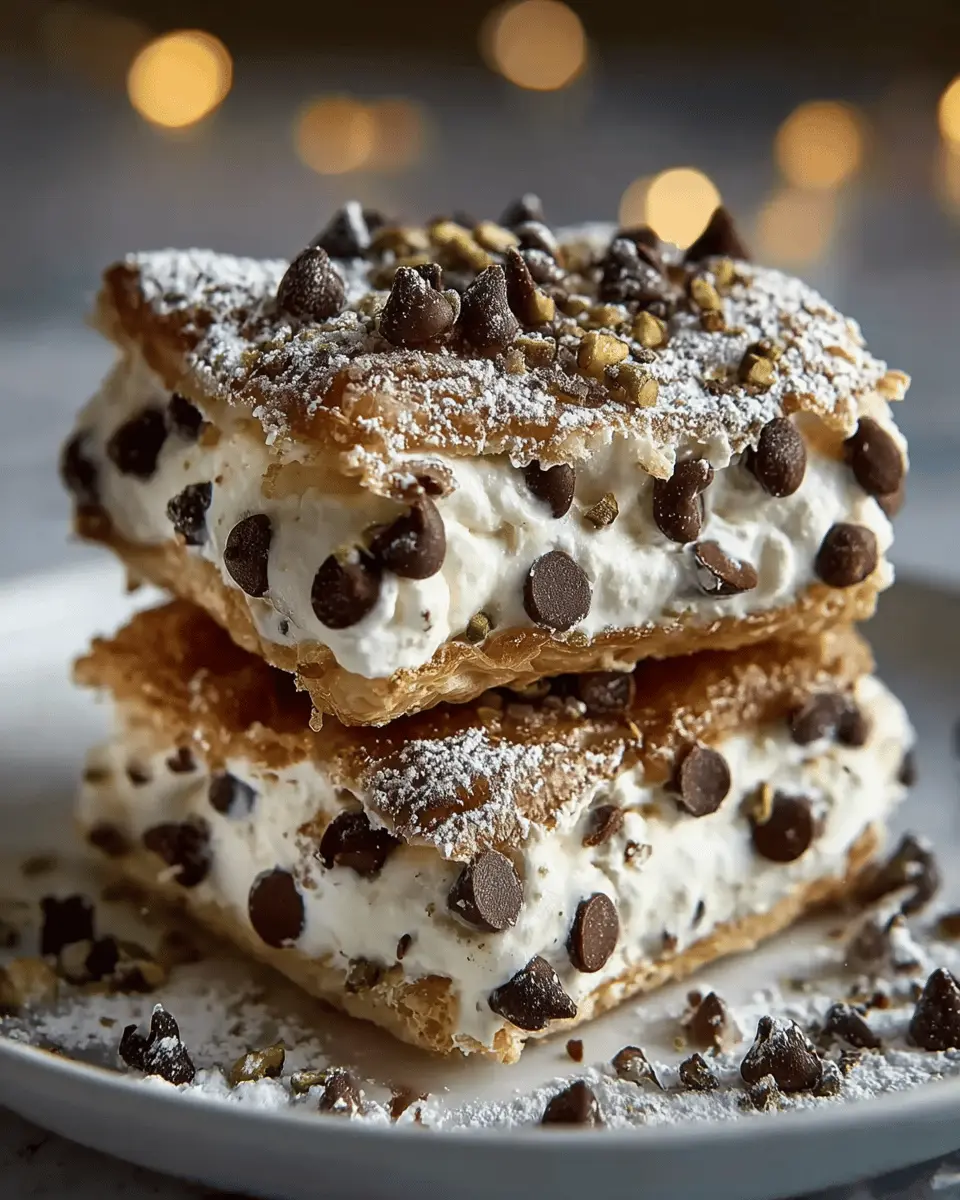
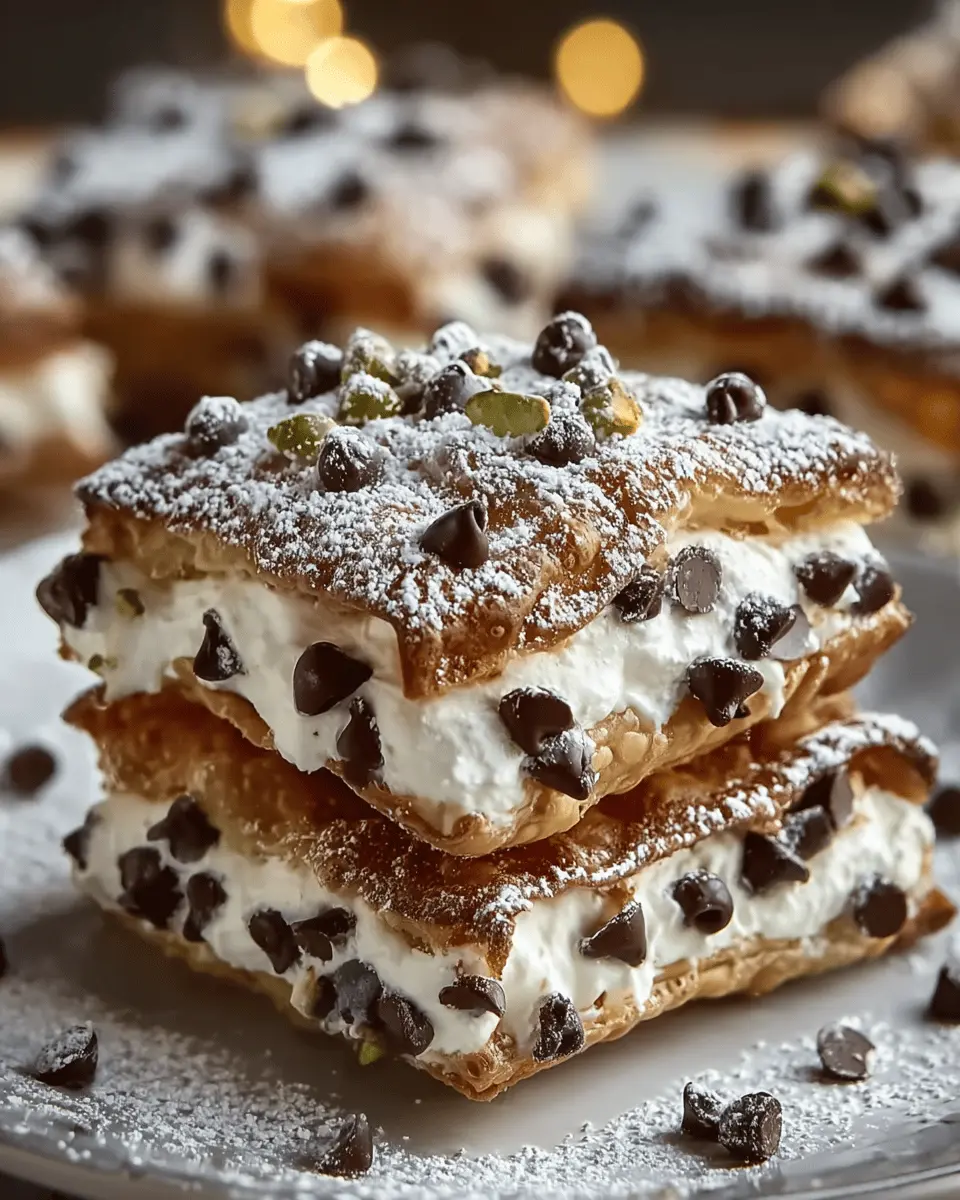
When it comes to sweet treats that bring a smile to your face, Classic Cannoli Squares hit all the right notes. These delicious squares transform the traditional Italian cannoli into a delightful and shareable form, making them an excellent choice for any gathering or dessert craving. Perfectly creamy ricotta and a hint of vanilla enveloped in a flaky crust promise a burst of flavor in every bite.
But why are Classic Cannoli Squares the perfect treat? For starters, they combine the best of both worlds: the crispy exterior of a pie crust and the luxurious filling reminiscent of traditional cannoli. This makes them both satisfying and easy to serve, ideal for parties or cozy nights in. You can also tailor the filling to match your taste, whether you love the classic chocolate chip mix or want to experiment with different flavorings.
Moreover, making Classic Cannoli Squares is surprisingly straightforward, requiring minimal time and effort in the kitchen. With just a few ingredients and simple steps, you’ll whip up a dessert that’s sure to wow your friends and family. So why not bring this delightful treat home and add a touch of Italian charm to your next gathering? Discover more about the joy of baking with community resources like The Joy of Baking or Serious Eats for additional tips!
Ingredients for Classic Cannoli Squares
Creating mouthwatering Classic Cannoli Squares starts with selecting the perfect ingredients. Here's what you'll need:
Essential Ingredients for the Filling
- 2 cups Ricotta Cheese: Go for whole milk ricotta for that decadent creaminess.
- 1 cup Powdered Sugar: Want a healthier twist? Try substituting with coconut sugar.
- 1 teaspoon Vanilla Extract: Pure vanilla makes a world of difference in flavor.
- ½ teaspoon Cinnamon: Add this for a subtle warmth, or leave it out for the traditional taste.
- ½ cup Mini Chocolate Chips: Dark chocolate is great for a richness that complements the ricotta.
Key Components of the Crust
- 2 Pre-Made Pie Crusts: While pre-made is convenient, a homemade crust can elevate your dish even further!
- 1 large Egg: A simple egg wash gives your squares that lovely golden finish.
- Sugar: Sprinkle on top for an extra sweet crunch after baking.
Optional Garnishes to Enhance Your Squares
- ¼ cup Chopped Pistachios: Adds a delightful crunch and stunning color to your slices.
- 3 pieces Maraschino Cherries: A fun little treat and a pop of color on top.
- ¼ cup Extra Chocolate Chips: Because who doesn’t love more chocolate?
With these ingredients, you're on your way to baking up a dish that’s bound to impress family and friends at your next gathering! For more inspiration, check out the history of cannoli herecannoli!
Preparing Classic Cannoli Squares
Making Classic Cannoli Squares is a delightful baking adventure that brings the flavors of the beloved Italian dessert into easy-to-manage squares. Let’s take a step-by-step journey to create these delicious treats that are sure to impress your friends and family!
Mix the Filling Ingredients
Start by gathering your filling ingredients: 2 cups of ricotta cheese, 1 cup of powdered sugar, and a few flavorful enhancers like 1 teaspoon of vanilla extract, ½ teaspoon of cinnamon, and ½ cup of mini chocolate chips. Using a mixing bowl, combine all these ingredients and whisk until the mixture is creamy and smooth. Make sure there are no lumps left—this step is crucial for creating that velvety filling that mimics traditional cannoli filling! If you’re curious about the benefits of ricotta, you can check out this informative article on Healthline.
Preheat the Oven
While you mix your filling, it’s the perfect time to preheat your oven to 375°F (190°C). Preheating is key to achieving that lovely golden brown top while baking. No one wants a sad-looking dessert, right?
Assemble the First Layer with Pie Crust
Next, take one of the pre-made pie crusts, unroll it, and fit it neatly into a 9x9-inch baking dish. Make sure it’s well pressed down so that the filling doesn’t leak during baking. This crust forms the foundation of your Classic Cannoli Squares.
Spread the Delicious Filling
Now, it’s filling time! Spoon your rich ricotta mixture evenly over the crust, spreading it out gently with a spatula. It's tempting to sneak a little taste at this stage—go ahead, we won’t judge! Just remember to save enough for the squares.
Seal and Prep the Top Crust
Take your second pie crust and place it over the filled dish, sealing the edges tightly to prevent any ooze during baking. Don’t forget to brush the top with a beaten egg for that glossy finish! A sprinkle of sugar will add a sweet crunch when it’s baked, making every bite that much more delightful.
Bake to Golden Perfection
Finally, pop the dish into your preheated oven. Bake for 30-35 minutes until the top is gloriously golden brown. This is where the magic happens! Your kitchen will fill with the enticing aroma of baked goods that will whet anyone’s appetite. Once it's out of the oven, let it cool for at least 30 minutes—patience is key here.
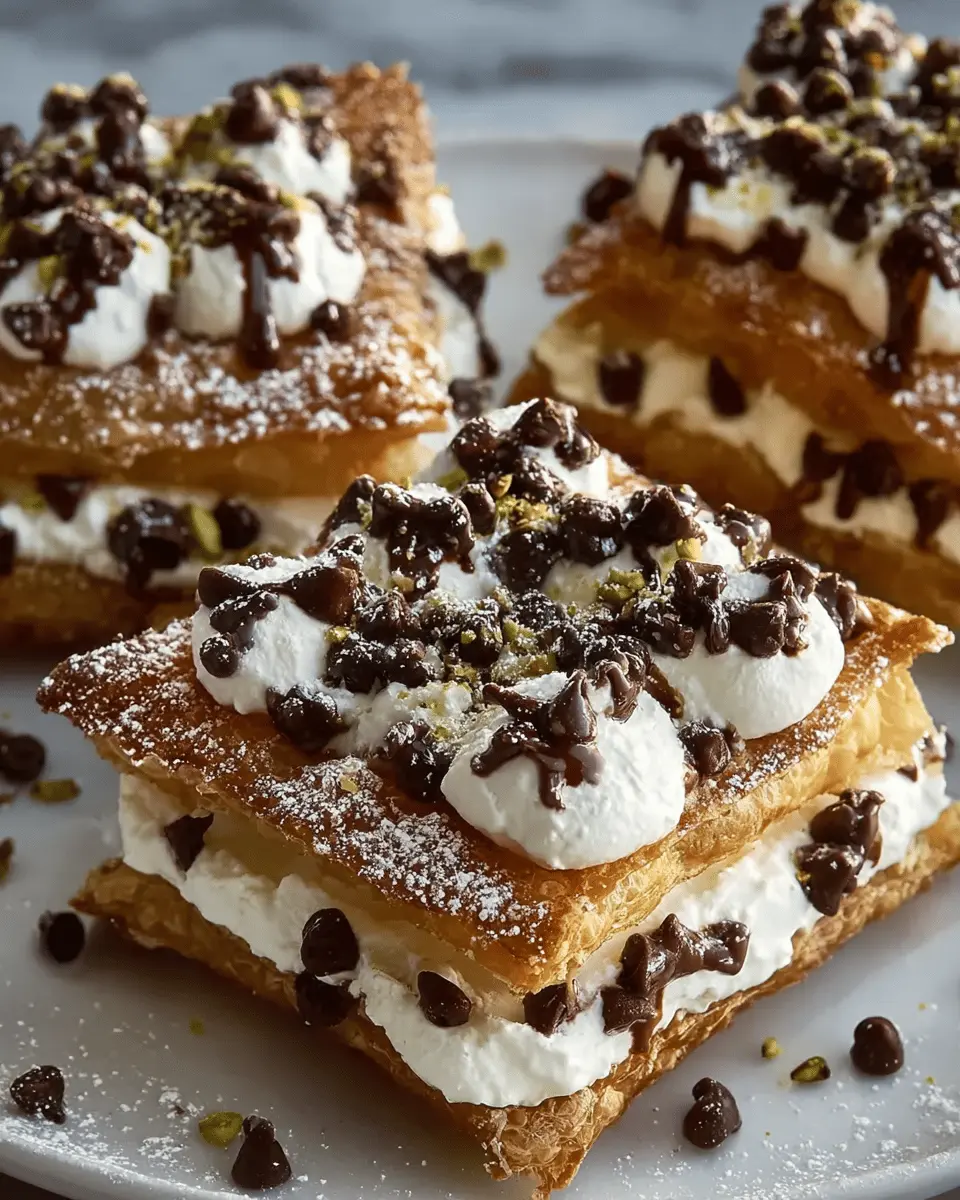
When cool, cut your Classic Cannoli Squares into perfect portions. If you like, add optional garnishes like chopped pistachios or a few maraschino cherries for an added decorative touch! Enjoy your culinary creation, and get ready to wow your taste buds!
Variations on Classic Cannoli Squares
Gluten-free option
Craving Classic Cannoli Squares but following a gluten-free diet? No worries! Substitute the pre-made pie crusts with gluten-free options available at your local store. Look for brands that use almond or coconut flour for a delightful twist that complements the creamy filling. Homemade gluten-free crusts using nut flours can also work wonders!
Unique flavor twists for the filling
Elevate your Classic Cannoli Squares by experimenting with different flavors in the filling. Why not try adding:
- Zest of an orange or lemon for a refreshing citrus kick?
- A splash of espresso for a coffee-infused enhancement?
- Chopped dried fruits like figs or apricots for a sweet texture contrast?
These unique twists can make your dessert truly stand out at gatherings! For more inspiration, check out the decadent flavor combinations recommended by Food Network.
Baking Notes for Classic Cannoli Squares
Tips for Achieving the Best Texture
To ensure your Classic Cannoli Squares have that perfect creamy filling and flaky crust, use whole milk ricotta for a richer texture. Don’t skip on the whisking; a smooth, lump-free filling is key. Consider letting the filling chill in the refrigerator for 30 minutes before assembling—this helps the flavors meld beautifully.
Common Pitfalls to Avoid
One common mistake is not sealing the edges of your crust thoroughly, which can lead to a messy filling spill during baking. Also, keep an eye on your oven; every oven is different. If they turn golden brown too quickly, reduce the temperature slightly and extend baking time to achieve that perfect finish. Enjoy your baking!
Serving Suggestions for Classic Cannoli Squares
Pairing Ideas for a Dessert Platter
When showcasing your Classic Cannoli Squares, consider crafting a delightful dessert platter. Complement these indulgent squares with fresh fruit like raspberries and strawberries for a burst of color. Add a variety of cookies, like biscotti or amaretti, to provide texture contrasts. Drizzle some melted dark chocolate or caramel sauce for an extra touch of sweetness and visual appeal. For added elegance, sprinkle some chopped pistachios or decorative sugar crystals around the platter.
Ideal Drink Pairings to Complement the Flavors
To perfectly enhance the flavors of your Classic Cannoli Squares, seek out refreshing drink options. A rich espresso or a creamy cappuccino is fantastic for balancing the sweetness. If you prefer non-caffeinated choices, try a smooth vanilla or caramel-flavored herbal tea, which can pair beautifully with the creamy filling. A chilled sparkling water with a splash of lemon can cleanse the palate between bites, highlighting the delicious layers in each square.
Ready to impress your guests with these serving suggestions? You’ll have them coming back for seconds!
Tips for Making Perfect Classic Cannoli Squares
Ingredient Quality Matters
When crafting your Classic Cannoli Squares, the quality of your ingredients can elevate your dessert from good to unforgettable. Opt for whole milk ricotta to enhance the richness of your filling, and choose pure vanilla extract for a real flavor punch. Don’t forget that even the pre-made pie crust can impact texture; consider a reputable brand that uses fewer additives. You’ll notice the difference!
Storing Your Squares Effectively
To keep your Classic Cannoli Squares fresh, store them in an airtight container in the refrigerator. This will help maintain their creamy filling for up to three days. If you wish to prepare them in advance, bake the squares but don’t add garnishes until you're ready to serve. This ensures the toppings stay crisp and appealing.
For more tips on ingredient quality, check out this article.
Time Details for Classic Cannoli Squares
Preparation time
Get ready to enjoy these delightful squares in just 15 minutes! That's all you need to mix and layer your ingredients before they head to the oven.
Baking time
Set your timers for 30-35 minutes. This is when the magic happens and your Classic Cannoli Squares will turn golden brown and delicious.
Total time
In under an hour, you'll have these delightful squares fresh out of the oven and ready to wow your taste buds! After allowing them to cool for at least 30 minutes, you're all set to dig in.
For more insights on similar recipes, check out Baker's Journal.
Nutritional Information for Classic Cannoli Squares
When indulging in Classic Cannoli Squares, it's helpful to know what you're treating yourself to. Here’s a quick snapshot of their nutritional profile per square:
- Calories: 280 kcal
- Protein: 6 g
- Sodium: 210 mg
These delightful squares balance rich flavors with a moderate calorie count, making them a sweet yet manageable treat! For more detailed information about nutritious ingredients, check out resources from the American Heart Association and the Academy of Nutrition and Dietetics.
FAQs About Classic Cannoli Squares
Can I make these squares ahead of time?
Absolutely! Classic Cannoli Squares can be prepared a day in advance. Just follow the recipe until baking, then cover and refrigerate. When you're ready to enjoy, pop them into the oven according to the baking instructions. This allows the flavors to meld beautifully, enhancing the overall taste!
How should I store leftovers?
If you find yourself with leftovers (which is rare!), store them in an airtight container in the refrigerator. They can last for up to three days. If you want to extend their shelf life, consider freezing them. Just wrap each square tightly in plastic wrap, then place them in a zip-lock bag.
What can I substitute if I don’t have ricotta?
If you find yourself short on ricotta, cottage cheese can work as a substitute! Just blend it until smooth for a creamy texture. Alternatively, mascarpone offers a rich and decadent flavor that aligns beautifully with the cannoli squares’ essence.
For more tips on ingredient substitutions, check out this helpful resource.
Conclusion on Classic Cannoli Squares
In conclusion, Classic Cannoli Squares are a delightful twist on the traditional favorite, perfect for any occasion. Their creamy filling and flaky crust will leave your taste buds dancing. Whether served at a gathering or as a sweet treat for yourself, these squares are sure to impress. Enjoy baking!

Classic Cannoli Squares: Indulgent Treat That Will Wow Your Taste Buds
Equipment
- Mixing Bowl
- baking dish
- Whisk
- oven
Ingredients
For the Filling
- 2 cups Ricotta Cheese use whole milk for a richer texture
- 1 cup Powdered Sugar substitute with coconut sugar for a healthier option
- 1 teaspoon Vanilla Extract opt for pure vanilla for the best taste
- ½ teaspoon Cinnamon omit if you prefer a classic cannoli flavor
- ½ cup Mini Chocolate Chips dark chocolate enhances richness
For the Crust
- 1 large Egg for an egg wash that gives a glossy finish
- sugar adds a sweet crunch on top when baked
For Optional Garnishes
- ¼ cup Chopped Pistachios offers a delightful crunch and color
- 3 pieces Maraschino Cherries adds a pop of sweetness and decoration
- ¼ cup Extra Chocolate Chips for those who can't get enough chocolate
Instructions
Preparation Steps
- In a mixing bowl, combine 2 cups of ricotta cheese, 1 cup of powdered sugar, 1 teaspoon of vanilla extract, ½ teaspoon of cinnamon, and ½ cup of mini chocolate chips. Whisk until smooth.
- Preheat your oven to 375°F (190°C).
- Unroll one pre-made pie crust and fit it into a 9x9-inch baking dish.
- Spoon the ricotta mixture over the pie crust evenly.
- Place the second pie crust over the filling, sealing the edges. Brush with beaten egg and sprinkle with sugar.
- Bake for 30-35 minutes until golden brown.
- Allow to cool for at least 30 minutes before cutting into squares.
Leave a Reply