
Introduction to Classic Peanut Butter Blossoms
Why Classic Peanut Butter Blossoms are a Must-Try
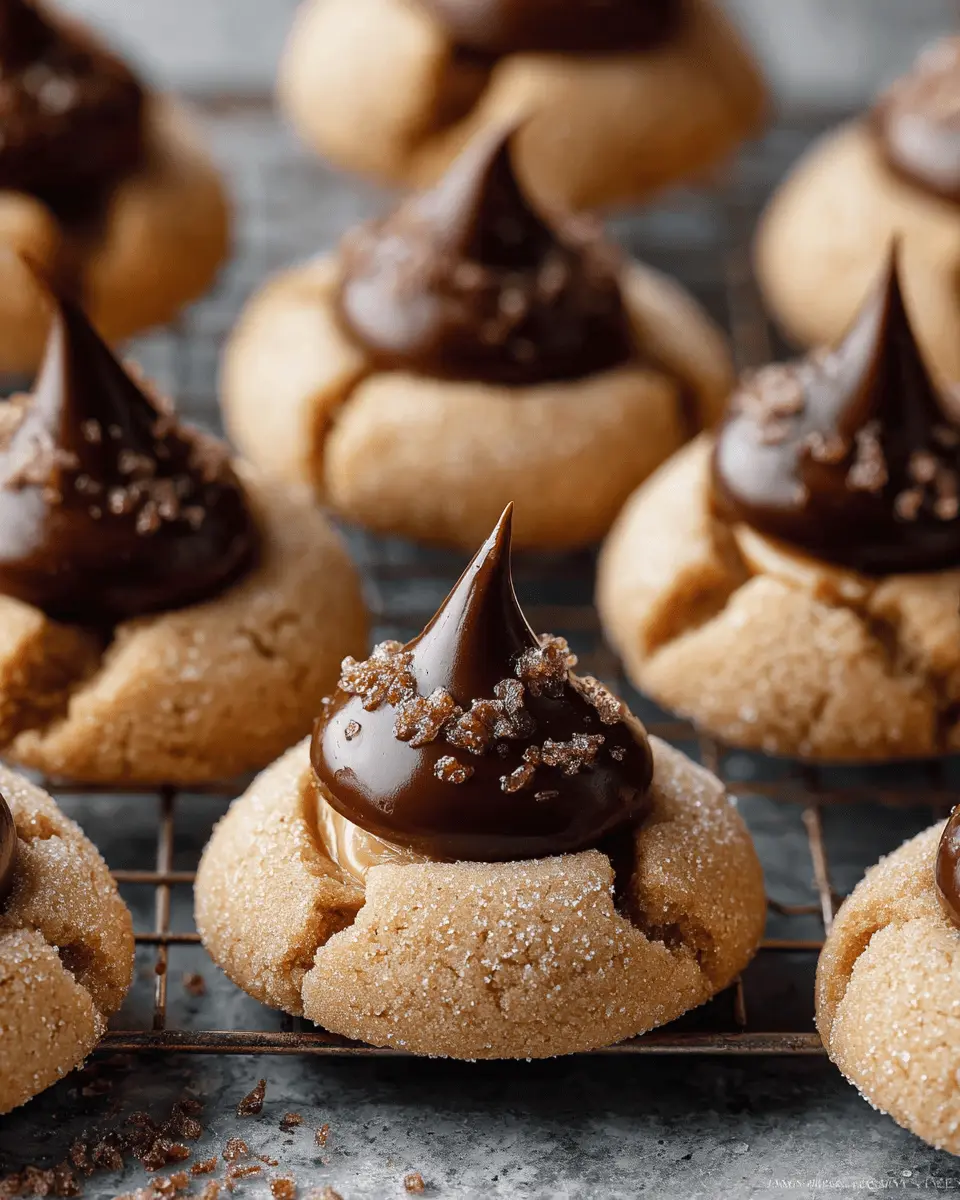
If you’re on the hunt for a cookie that perfectly blends comfort, nostalgia, and deliciousness, look no further than classic peanut butter blossoms. These delightful treats are not just any cookies; they’re a celebration of simplicity and flavor that everyone will love. Imagine a soft and chewy peanut butter cookie crowned with a chocolate kiss—what’s not to adore?
One of the best things about these cookies is their versatility. Whether it's a cozy family gathering, a holiday party, or just a lazy Sunday afternoon, classic peanut butter blossoms fit any occasion. They’re super easy to make, and even novice bakers can whip up a batch that will make their friends and family swoon. Plus, did you know that peanut butter is packed with protein? So while your taste buds are treated to sweet bliss, you're sneaking in a bit of nourishment.
If you’re ready to impress your guests or simply treat yourself, grab your mixing bowl and let’s get baking! You won’t regret diving into the classic flavors of peanut butter blossoms—they’re a warm hug for your taste buds that everyone should experience. Need more inspiration? Check out Sally’s Baking Addiction for tips on perfecting your cookie game!
Ingredients for Classic Peanut Butter Blossoms
Essential Ingredients for the Best Peanut Butter Cookies
To whip up a batch of classic peanut butter blossoms, you’ll want to gather these essential ingredients:
- All-purpose flour: 1 and ¼ cups, spooned and leveled for the best texture.
- Baking soda: ½ teaspoon to help your cookies rise perfectly.
- Salt: A touch of ¼ teaspoon enhances flavors.
- Unsalted butter: ½ cup, softened to room temperature for easy mixing.
- Brown sugar and granulated sugar: A combo of ½ cup brown and ¼ cup granulated adds depth and sweetness.
- Egg: 1 large, at room temperature, binds everything together.
- Creamy peanut butter: ¾ cup, the star of the show for that signature flavor.
- Pure vanilla extract: 1 teaspoon for extra aroma and taste.
- Chocolate kiss candies: 24, unwrapped, for that delightful finish.
Optional Coatings for Extra Flavor
For a bit of flair, consider using optional coatings. Roll the cookie dough balls in granulated sugar for a sweet crunch or get festive with a blend of red and green sanding sugars. These choices not only add flavor but also create a visually stunning cookie that’s sure to impress!
For additional tips on ingredient quality, check out Sally's Baking Addiction for measuring advice, and for choosing the best peanut butter, learn more from Serious Eats.
Step-by-Step Preparation of Classic Peanut Butter Blossoms
Making classic peanut butter blossoms is not just a baking task—it's an experience that fills your kitchen with delicious aromas and creates sweet memories. Follow this step-by-step guide to ensure your cookies come out perfectly every time!
Gather and Measure Your Ingredients
Start by gathering all your ingredients:
- 1 and ¼ cups all-purpose flour
- ½ teaspoon baking soda
- ¼ teaspoon salt
- ½ cup unsalted butter, softened to room temperature
- ½ cup packed light or dark brown sugar
- ¼ cup granulated sugar
- 1 large egg, at room temperature
- ¾ cup creamy peanut butter
- 1 teaspoon pure vanilla extract
- 24 chocolate kiss candies, unwrapped
- For coating: ½ cup granulated sugar or a mix of green and red sanding sugars
Preparation is key! Measuring accurately and assembling your ingredients beforehand will make the baking process smoother and more enjoyable.
Mix the Dry Ingredients
In a medium bowl, whisk together the all-purpose flour, baking soda, and salt. This step ensures that the ingredients are evenly mixed, preventing any clumps of baking soda or salt from ruining the texture of your cookies. Set this mixture aside for now!
Cream the Butter and Sugars
In a large bowl, use a hand mixer or stand mixer to beat the softened butter on high speed for about a minute until creamy. Then add the brown sugar and granulated sugar, mixing on medium-high speed for about two minutes until the mixture is smooth. It’s essential to achieve a fluffy texture here; if you're unsure how to cream butter properly, you might find this guide helpful: How to Cream Butter and Sugar.
Incorporate the Egg and Peanut Butter
Once you've creamed the butter and sugars, add in the room temperature egg and beat it for about a minute. Then, stir in the peanut butter and vanilla extract until well combined. Be sure to scrape the side of your bowl periodically for an even mix.
Combine All Ingredients into a Dough
Now, gradually add the dry mixture to your wet mixture, beating on low speed until fully blended. Don't worry if the dough looks a bit soft; that's perfectly normal for classic peanut butter blossoms.
Chill the Dough for Best Results
Cover the dough and place it in the refrigerator for at least an hour. Chilling helps the cookies hold their shape and prevents them from spreading too much while baking. You can chill the dough for up to three days if you want to prepare it ahead of time.
Preheat Oven and Prepare Baking Sheets
While the dough is chilling, preheat your oven to 350°F (177°C). Line two large baking sheets with parchment paper or silicone baking mats for easy removal of your cookies after baking. These tools can be invaluable for achieving that perfect cookie base!
Roll and Coat the Dough Balls
Once your dough is chilled, scoop out about a heaping tablespoon of dough and roll it into a ball. Then, roll each ball in granulated sugar or your chosen sanding sugar mix for an extra festive touch. Place them on the baking sheet about three inches apart since these cookies will spread slightly.
Bake Your Cookies to Perfection
Bake your cookies for 11–13 minutes, or until their tops start to crack. It’s important to keep an eye on them, as you want them to be perfectly golden and chewy. When they come out of the oven, let them sit on the baking sheet for about five minutes to set.
Add the Chocolate Kisses
Finally, gently press a chocolate kiss into the center of each cookie while they are still warm. This is the best part because who doesn’t love that delicious melty chocolate? To help set the chocolate, pop the cookies in the freezer for about 10 minutes.
With these steps, your classic peanut butter blossoms will be ready to enjoy in no time! Don’t forget to share them with friends and family—if you can resist eating them all yourself. Enjoy your baking adventure!
Variations on Classic Peanut Butter Blossoms
Alternative Nut Butters for Unique Twists
Looking to shake things up with your classic peanut butter blossoms? Try swapping in alternative nut butters! Almond butter offers a milder taste, while sunflower seed butter creates a fantastic nut-free option. Each variation introduces a different flavor profile, keeping your cookies exciting and new. Just remember, if you go for a natural nut butter, it might yield a slightly crumbly cookie, so adjust your expectations accordingly for texture.
Festive Holiday Variations
Make your peanut butter blossoms even more special during the holidays! Consider rolling the cookie dough balls in colorful sanding sugar to add a fun twist. For a taste of the season, try topping each cookie with a peppermint chocolate instead of a standard chocolate kiss. Presenting these cookies in festive tins or plates can also really elevate their appeal at holiday gatherings. Who doesn’t love a bit of holiday cheer with their treats?
Baking Notes for Classic Peanut Butter Blossoms
Tips for the Perfect Cookie Texture
To achieve the ultimate texture in your classic peanut butter blossoms, consider these essential tips:
-
Chill the Dough: After mixing, cover and refrigerate your dough for at least 1 hour. This step is crucial as it prevents the cookies from spreading too much while baking, ensuring they remain soft and chewy.
-
Room Temperature Ingredients: Make sure your butter and egg are at room temperature. This helps create a creamy dough that incorporates air effectively, leading to a lighter cookie.
-
Measure Flour Correctly: Use the spoon-and-level method to measure your flour accurately. Too much flour can result in a dry cookie.
-
Avoid Overbaking: Keep an eye on your cookies as they bake. They're ready when they just start to crack on top—this keeps them tender and delicious!
For more tips on measuring ingredients, check out this helpful guide and enhance your baking skills!
Serving Suggestions for Classic Peanut Butter Blossoms
Creative Ways to Serve and Enjoy
When it comes to classic peanut butter blossoms, there are plenty of fun and creative ways to elevate your cookie experience!
-
Pair with Warm Beverages: Serve these delightful cookies with a cup of hot chocolate, coffee, or tea. The warm drinks perfectly complement the rich flavors of the cookies.
-
Ice Cream Sandwich: Transform your blossoms into an impressive dessert by sandwiching a scoop of vanilla ice cream between two cookies for a delightful treat.
-
Gift Giving: Package these cookies in a decorative tin or box for a thoughtful homemade gift. Whether it’s for a holiday or special occasion, they make for a heartfelt gesture.
-
Decorate Your Plate: Add a touch of flair by garnishing your serving plate with fresh fruit or drizzles of chocolate or caramel sauce. It makes your cookie presentation pop!
No matter how you choose to enjoy your classic peanut butter blossoms, they are sure to bring smiles and satisfaction at any gathering!
Tips for Making Perfect Classic Peanut Butter Blossoms
Common Mistakes and How to Avoid Them
Creating those delicious classic peanut butter blossoms can be quite simple, but a few missteps can turn your baking adventure into a challenge. Here are some tips to ensure perfection:
- Overmixing: When combining your wet and dry ingredients, mix just until combined. Overmixing can lead to tough cookies.
- Chilling Dough: Don’t skip the chilling step! Chilled dough helps maintain shape and prevents spreading.
- Pressing the Chocolate: Ensure you press the chocolate kiss into the cookie right after baking. But be gentle; these cookies are soft and fragile!
For further guidance, check out this insightful baking tutorial on keeping your cookies soft and chewy!
Time Breakdown for Classic Peanut Butter Blossoms
Preparation Time
The preparation for classic peanut butter blossoms takes about 20 minutes. This includes gathering your ingredients, mixing, and chilling the dough to achieve that perfect texture.
Baking Time
Once the dough is ready, baking takes 11-13 minutes. Keep an eye on them as they bake—look for those telltale cracks on top signaling they’re golden perfection.
Total Time
From start to finish, you’re looking at approximately 1 hour and 30 minutes, including chill time. Be patient—it’s worth it when you take that first bite of these nostalgic treats!
For more helpful baking tips, check out resources from Sally’s Baking Addiction for everything from baking basics to advanced techniques.
Nutritional Facts for Classic Peanut Butter Blossoms
Calories: Each classic peanut butter blossom packs around 110 calories. These cookies are a fun treat that won't derail your dietary goals when enjoyed in moderation.
Protein: With about 3 grams of protein per cookie, these treats offer a nice little boost, thanks to the peanut butter. Pair this indulgence with some fresh fruit for a more balanced snack!
Sugar: Each cookie contains roughly 6 grams of sugar. If you're mindful of your sugar intake, consider enjoying them occasionally or sharing with friends to spread the joy without going overboard.
For more in-depth nutritional insights or information on peanut butter benefits, check out resources like the USDA FoodData Central for more accurate and detailed nutritional breakdowns!
FAQs about Classic Peanut Butter Blossoms
Can I use natural peanut butter?
Absolutely! You can use natural peanut butter for your classic peanut butter blossoms, but keep a couple of things in mind. Make sure it’s well-stirred and at room temperature for the best results. Just note that cookies made with natural peanut butter may be slightly crumblier than those made with processed varieties like Jif or Skippy.
How do I store leftover cookies?
If you have any leftover cookies (which might be a challenge!), make sure to store them in an airtight container at room temperature. This will help keep your classic peanut butter blossoms soft and fresh for up to one week! For longer storage, try freezing them between layers of parchment paper.
What can I substitute for chocolate kisses?
If you’re looking for alternatives to chocolate kisses, consider using chocolate chips or even caramel candies. You could also try swapping in white chocolate or peanut butter cups for a unique twist. Just make sure whatever candy you choose complements the peanut butter flavor for the best experience!
Conclusion on Classic Peanut Butter Blossoms
Classic peanut butter blossoms bring a delightful blend of flavors and textures that can brighten any occasion. With their soft, chewy base contrasted by the rich chocolate kiss, these cookies are not just a treat but also a cherished memory for many. Happy baking!
For more delicious recipes, explore Bon Appétit or check out Serious Eats.
Classic Peanut Butter Blossoms
Equipment
- Mixing Bowl
- hand mixer
- Paddle Attachment
- silicone spatula
- baking sheets
- parchment paper
Ingredients
Cookie Base
- 1.25 cups all-purpose flour spooned & leveled
- 0.5 teaspoon baking soda
- 0.25 teaspoon salt
- 0.5 cup unsalted butter softened to room temperature
- 0.5 cup light or dark brown sugar packed
- 0.25 cup granulated sugar
- 1 large egg at room temperature
- 0.75 cup creamy peanut butter
- 1 teaspoon pure vanilla extract
- 24 chocolate kiss candies unwrapped
Coating
- 0.5 cup granulated sugar
- 0.25 cup green sanding sugar optional
- 0.25 cup red sanding sugar optional
Instructions
Preparation
- Whisk the flour, baking soda, and salt together in a medium bowl. Set aside.
- Beat the butter for 1 minute on high speed until creamy. Add brown sugar and granulated sugar and beat for 2 minutes until smooth.
- Add the egg, peanut butter, and vanilla extract and beat until combined.
- Add the flour mixture and beat on low speed until combined. Chill the dough for at least 1 hour.
- Preheat oven to 350°F (177°C) and prepare baking sheets.
- Scoop and roll cookie dough, coat in sugar, and arrange on baking sheets.
- Bake for 11–13 minutes until tops slightly crack. Cool on baking sheets for 5 minutes.
- Press a chocolate kiss into the center of each cookie and freeze for 10 minutes to set the chocolate.
- Remove from freezer and serve. Cookies stay fresh covered at room temperature for up to 1 week.
Leave a Reply