
Introduction to Homemade Ciabatta Bread
Making homemade ciabatta bread is not just about baking; it’s an art that connects you to Italy's rich culinary heritage. The allure of ciabatta lies in its beautifully rustic appearance and its wonderfully airy crumb, which makes it perfect for sandwiches or simply dipped in olive oil. But why is homemade ciabatta so beloved?
Why is homemade ciabatta so beloved?
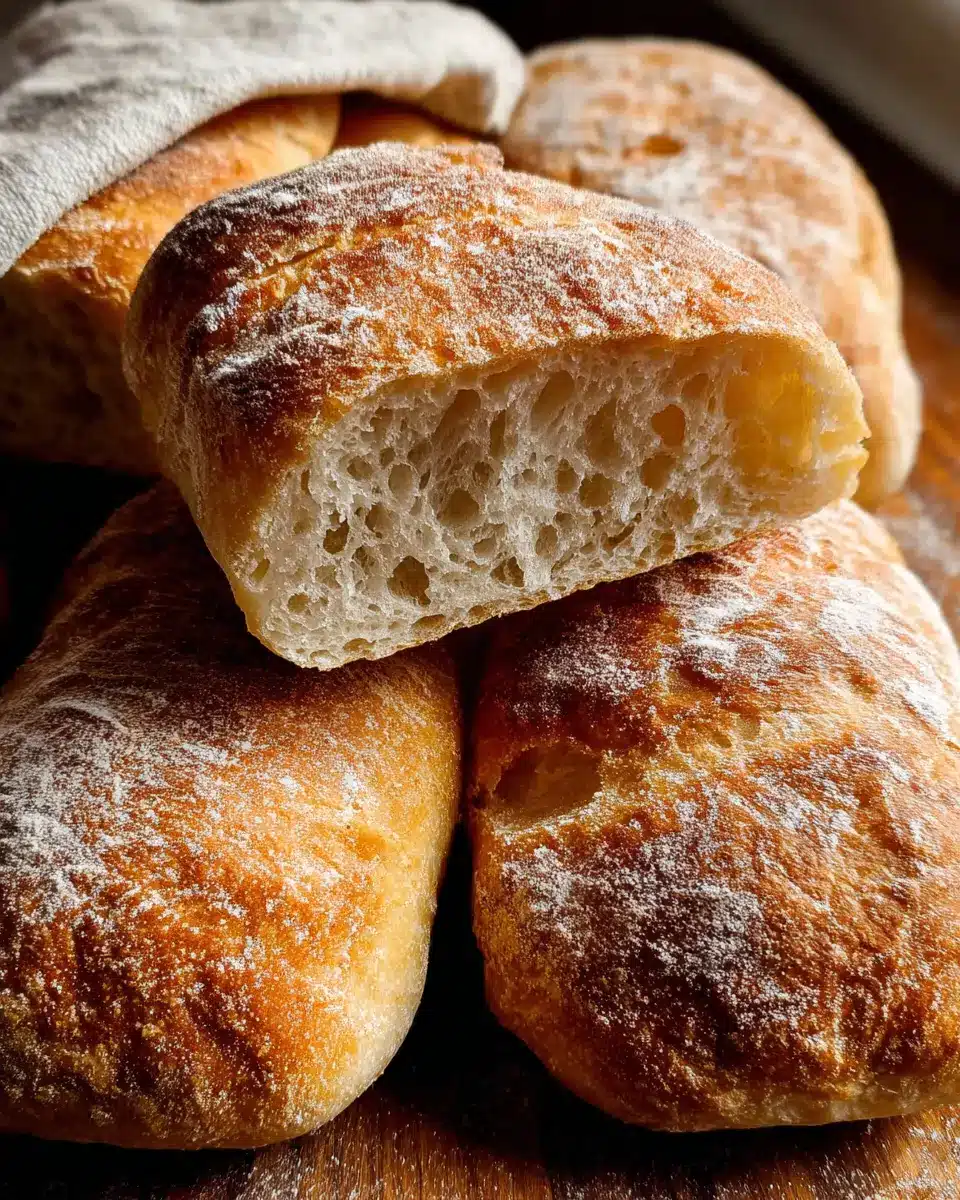
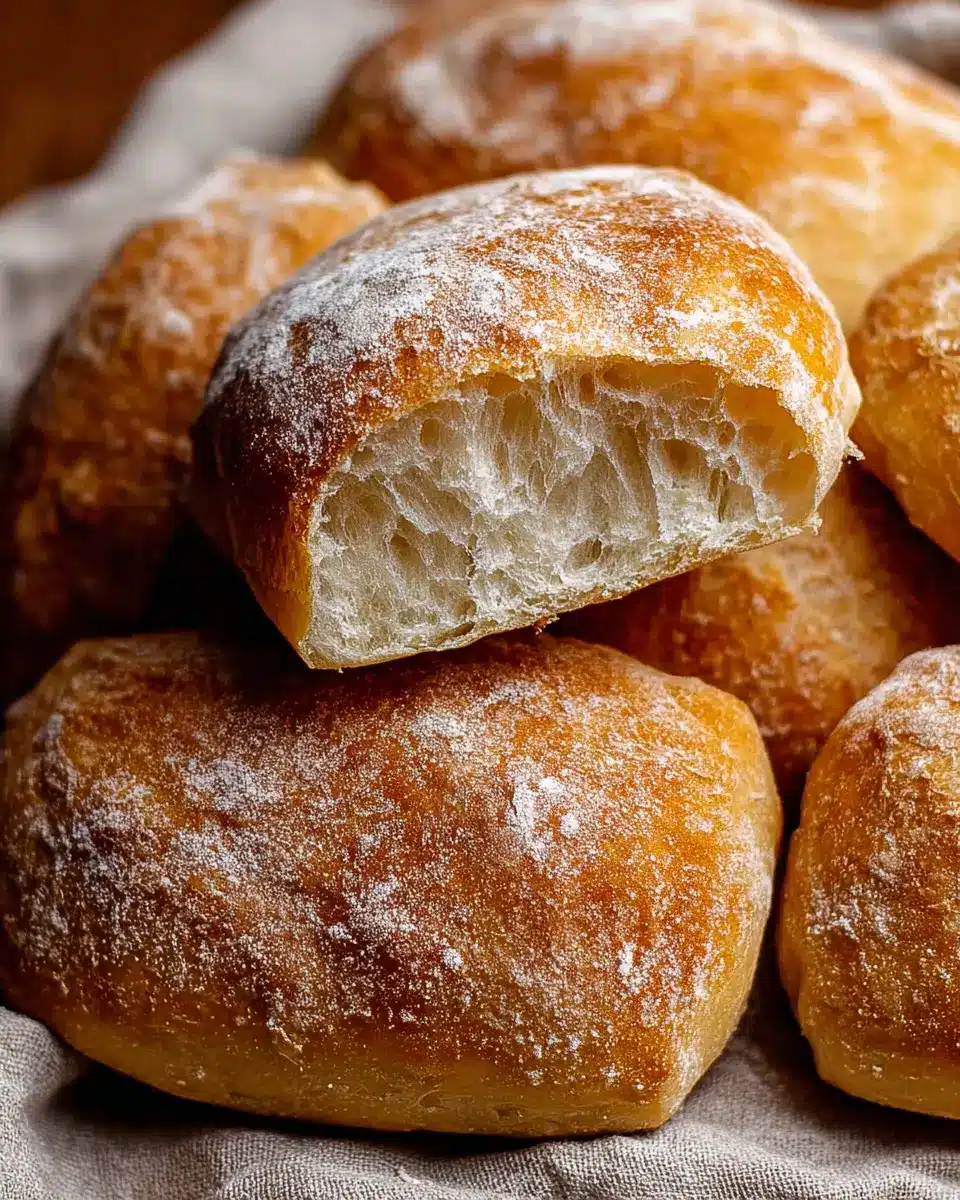
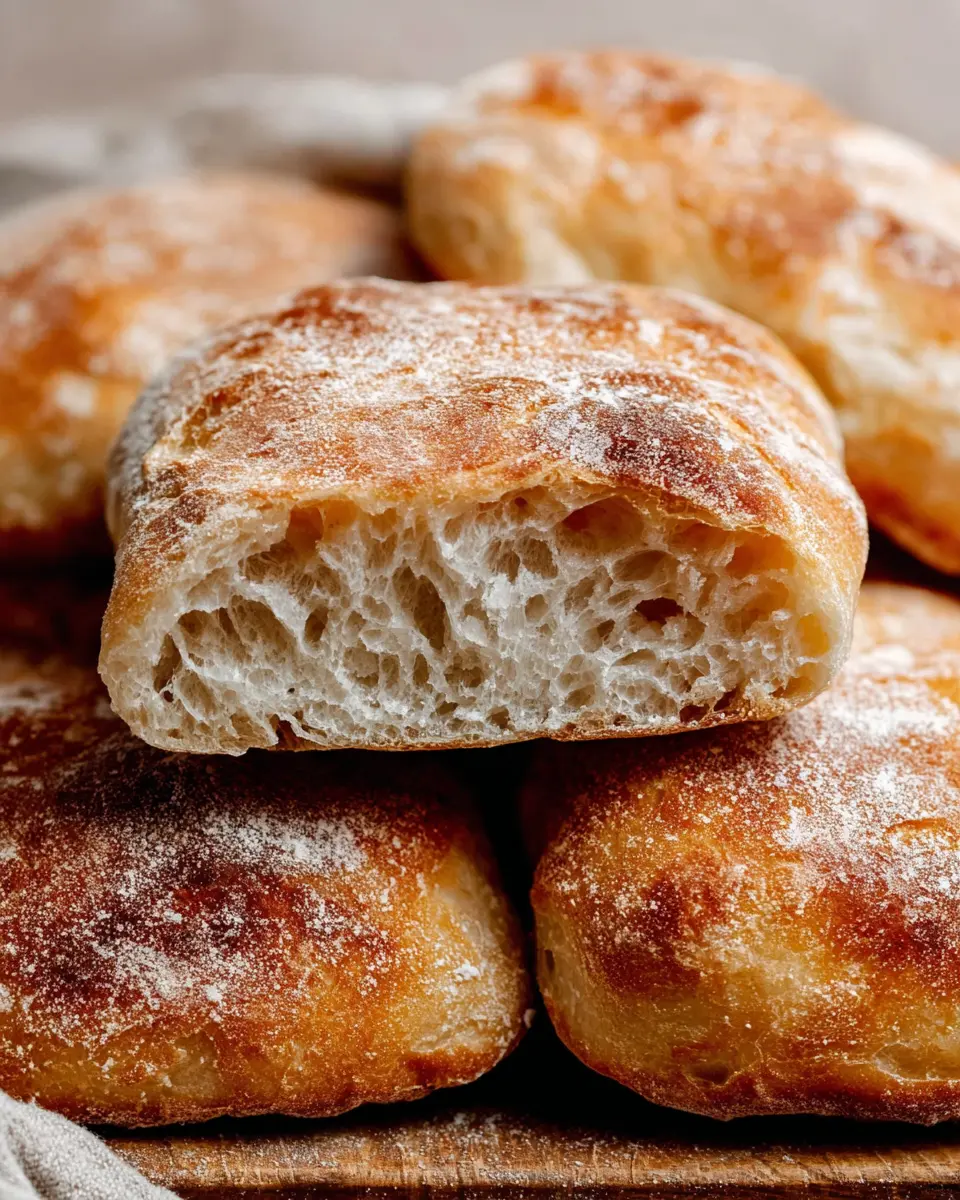
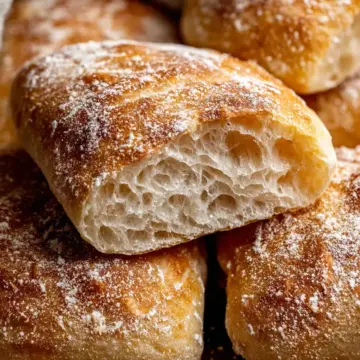
There’s something truly rewarding about crafting your own bread. When you knead and shape the dough, you engage with the process in a way that's both meditative and gratifying. Freshly baked ciabatta has a crust that crackles under your fingers and a soft, chewy interior that is hard to resist.
Unlike store-bought versions, baking at home allows for customization. You can experiment with herbs, spices, or even add ingredients like roasted garlic or olives to elevate your creation. As you create your homemade ciabatta bread, the aroma that fills your kitchen becomes comforting and nostalgic, inviting friends and family to gather around.
Ready to embrace this savory journey? Let’s dive into the recipe and discover how easy it is to bring a piece of Italy into your kitchen. For more tips on measuring ingredients correctly, check out Sally's Baking Addiction. With just a few simple ingredients, you'll be on your way to enjoying your very own authentic ciabatta bread!
Ingredients for Homemade Ciabatta Bread
When it comes to making homemade ciabatta bread, a few key ingredients are necessary for a successful bake. Understanding how each ingredient factors into the flavor and texture of your bread can elevate your baking game to new heights.
Essential ingredients for biga/preferment
Before you dive into the main dough, you'll need to prepare a biga (or preferment), which helps develop the bread’s flavor and texture. Here’s what you’ll need:
- Bread flour: A robust flour that provides the gluten structure essential for chewy ciabatta. Opt for around 1 cup (130g) for the biga.
- Active-dry or instant yeast: Just a pinch (⅛ teaspoon) does the trick, allowing for a slow fermentation.
- Room-temperature water: Use about ½ cup (120g/ml) to bring your ingredients together — aim for around 70°F (21°C).
Key ingredients for ciabatta rolls
Once your biga is ready, it’s time to create the dough for your ciabatta rolls. You’ll need:
- Warm water: Approximately 1 cup (240g/ml) at about 100–110°F (38°–43°C) helps activate the yeast.
- Bread flour: A heartier quantity of 2 and ½ cups (325g) creates a perfect base for chewy rolls.
- Table salt: Just 1 and ½ teaspoons (8g) brings out the flavors beautifully.
- Olive oil: Handy for greasing things along the way, ensuring a smooth mixing process.
These ingredients are basics for a classic ciabatta, but feel free to experiment with herbs or spices to customize your bread! For more insights on flour choices, check out King Arthur Baking. Happy baking!
Step-by-Step Preparation of Homemade Ciabatta Bread
Making homemade ciabatta bread is an incredibly rewarding process that will fill your home with the delightful aroma of freshly baked bread. Let's walk through the step-by-step preparation, ensuring you get the perfect ciabatta every time.
Day 1: Making the Biga
The first step in your homemade ciabatta bread adventure is creating the biga, a type of preferment that enhances the flavor and texture of your bread.
- In a large mixing bowl, combine 1 cup (130g) of bread flour with ⅛ teaspoon of active-dry or instant yeast.
- Slowly add in ½ cup (120g/ml) of room-temperature water (around 70°F or 21°C).
- Mix using a silicone spatula until well combined.
- Cover the bowl tightly with plastic wrap and allow it to rest at room temperature for 8–24 hours. The longer, the better—this helps develop flavor complexity.
Day 2: Preparing the Dough
Once your biga is ready, it’s time to make the ciabatta dough!
- In a separate large mixing bowl, or the bowl of your stand mixer, whisk together 1 teaspoon of active-dry yeast and 1 cup (240g/ml) of warm water (approximately 100-110°F or 38°-43°C). Let it sit for about 5 to 10 minutes until the yeast is dissolved.
- Add in the biga, 2 and ½ cups (325g) of bread flour, and 1 and ½ teaspoons of table salt. Mix with a silicone spatula or use the dough hook on your stand mixer. The dough may seem shaggy and dry initially, but keep mixing until it forms a uniform texture.
First Rest Period for the Dough
After mixing, it’s essential to give the dough some time to rest.
- Cover your bowl with a towel or plastic wrap and let it rest for 30 minutes. This allows the gluten to relax, which will aid in stretching and shaping later.
Stretch-and-Fold Technique Explained
This technique is crucial for developing the structure of your dough.
- Visualize a clock on your dough. For the first fold, lift the dough at the 12 o’clock position and gently stretch it towards the 6 o’clock position, folding it down.
- Turn the bowl 90 degrees and repeat, creating a total of 8 folds around the dough.
- Cover and let it rest for another 30 minutes. You'll repeat this stretch-and-fold process two more times with similar resting periods.
Final Shaping of Rolls/Bread
Once you’ve completed your folds, it’s shaping time!
- Generously flour your work surface. Using lightly oiled hands or spatula, transfer the dough onto the floured surface.
- Gently stretch it into a rough rectangle. Decide whether you’re making rolls or loaves:
- For 8 rolls: Cut the dough into 8 equal pieces.
- For 2 loaves: Cut it in half to create two rectangles.
Proofing the Dough Prior to Baking
Now let your shaped dough proof to develop that airy texture.
- Sprinkle a bit of flour on top of the rolls or loaves and cover them with a clean towel. Let them rest at room temperature for about 1 hour. This step is critical for making the bread fluffy.
Baking Ciabatta in a Steam Environment
To create that quintessential crust, steam is your friend!
- Preheat the oven to 450°F (232°C) and place a flat cookie sheet on the middle rack.
- When ready to bake, add several cups of ice cubes to a metal roasting pan and place it in the bottom rack to generate steam.
- Carefully slide the shaped dough onto the preheated baking sheet and quickly close the door. Let them bake for 20–25 minutes until golden brown and sounding hollow when tapped.
Cooling and Slicing for Best Texture
Patience is key!
- After baking, remove the ciabatta and let it cool for at least 45 minutes before slicing. Cutting into it too early can lead to a gummy texture, but waiting will reward you with a delicious, airy bread perfect for sandwiches or dipping in olive oil.
And there you have it! A step-by-step approach to making your very own homemade ciabatta bread. Don’t be intimidated by the process; enjoy the journey, and soon enough, your kitchen will be the best bakery in town. For more baking tips, check out resources like King Arthur Baking to enhance your skills!
Variations on Homemade Ciabatta Bread
Incorporating Herbs for Flavor
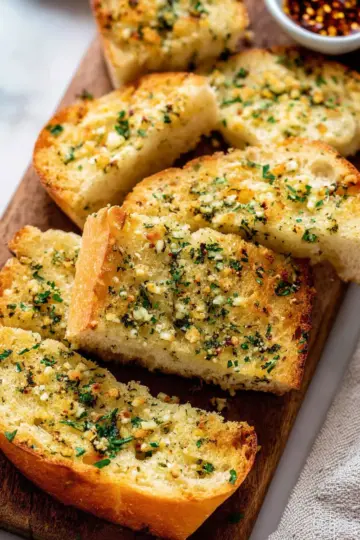
One delightful way to elevate your homemade ciabatta bread is by incorporating herbs into the dough. Fresh or dried herbs can add a burst of flavor. I often opt for rosemary—just add 2 teaspoons of fresh chopped rosemary or 1 teaspoon of dried during the mixing stage. If you’re feeling adventurous, try adding garlic, sundried tomatoes, or even olives!
Experimenting with Different Bread Shapes
Don’t feel confined to just classic rolls! Embrace your creativity by shaping your ciabatta dough into different forms. Consider making a rustic loaf or a braided bread for a stunning centerpiece at your next gathering. You could even create smaller buns for sliders—you'll be the talk of the party!
For more ideas, check out Cooking Light's guide to shaping bread.
Cooking Tips and Notes for Homemade Ciabatta
Ensuring Proper Flour Measurement
Getting your flour measurement just right is crucial when making homemade ciabatta bread. Always use the spoon and level technique to measure flour accurately—this ensures the dough maintains the right texture. A kitchen scale can be your best friend here. Did you know that even a slight variation in flour can lead to big differences in your bread?
Importance of Dough Hydration
Don’t shy away from the wetness of the dough; high hydration is what gives ciabatta its signature open crumb and chewy texture. While it may feel sticky and challenging to handle, that’s exactly what you want! If you’re new to working with wet doughs, keep a little extra flour on hand for dusting, but resist the urge to add too much. Just remember, the stickiness is part of the magic!
For more insights, explore Sally's Baking Addiction about accurate ingredient measurements, and enhance your baking experience!
Serving Suggestions for Homemade Ciabatta Bread
Pairing with Dips and Spreads
Nothing complements homemade ciabatta bread quite like a colorful selection of dips. Try pairing it with:
- Hummus: A creamy classic to elevate your bread.
- Olive Tapenade: Adds a burst of flavor that pairs beautifully with ciabatta.
- Pesto: Fresh basil and garlic in every bite will leave you craving more.
Creative Sandwich Ideas Using Ciabatta
Transform your ciabatta rolls into gourmet sandwiches with these ideas:
- Turkey Bacon and Avocado: Layer turkey bacon, avocado slices, and a drizzle of olive oil for a satisfying treat.
- Chicken Ham and Arugula: Add chicken ham, some spicy arugula, and a touch of mustard for zing.
- Caprese: Fresh mozzarella, tomatoes, and basil drizzled with balsamic glaze make for a delicious vegetarian option.
Each of these suggestions enhances the airy texture and crispy crust of your homemade ciabatta bread, making every meal an exciting culinary experience.
Time Breakdown for Homemade Ciabatta Bread
Preparation time
Making the biga requires about 15 minutes, where you mix flour, yeast, and water. Then, for the rest of the dough, expect another 15–20 minutes to combine the ingredients.
Resting and proofing time
The biga rests for 8–24 hours; once you make the dough, allow it to rest for around 2 hours with multiple stretches and folds. Finally, the shaped rolls need to proof for 1 hour before baking.
Baking time
Your delicious ciabatta will take 20–25 minutes in the oven, depending on how dark you like your crust.
Total time
From start to finish, you’re looking at a total of about 10–26 hours, largely due to the resting period. The actual hands-on time is just over an hour, making this an engaging yet rewarding baking adventure!
Nutritional Facts for Homemade Ciabatta Bread
Understanding the nutritional profile of your homemade ciabatta bread can enhance your enjoyment and make it easier to incorporate into your diet. Each roll contains approximately:
- Calories per roll: 233 calories, making it a robust option for sandwiches or snacking.
- Protein content: With 7.4 grams of protein, it offers a satisfying boost, particularly beneficial for a balanced meal.
- Sodium levels: At 437.5 mg of sodium per roll, it's advisable to be mindful if you're watching your salt intake.
Enjoy this delightful bread knowing its nutritional contributions! For more health tips, check out resources like the USDA FoodData Central.
FAQ about Homemade Ciabatta Bread
What’s the secret to a crispy crust?
The key to achieving that delightful crispy crust on your homemade ciabatta bread is steam! During baking, the steam keeps the crust soft for the first few minutes, allowing the bread to rise fully before creating a crispy exterior. You can create steam by placing a shallow pan with ice cubes in the oven while your bread bakes. As the ice melts, it generates steam that promotes that lovely crust.
How can I store leftover ciabatta?
To keep your leftover ciabatta fresh, store it in a paper bag at room temperature for up to 5 days. If you anticipate not finishing it in that time, consider wrapping it tightly in plastic wrap and placing it in the freezer for up to 3 months. Just remember to thaw it at room temperature before enjoying!
Can I use all-purpose flour instead of bread flour?
While using all-purpose flour is possible, it might alter the texture slightly. Bread flour has a higher protein content, giving your ciabatta bread that excellent chewy structure. If you’re in a pinch, feel free to substitute it 1:1, but be aware the dough may be less forgiving. For best results, sticking with bread flour is ideal.
For more tips on baking with different types of flour, check out King Arthur Baking.
Conclusion on Homemade Ciabatta Bread
Creating your own homemade ciabatta bread is not only a rewarding experience but also fills your kitchen with irresistible aromas. The crunchy crust and airy texture make every bite a delight. Embrace this straightforward recipe, and soon you'll be serving up fresh, warm rolls that impress friends and family alike.
For more tips on baking, check out The Kitchn’s Bread Baking Guide. Happy baking!
Homemade Ciabatta Bread
Equipment
- Mixing Bowl
- dough hook
- bench scraper
- Baking Sheet
- parchment paper
- Instant-Read Thermometer
Ingredients
Biga/Preferment
- 1 cup bread flour [**I use this**](https://amzn.to/3PkKuxS), [**spooned & leveled**](https://sallysbakingaddiction.com/how-to-measure-baking-ingredients/)
- ⅛ teaspoon active-dry or instant yeast
- ½ cup room-temperature water (about 70°F (21°C))
Ciabatta Rolls
- 1 teaspoon active-dry or instant yeast
- 1 cup warm water (about 100–110°F (38°–43°C))
- 2.5 cups bread flour [**spooned & leveled**](https://sallysbakingaddiction.com/how-to-measure-baking-ingredients/), plus more as needed
- 1.5 teaspoons table salt
- olive oil as needed for coating hands and spatula
Instructions
Instructions
- Day 1: Make the biga/preferment: In a large mixing bowl, whisk together the bread flour and yeast. Add the water and mix with a silicone spatula until combined. Cover the bowl tightly with plastic wrap and let rest at room temperature for 8–24 hours.
- Day 2: Make the dough: Uncover the bowl with the biga. In a separate large mixing bowl, whisk together the yeast and warm water. Cover and let sit for 5 to 10 minutes until the yeast has dissolved. Add the biga, flour, and salt. Gently mix until uniform.
- Cover the bowl and let the dough rest for 30 minutes at room temperature.
- Visualize a clock on top of your dough. Fold the dough at the 12 o’clock mark, then turn the bowl 90 degrees and repeat for a total of 8 folds. Cover and let rest for 30 minutes.
- Repeat the last step three more times, allowing for 30-minute rests in between. After the 4th stretch-and-fold, refrigerate the dough for at least 1 hour.
- Gently scrape the dough onto a floured work surface. Shape the dough into a rectangle (about 10 x 7 inches). Cut into 8 pieces for rolls or 2 pieces for loaves.
- Transfer the dough pieces to floured parchment, arranging them 2 inches apart.
- Cover the rolls with a clean towel and let rest for 1 hour.
- Preheat the oven to 450°F (232°C) with a baking sheet inside.
- Before baking, uncover the rolls and optionally spray with water. Slide the parchment with dough onto the preheated baking sheet and add ice cubes to a pan in the oven for steam.
- Bake for 20–25 minutes, until golden brown and hollow-sounding when tapped. Allow to cool for 45 minutes before slicing.
- Store leftovers loosely covered at room temperature for up to 5 days or refrigerate for 1 week.


Leave a Reply