
Introduction to Oreo Ice Cream Bars
The Joy of Homemade Desserts
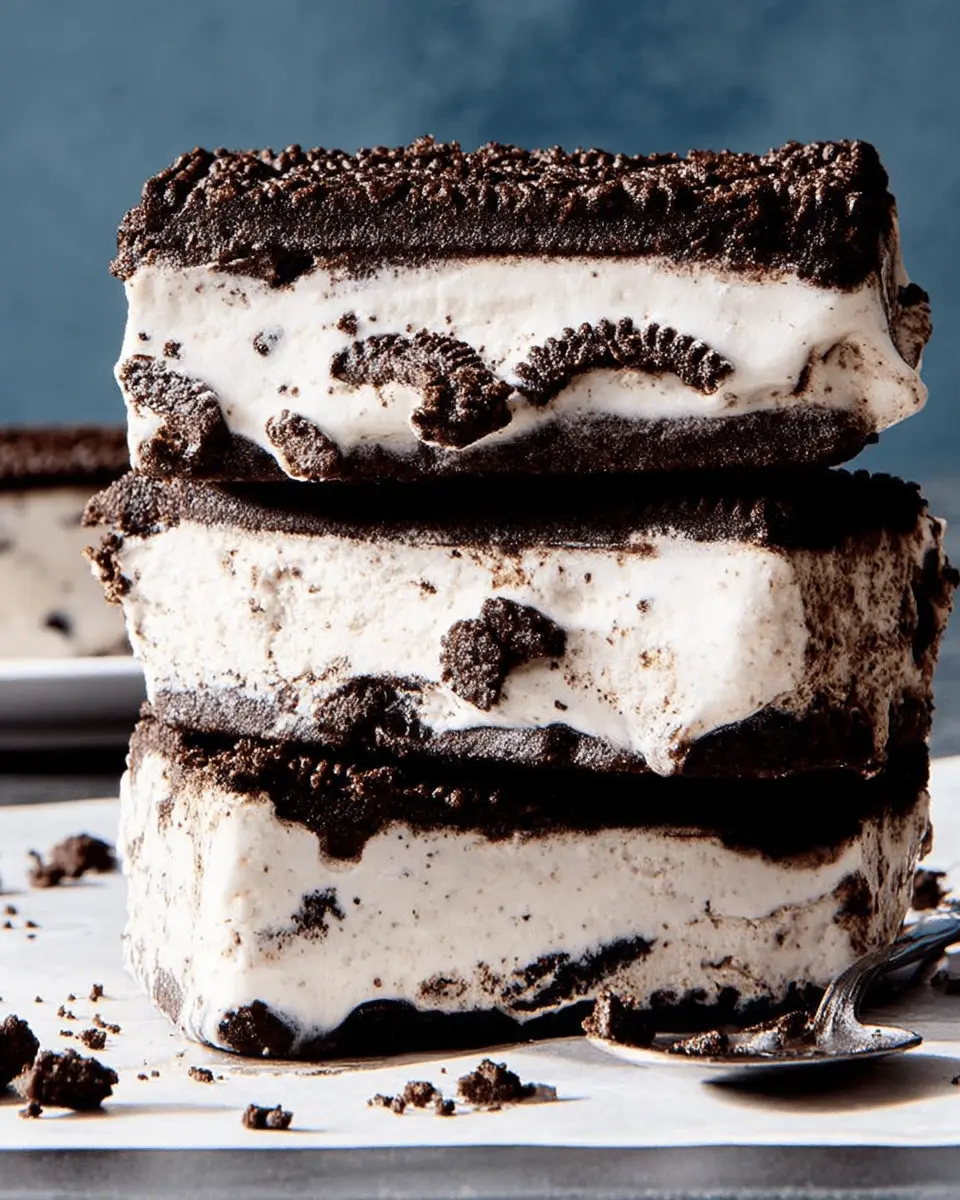
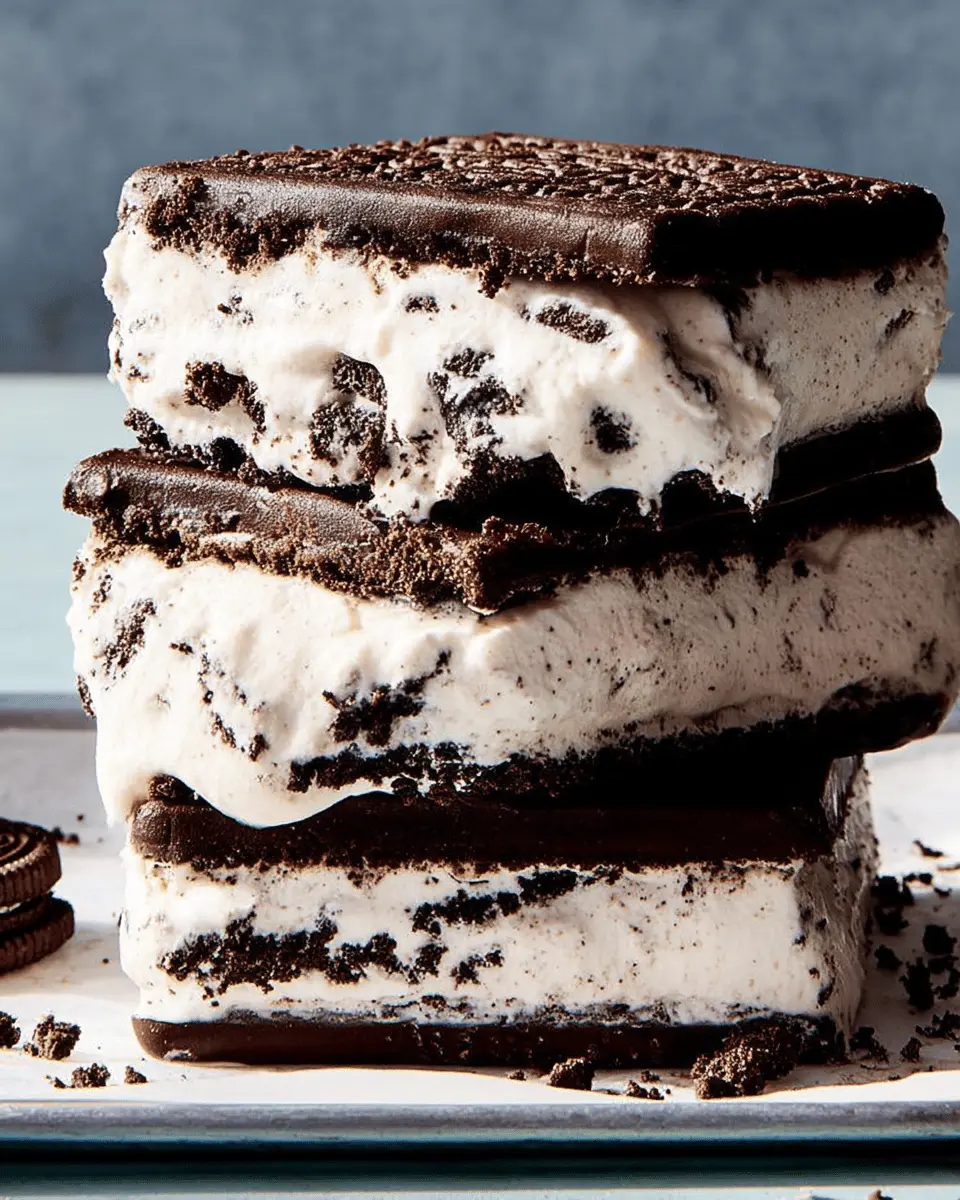
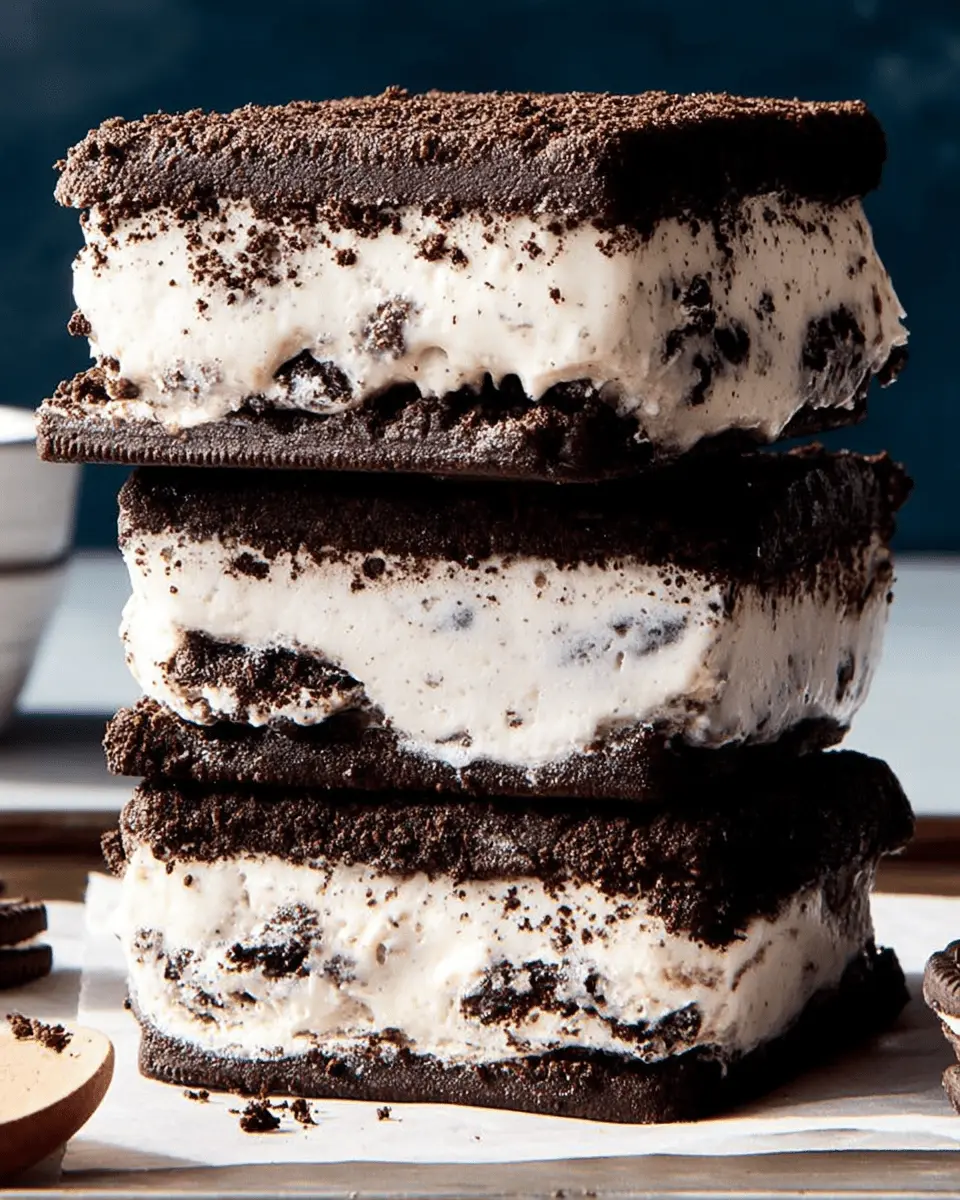
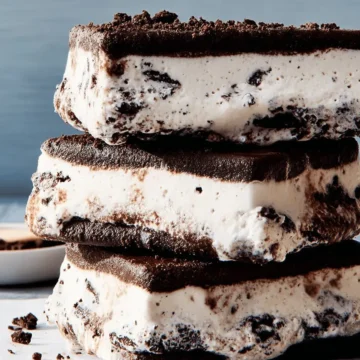
There's something undeniably satisfying about whipping up your own desserts, especially when they involve classic favorites. Oreo Ice Cream Bars are the perfect blend of creamy indulgence and crunchy texture, creating a treat that’s sure to impress your friends and family. Imagine biting into a chilled, chocolatey confection that combines velvety ice cream with the beloved flavor of Oreo cookies—it’s a dessert lover’s dream!
Why go the homemade route? For starters, you control the ingredients, meaning you can swap out or add flavors as you please. Plus, making your own desserts can often save you a trip to the store and can be a fun way to unwind after a hectic day. As someone who enjoys a sweet treat now and again, I've found that homemade desserts not only taste better but also provide a wonderful sense of accomplishment.
Whether you're hosting a summer gathering, looking for a simple weekend project, or just satisfying a sweet tooth, these Oreo Ice Cream Bars are a delightful way to celebrate the joy of homemade desserts. Don't be surprised if everyone asks for seconds, or even thirds!
For more tips on homemade ice cream creations, check out Serious Eats for expert advice!
Essential Ingredients for Delicious Oreo Ice Cream Bars
Creating scrumptious Oreo Ice Cream Bars is a delightful venture that requires just a handful of ingredients to bring a world of flavor to your freezer. Let’s break them down:
-
Oreos: The star ingredient! You'll need about 1 ½ packages (roughly 50 cookies) to achieve that rich, chocolatey crunch that pairs perfectly with creamy ice cream.
-
Milk Chocolate Chips: Approximately 8 ounces of these melted beauties will add a smooth, luscious flavor that binds the cookie crumbs together. This chocolatey goodness is what elevates your ice cream bars.
-
Kosher Salt: Just half a teaspoon! This tiny amount brings out the sweetness and balances the flavors beautifully, enhancing the chocolate and cream.
-
Cookies & Cream Ice Cream: One 1.5-quart container is essential for that classic taste. It’s creamy, delicious, and pairs perfectly with the crunchy layers.
With these simple yet effective ingredients, your Oreo Ice Cream Bars will be a hit! For more ice cream inspiration, check out this detailed guide on ice cream types and flavors. Enjoy crafting these tasty treats!
Preparing Oreo Ice Cream Bars
Making Oreo Ice Cream Bars is a delightful way to beat the heat while satisfying your sweet tooth. This recipe is not only simple but also a fun activity to share with friends or family. Let’s dive into the steps to prepare these delicious bars!
Gather your kitchen tools
Before you start, you’ll want to gather the necessary kitchen tools to make the process smooth and enjoyable. Here’s what you’ll need:
- A 9" x 9" baking dish
- Parchment paper
- A large food processor
- Mixing bowls
- A spatula
- Measuring spoons and cups
This setup will make assembling your Oreo Ice Cream Bars a breeze, without any last-minute scrambles!
Process the Oreos
First things first—let’s get those delightful Oreos ready! Grab your food processor and break out your 1.5 packages of Oreos (about 50 cookies). It’s as easy as throwing them in and processing until they form fine crumbs. Once you have your Oreo dust, transfer it to a large mixing bowl.
Now, for a little extra flavor, you’ll want to add in 8 oz. of melted milk chocolate chips along with ½ teaspoon of kosher salt. The mixture should come together to look like wet sand—this is the magic that will create a delicious base layer for your bars.
Create the base layer
With your Oreo mixture ready, it’s time to form the crust! Press half of this mixture (approximately 1.5 cups) firmly into the bottom of your prepared baking dish. It should feel even and compact.
Once that’s done, cover the bowl with the remaining Oreo mixture and pop it in the refrigerator. This keeps it fresh and ready for later!
Add the ice cream
Next up, it’s ice cream time! Take a pint of cookies & cream ice cream and let it soften slightly (about 10 minutes should do). This makes it easier to spread. Use a spatula to gently spread the ice cream over your Oreo base, making sure to reach the edges.
Now, here’s where patience comes in—freeze the dish for 1 to 2 hours, or until the ice cream is firm. You might want to kick back and relax during this time, maybe even treat yourself to an Oreo while you wait!
Top with more Oreo goodness
Once the ice cream is nice and firm, it’s time for the finale. Retrieve your reserved Oreo mixture from the fridge and gently press it atop the ice cream layer. This will give your Oreo Ice Cream Bars that signature crunch!
Return the dish to the freezer and let it set for at least 8 hours—better yet, overnight if you can wait that long.
And there you have it! When you’re ready, lift out the bars using the parchment overhang and cut them into squares. Your delicious creation is now ready to be enjoyed with friends or family!
For more great Oreo dessert ideas, check out this amazing blog that will surely inspire your next sweet adventure. Happy baking!
Variations on Oreo Ice Cream Bars
Double Chocolate Version
For all the chocolate lovers out there, indulge in a Double Chocolate Oreo Ice Cream Bar variation! Just mix additional dark chocolate chips into your melted chocolate before combining with the Oreo crumbs. You can even swirl in some chocolate fudge before freezing for a luscious layer of extra chocolate goodness. This delicious twist ensures each bite is a sublime experience.
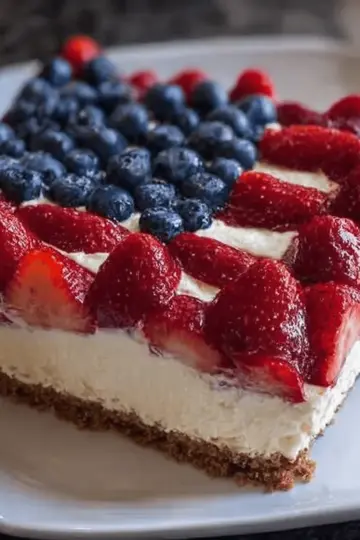
Fruity Twist with Berries
Looking for a refreshing take? Consider adding a fruity twist! Layer in fresh berries like strawberries or raspberries between the Oreo layers or mix them directly into the ice cream. The tartness of the berries beautifully cuts through the rich creaminess, creating a delightful contrast. Who knew your Oreo Ice Cream Bars could be so versatile?
For more creative ice cream ideas, check out Ben & Jerry's for inspiration!
Cooking tips and notes for Oreo Ice Cream Bars
Importance of freezer time
Freezer time is crucial for creating perfect Oreo Ice Cream Bars. After assembling the bars, let them freeze for at least 8 hours, or better yet, overnight. This not only allows the ice cream to firm up but also ensures that the layers meld together, providing that delightful contrast between the crunchy Oreos and the creamy ice cream. Trust me, patience pays off!
Using quality ingredients
The flavor of your Oreo Ice Cream Bars relies heavily on the quality of your ingredients. Use fresh cookies and high-quality chocolate chips to enhance the overall taste. Don't skimp here; your homemade treats deserve the best! If you’re looking to elevate the taste even further, consider experimenting with gourmet ice cream options or creative toppings. For more insights on ingredient selection, check out this source.
Serving suggestions for Oreo Ice Cream Bars
Perfect for parties
Oreo Ice Cream Bars are an absolute crowd-pleaser at any gathering. Whether it’s a birthday bash or a potluck, these bars can be cut into small squares, making them easy to serve. Pair them with fresh fruit, like strawberries or raspberries, for a refreshing balance. You might also consider setting up a topping station with whipped cream, sprinkles, or even crushed Oreos for guests to customize their treat. For more fun ideas, you can check out Food Network for additional party snack inspiration.
A fun treat for movie night
Make your movie night extra special by serving Oreo Ice Cream Bars alongside your favorite films. Just imagine curling up with a delectable square while you dive into a thrilling cinematic experience. Enhance the mood with some cozy blankets and popcorn on the side. You can even create a mini dessert platter with small portions of these bars, popcorn, and a few candy selections for a delightful mix. This combination is sure to impress your friends and elevate your viewing experience!
Time breakdown for Oreo Ice Cream Bars
Preparation time
Getting started with your Oreo Ice Cream Bars is a breeze! You’ll need about 15 minutes to gather your ingredients and mix everything together. This quick prep time means you can whip these bars up effortlessly, making them perfect for last-minute gatherings or dessert cravings.
Freezing time
The real magic happens in the freezing stage. You’ll need to allow at least 8 hours for your bars to set properly, though you can leave them overnight for best results. This patience pays off with a creamy, delicious treat that will impress everyone.
Total time
In total, you’re looking at about 9 hours and 15 minutes from start to finish—including prep and freeze times. But don't worry; most of this time is simply letting the bars chill in the freezer. So while you're waiting, why not plan a movie night or read a book?
Feel free to check out more tips on freezing desserts effectively on Serious Eats. Enjoy your cooling adventure with these scrumptious Oreo Ice Cream Bars!
Nutritional Facts for Oreo Ice Cream Bars
Calories per serving
Each serving of these delicious Oreo Ice Cream Bars contains about 250 calories. While it’s a sweet treat, remembering portion sizes is key to enjoying without guilt.
Sugar content
These bars pack a punch of sweetness! Each serving has approximately 20 grams of sugar, sourced primarily from the Oreo cookies and cookies & cream ice cream. It’s a delightful indulgence, so consider balancing it with lighter meals throughout the day.
Key nutrients
While these bars are primarily a dessert, they do offer some nutritional benefits. Each serving typically includes:
- Calcium: Vital for bone health.
- Iron: Important for transporting oxygen in the bloodstream.
- Vitamin A: Essential for vision and immune function.
For a closer look at the nutritional breakdown, check out Nutritiondata for personalized insights and food comparisons.
Enjoy your Oreo Ice Cream Bars and feel free to modify the ingredients to suit your dietary needs! Whether you're sharing with friends or savoring alone, this treat brings together the rich flavors of chocolate and cookies in every bite.
FAQs about Oreo Ice Cream Bars
Can I use gluten-free Oreos?
Absolutely! You can easily make your Oreo Ice Cream Bars gluten-free by substituting regular Oreos with gluten-free Oreos. The taste and texture will remain delicious, ensuring everyone can enjoy this delightful treat without worry.
How to store leftover bars?
Storing your Oreo Ice Cream Bars is super simple! Just wrap any leftover bars tightly in plastic wrap or place them in an airtight container. These delicious treats can be stored in the freezer for up to two weeks, though they’re likely to disappear much sooner!
Can I make these in advance?
Yes, you can! Oreo Ice Cream Bars are perfect for make-ahead desserts. Prepare them one to two days before the event and store them in the freezer. Just be sure to let them set properly overnight for the best texture. Need a little inspiration? Check out this freezer-friendly dessert guide for more ideas!
Feel free to ask any additional questions, and happy cooking!
Conclusion on Oreo Ice Cream Bars
In conclusion, Oreo Ice Cream Bars are the ultimate treat for any occasion. Combining the rich flavors of Oreos and creamy ice cream, these bars are not only simple to make but also a delicious way to impress your friends. So, why wait? Dive into this tasty adventure!
Oreo Ice Cream Bars: Indulgent Treat to Beat the Heat
Equipment
- 9" x 9" baking dish
- food processor
Ingredients
Oreo Base
- 1 ½ pkg Oreos (about 50 cookies)
- 8 oz milk chocolate chips melted
- ½ teaspoon kosher salt
Ice Cream
- 1 container cookies & cream ice cream (1.5 qt)
Instructions
Preparation Steps
- Line a 9" x 9" baking dish with parchment, leaving an overhang on 2 opposite sides. In a large food processor, process Oreos until fine crumbs form. Transfer to a large bowl and add melted chocolate and salt. Stir until mixture resembles wet sand.
- Press half of Oreo mixture (about 1 ½ cups) into bottom of prepared dish; cover bowl and refrigerate remaining Oreo mixture. Top Oreo layer with ice cream, gently spreading to edges. Freeze until ice cream is firm, 1 to 2 hours.
- Gently press reserved Oreo mixture on top. Continue to freeze until set, at least 8 hours and up to overnight.
- Using parchment overhang, lift out bar and transfer to a cutting board. Cut into 9 squares.
Leave a Reply