
Introduction to Osaka-Style Okonomiyaki
What is Osaka-Style Okonomiyaki?
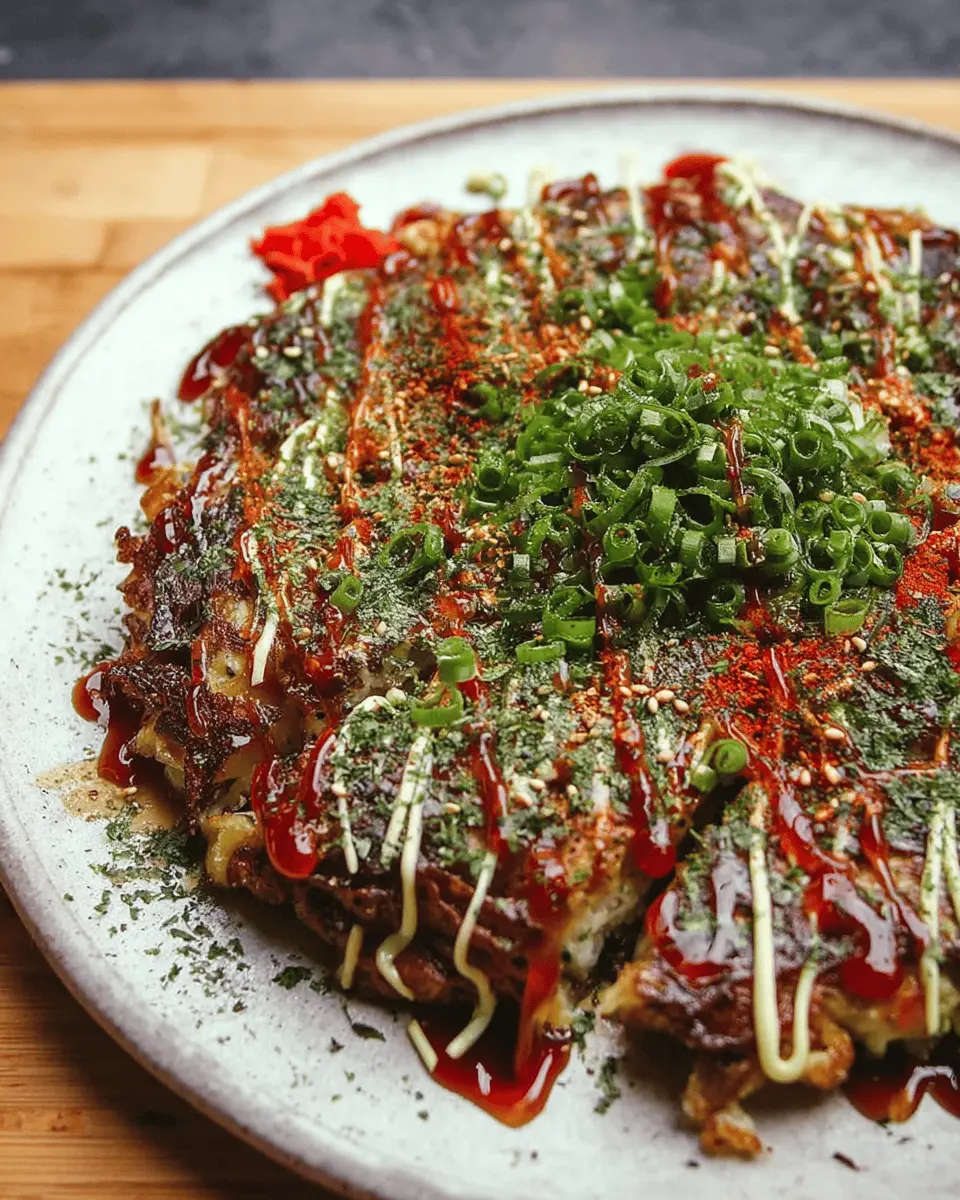
Osaka-Style Okonomiyaki is a savory Japanese pancake that embodies the essence of comfort food. Often referred to as "Japanese pizza," this delightful dish combines a batter made from flour, eggs, and shredded cabbage, with a variety of fillings like meat, seafood, and vegetables. The beauty of okonomiyaki lies in its customization—“okonomi” means "what you like," allowing for infinite variations that cater to individual tastes. Drizzled with a savory sauce and topped with Kewpie mayonnaise, it provides a satisfying blend of flavors and textures that keeps you coming back for more.
The history behind this delectable dish
The origins of okonomiyaki can be traced back to post-World War II Japan, where it emerged as a popular street food in Osaka, fueled by the need for affordable and filling meals. As a symbol of community eating, vendors would often cook okonomiyaki right before your eyes on hot griddles, making the experience both interactive and enjoyable. Through the decades, regional variants developed, but Osaka's take remains the most beloved, featuring a distinct texture and rich flavors. For further exploration into its fascinating culinary journey, consider checking resources like Nippon.com to understand how modern adaptations continue to shape this traditional favorite.
So grab your ingredients, and get ready to dive into the world of Osaka-Style Okonomiyaki — a dish that’s as fun to make as it is to eat!
Ingredients for Osaka-Style Okonomiyaki
Essential ingredients you'll need
To create a mouthwatering Osaka-Style Okonomiyaki, you’ll start with these essential ingredients:
- ½ small head cabbage, finely shredded (about 4 packed cups)
- 3 scallions, thinly sliced
- 2 ounces beni-shoga (Japanese pickled red ginger), divided
- ½ ounce katsuobushi (dried bonito), divided
- 2 large eggs
- ½ cup cold water or dashi
- ¾ cup all-purpose flour
- 8 to 10 thin slices of uncured pork belly (or substitute ground beef)
- 2 tablespoons vegetable oil
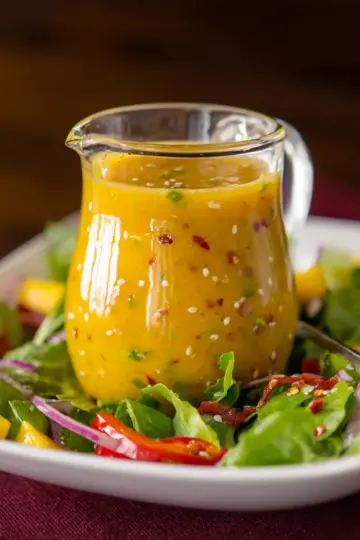
- Ao-nori, okonomiyaki sauce, and Kewpie mayonnaise for serving
These ingredients come together to create a deliciously hearty dish that embodies the vibrant flavors of Osaka.
Specialty ingredients explained
Now let’s dive into some of the specialty ingredients that you might be curious about:
- Beni-shoga: This bright-red pickled ginger adds a zesty zing and can often be found in Japanese grocery stores.
- Katsuobushi: Made from smoked and dried bonito, this ingredient imparts a rich umami flavor essential to authentic Osaka-Style Okonomiyaki.
- Yamaimo: While optional, this Japanese mountain yam provides a unique texture. If you can’t find it, don’t worry—it’s okay to skip this.
- Ao-nori: This seaweed powder adds a subtle oceanic flavor and a pop of green color, enhancing both taste and presentation.
These ingredients work together to bring your Osaka-Style Okonomiyaki to life, making it a memorable dish that’ll delight your taste buds! For more detailed explanations and substitutions, feel free to check out resources like Serious Eats.
Preparing Osaka-Style Okonomiyaki
Making Osaka-Style Okonomiyaki at home is a fun and rewarding experience. With a mix of fresh ingredients and a few cooking techniques, you can create this delicious savory pancake right in your kitchen. Let’s dive into the steps!
Combine the fresh ingredients
Start by gathering your ingredients—this is both fun and crucial. In a large bowl, you'll need to combine:
- Finely shredded cabbage
- Scallion whites and half of the greens
- Half of the beni-shoga (Japanese pickled ginger)
- Three-quarters of katsuobushi (dried bonito flakes)
- Grated yamaimo (optional, for added texture)
- Two large eggs
- Cold water or dashi
Once these are in your bowl, sprinkle in all-purpose flour and give it a good mix. Use a fork to stir vigorously until bubbles start forming in your batter. This step aerates the mixture, making your okonomiyaki fluffy and light. Let the concoction sit while you prep your skillet.
Prepare the skillet for cooking
If you're including beef, this is where it gets exciting. Line the bottom of a nonstick skillet (10 inches is ideal) with thin slices of uncured beef. The fat will create a deliciously crispy bottom. Heat the skillet over medium heat until the meat is sizzling, then spread your okonomiyaki batter evenly on top. If you're going meatless, simply heat some vegetable oil until it shimmers, then add the batter.
Perfectly cook the okonomiyaki
Now comes the waiting game. Cover your skillet and let it cook for about 10 minutes. To ensure an even layer of crispiness at the base, gently shake the pan every now and then. Keep an eye on it to prevent burning. The bottom should become beautifully browned while the inside remains custardy and tender.
The art of flipping
Flipping might sound daunting, but with a little practice, it becomes second nature. First, drain any excess fat if you used beef. Then, place a lid over the skillet and, using a pot holder, flip everything upside down quickly. The okonomiyaki should easily land on the lid. Carefully slide it back into the skillet browned side up. This may take some practice, but don’t worry—everyone has a first attempt!
Final touches and plating
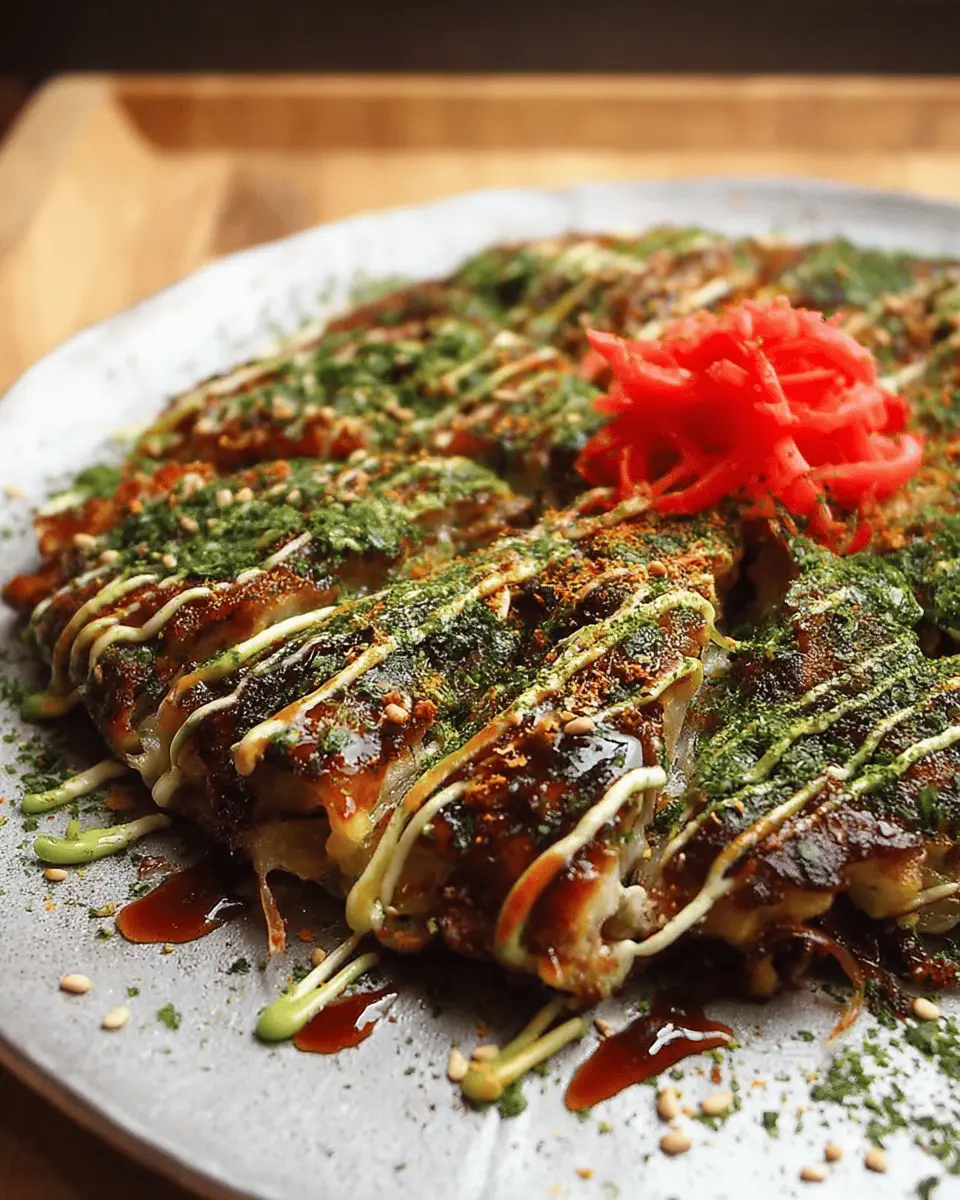
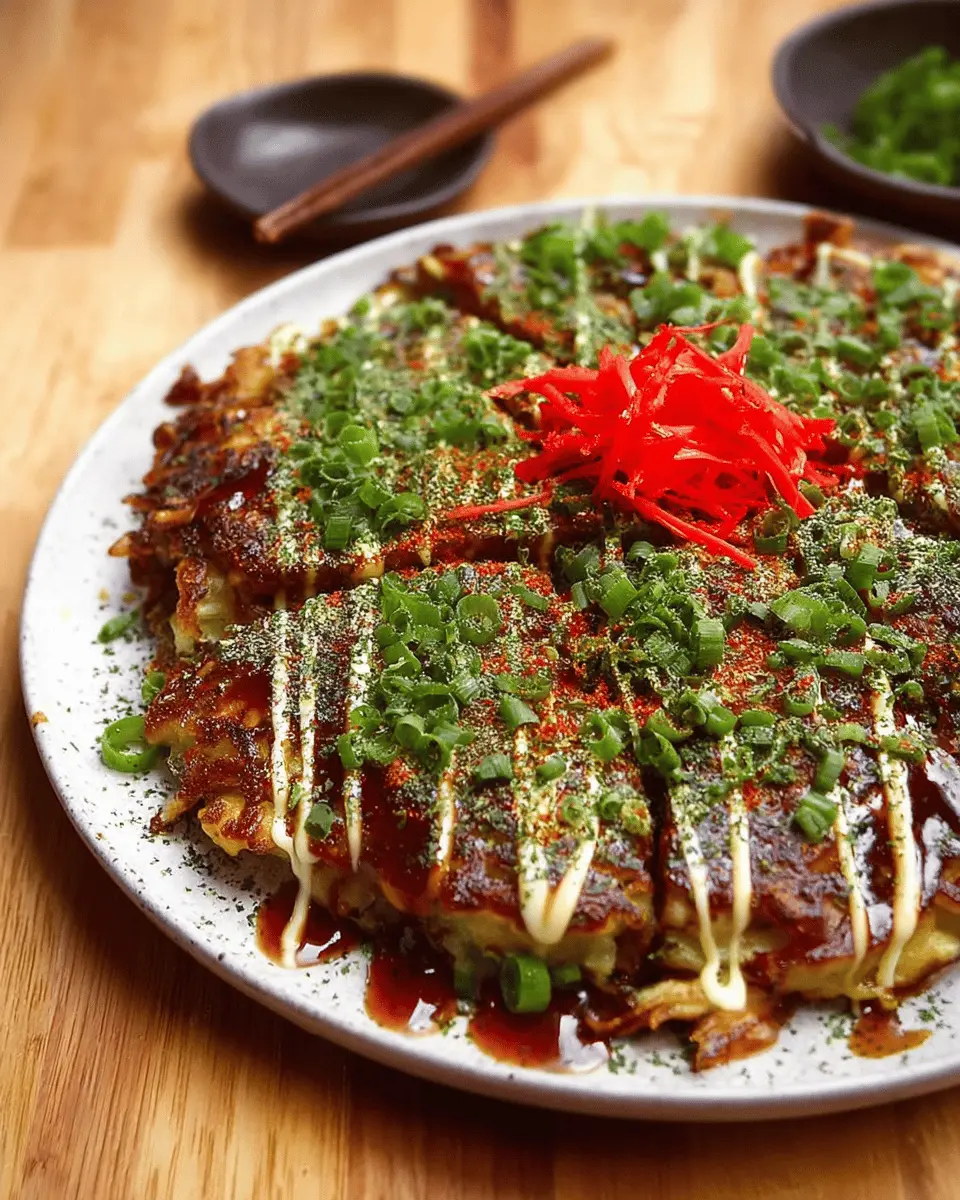
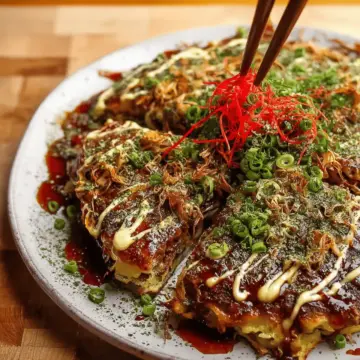
To finish your Osaka-Style Okonomiyaki, cover again and cook for an additional 8 minutes, ensuring it cooks through without losing that tender texture. When they’re ready, transfer your beautiful creations to a serving platter, beef side up.
Drizzle generous amounts of okonomiyaki sauce and Kewpie mayonnaise, then sprinkle with ao-nori, the remaining beni-shoga, and scallion greens. Enjoy your masterpiece immediately, sharing with friends or savoring solo!
For further inspiration and variations on this classic dish, check out these resources: Serious Eats for ingredient substitutes and Japanese Cooking 101 for cooking techniques.
Happy cooking!
Variations on Osaka-Style Okonomiyaki
Seafood Okonomiyaki Variations
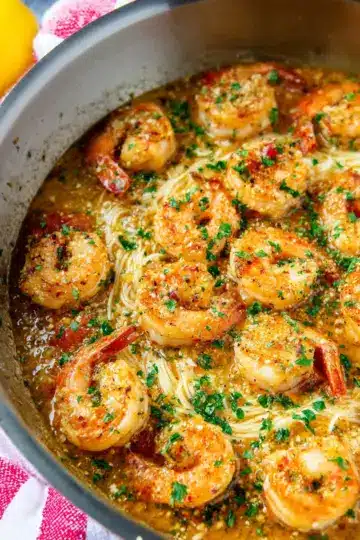
For a delightful twist on Osaka-Style Okonomiyaki, consider incorporating a variety of seafood. Shrimp, squid, and even scallops can bring an oceanic flair to your dish. Simply add about ½ pound of your chosen seafood to the batter for a savory treat. Enjoy the delightful blend of textures and flavors while still enjoying the classic okonomiyaki base.
Vegetarian Options for Okonomiyaki
If you’re leaning toward a more plant-based option, rejoice! Osaka-Style Okonomiyaki is incredibly versatile and can be customized to suit vegetarian diets. Swap out the meat for delicious veggies like mushrooms, bell peppers, and zucchini. You can also add tofu or tempeh for protein. Experimenting with ingredients like corn or even sweet potato can heighten the dish's flavor profile.
Whether you stick to the traditional recipe or explore these variations, there’s an okonomiyaki style for everyone! Let your culinary creativity shine through!
Cooking Tips for Osaka-Style Okonomiyaki
Achieving the Perfect Texture
To master Osaka-style okonomiyaki, focus on achieving that ideal fluffy yet crispy texture. Combine the ingredients just enough to moisten them without overmixing, as excess stirring can lead to a heavy pancake. The inclusion of grated yamaimo adds a unique starchiness that lightens the batter—don’t skip it! Additionally, letting the batter rest for a few minutes allows the ingredients to meld, enhancing flavor and texture.
Common Mistakes to Avoid
A couple of common pitfalls can easily sabotage your okonomiyaki experience:
- Too Much Liquid: Adding excessive water or dashi can create a soggy texture, so stick to the recommended amounts.
- Skipping the Cook Time: Be patient! Proper cooking time is essential for developing a crispy base and a tender center.
- Incorrect Flipping: If using turkey bacon or beef, ensure enough fat renders to prevent sticking; using a nonstick skillet helps.
By following these tips, you’ll be well on your way to creating the perfect Osaka-style okonomiyaki! For additional techniques and variations, check out Serious Eats for deeper insights.
Serving Suggestions for Osaka-Style Okonomiyaki
How to Serve for a Communal Meal
Osaka-Style Okonomiyaki is perfect for sharing and creating a fun, communal experience. Serve your okonomiyaki directly from a big communal platter, allowing everyone to cut their own pieces. Consider bringing out a variety of toppings such as ao-nori, Kewpie mayonnaise, and pickled ginger for guests to customize their servings. This interactive style keeps the meal lively and lets everyone engage with the deliciousness of okonomiyaki!
Pairing Drinks and Sides
For a refreshing pairing, serve your okonomiyaki with a chilled green tea or a sparkling fruit soda. Side dishes can include simple salads or a light miso soup to complement the rich flavors. If you want an extra kick, try accompanying it with edamame or pickled vegetables. These sides enhance the overall meal, balancing flavors beautifully.
For more ideas on pairing sides and beverages, check out this guide on Japanese meal pairings.
Time Breakdown for Osaka-Style Okonomiyaki
Preparation Time
Getting everything ready for your Osaka-Style okonomiyaki is a breeze! It typically takes about 15 minutes to chop your veggies, mix the batter, and gather all your ingredients.
Cooking Time
Cooking these delicious savory pancakes requires roughly 18 minutes. You'll want to ensure they’re perfectly crispy on the outside yet tender inside.
Total Time
In total, you’ll spend around 33 minutes from prep to plating. This quick and delightful dish is great for weeknights or impressing friends at a weekend gathering. Happy cooking!
Nutritional Facts for Osaka-Style Okonomiyaki
When you're diving into a delicious Osaka-Style Okonomiyaki, it's good to know what you're enjoying! Here's a quick look at the nutritional facts per serving:
Calories per Serving
One serving of Osaka-Style Okonomiyaki typically contains around 300-400 calories. This makes it a satisfying meal without overloading on calories, especially considering the burst of flavors you get in each bite.
Protein Content
You'll find about 12-15 grams of protein in each serving, primarily from the eggs and optional beef or turkey bacon toppings. This rich protein content adds to the dish's heartiness, making it a great post-workout meal or a fulfilling lunch option.
Sodium Levels
Be mindful of sodium levels, as one serving can contain around 600-800 mg of sodium depending on the sauces and toppings used. While it’s delicious, try to balance it out with lower-sodium ingredients or accompany it with fresh veggies for a healthier twist.
For more information on the health benefits of the ingredients used, take a peek at reliable sources like Healthline or NutritionData. Enjoy your culinary journey with this delightful dish!
FAQs about Osaka-Style Okonomiyaki
Can I make okonomiyaki ahead of time?
Absolutely! You can prepare the batter for Osaka-style okonomiyaki a few hours in advance. Just store it in the fridge to keep those flavors fresh. However, for the best texture and taste, cooking it just before serving is ideal. If you have leftovers, simply reheat them in a skillet for that crispy texture!
What’s a great substitute for yamaimo?
If yamaimo is hard to find, don’t worry! You can substitute it with grated zucchini or potatoes, keeping in mind that they create a slightly different texture. Using a bit less of these substitutes will also work, so feel free to experiment based on what you have available.
How do I customize my okonomiyaki toppings?
Customization is where the magic happens! Feel free to add various toppings based on your preferences. Try options like shrimp, chicken ham, or even different veggies! A sprinkle of furikake or sliced mushrooms can elevate the dish. Think of toppings as your canvas; unleash your creativity!
For more on specific ingredients, check out Just One Cookbook for substitutions and ideas!
Conclusion on Osaka-Style Okonomiyaki
In summary, Osaka-Style Okonomiyaki is a delectable and versatile dish that invites creativity and customization. Whether you stick to the classic recipe or experiment with different fillings, this savory pancake is sure to delight your taste buds. Enjoy making it for friends or family—it's a truly communal experience!
Osaka-Style Okonomiyaki
Equipment
- 10-inch nonstick skillet
Ingredients
Vegetables
- 0.5 head cabbage, finely shredded about 4 packed cups; 14 ounces; 400 g
- 3 scallions scallions, thinly sliced dark green parts reserved separately
Seasonings
- 2 ounces beni-shoga Japanese pickled red ginger, divided
- 0.5 ounce katsuobushi dried bonito, divided
- 0.25 pound yamaimo peeled and grated on the smallest holes of a box grater (optional)
- 2 large eggs
- 0.5 cup cold water or dashi or use cold water with 2 teaspoons Hondashi
- 0.75 cup all-purpose flour 3 ¾ ounces; 110 g
Meat
- 8 to 10 slices uncured pork belly optional
Oil
- 2 tablespoons vegetable oil if not using pork belly
Toppings
- Ao-nori for serving
- okonomiyaki sauce for serving
- Kewpie mayonnaise for serving
Instructions
Preparation
- Combine cabbage, scallion whites, half of greens, half of beni-shoga, ¾ of katsuobushi, yamaimo, eggs, and water (or dashi) in a large bowl. Sprinkle with flour. Stir with a fork and beat heavily until a thick batter with plenty of bubbles forms. Set aside.
- If using pork belly, cover the bottom of a 10-inch nonstick skillet with pork belly and set over medium heat. Add okonomiyaki mixture and spread into an even layer with a fork. If not using pork belly, heat vegetable oil in skillet over medium heat until shimmering. Add okonomiyaki mixture and spread into an even layer with a fork.
- Cover and cook, shaking pan occasionally, until bottom layer is crisp and well browned, about 10 minutes, lowering heat as necessary if cabbage threatens to burn.
- To flip, drain off any excess fat, then, working over a sink and holding the lid tightly against pan with a pot holder, flip entire pan and lid over so that okonomiyaki transfers to pan lid. Remove pan, then carefully slide okonomiyaki off lid and back into pan, browned side up.
- Return to heat, cover, and continue to cook, shaking gently, until both sides are browned and okonomiyaki is not runny but still custardy and tender in the center, about 8 minutes longer. Transfer to a serving platter, pork side up.
- Drizzle with okonomiyaki sauce and mayonnaise; sprinkle with ao-nori, remaining beni-shoga, remaining katsuobushi, and remaining scallion greens; and serve immediately off of a communal plate.
Leave a Reply