
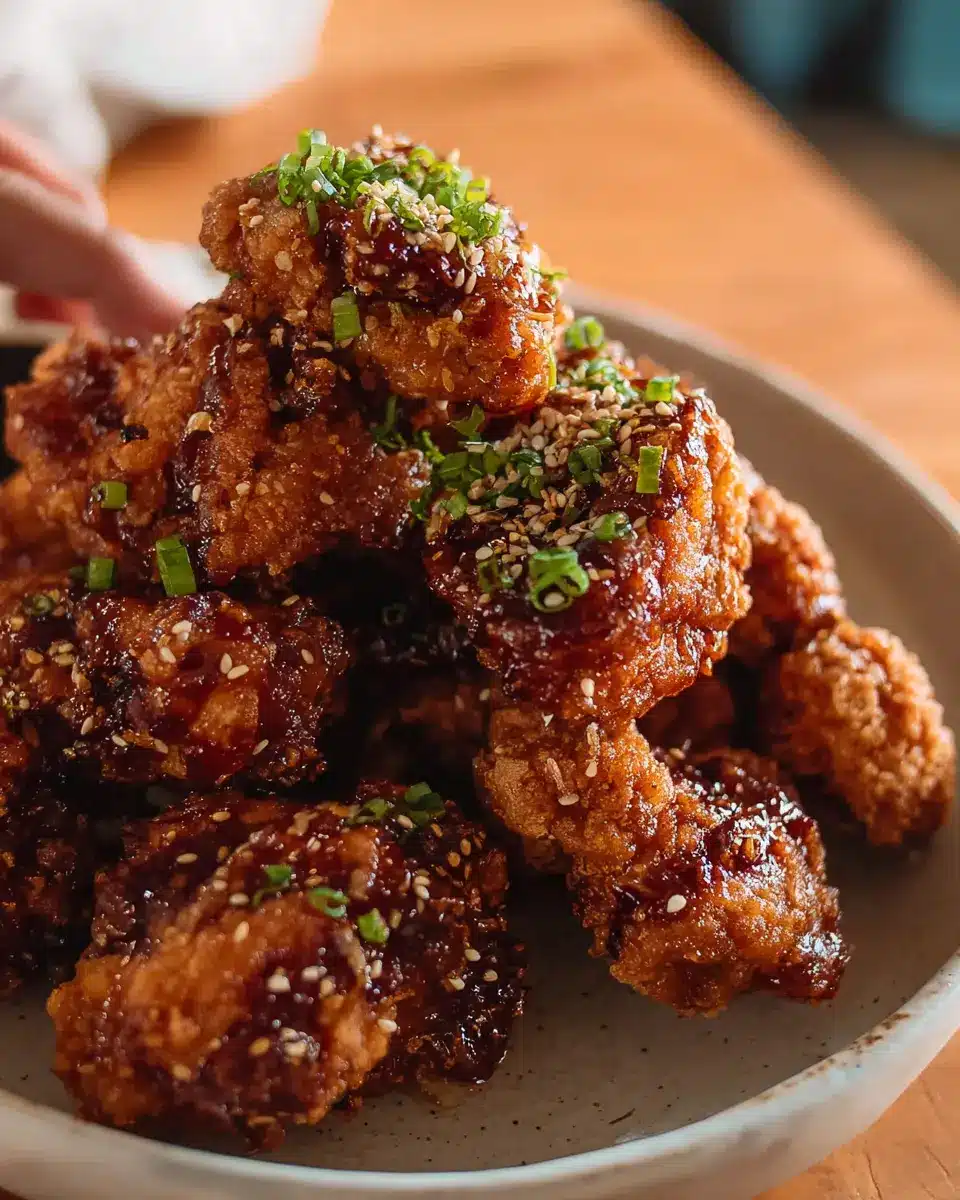
Introduction to Soy Garlic Korean Fried Chicken
There's something magical about homemade Soy Garlic Korean Fried Chicken that simply can't be replicated by fast food chains. When you whip this dish up in your kitchen, you're not just cooking—you’re infusing your meal with your unique touch and love. Plus, nothing beats knowing exactly what’s going into your food. Opting for fresh ingredients means you skip on preservatives and mystery additives that often come with takeout.
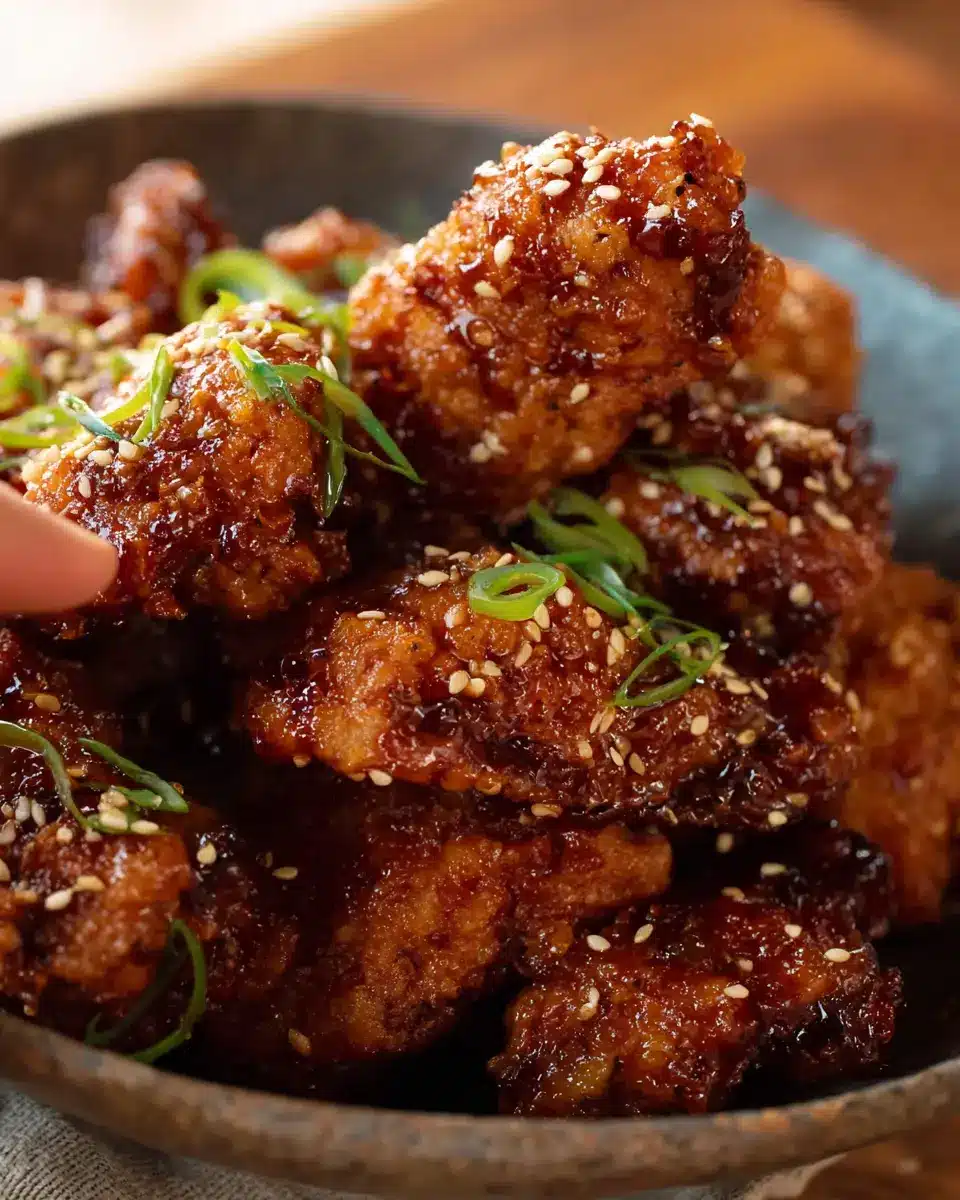
When you make this butter-crisp delicacy at home, you have complete control over the flavor profile. Adjust the soy sauce and garlic levels to suit your taste, creating a savory punch that will wow your friends at the next gathering. Did you know that Korean fried chicken is generally lighter and crispier than its American counterpart? That’s right! The deep-frying process here emphasizes the texture, making each bite delightfully airy.
In terms of health, a homemade version allows you to choose the cooking oil and balance your ingredients which empowers you to make healthier choices. Investing some time in the kitchen could lead to a dish that’s not only delicious but also reflective of your personality. So roll up your sleeves, and let’s dive into making this decadent feast together!
Ingredients for Soy Garlic Korean Fried Chicken
When craving that delicious Soy Garlic Korean Fried Chicken, starting with the right ingredients is crucial! Here’s a quick breakdown to ensure you have everything at hand for a flavor-packed dish.
Essential Ingredients for Marinating the Chicken
To achieve the perfect marinade that tenderizes the chicken and infuses it with flavor, gather these essentials:
- 3 pounds chicken wings: The star of the show!
- 5 garlic cloves, minced: Garlic brings a robust depth to your marinade.
- 1 teaspoon grated ginger: A hint of warmth and spice.
- 2 tablespoons soy sauce: For that umami kick.
- 2 tablespoons mirin: Adds a touch of sweetness.
- ¼ teaspoon black pepper: Just enough to enhance those flavors.
Key Ingredients for the Sauce
The sauce is what really elevates your Soy Garlic Korean Fried Chicken. You'll want to have:
- 3 ½ tablespoons soy sauce: Authenticity in flavor.
- 3 ½ tablespoons mirin: Sweetness is key!
- 3 ½ tablespoons brown sugar: For a caramelized finish.
- 3 ½ tablespoons honey: Adding a rich, sticky sweetness.
- 3 tablespoons water: To adjust the sauce’s consistency.
- 2 tablespoons rice vinegar: A touch of acidity to balance flavors.
- 3 ½ teaspoons sesame oil: A nutty finish that ties everything together.
Dredging Essentials for That Perfect Crunch
Achieving that incredible crispy texture requires the right dredging ingredients:
- 1 ¼ cup potato starch: This is vital for maximum crunch—definitely a must-have!
- 1 tablespoon garlic powder: Enhances the garlic flavor.
- ¼ teaspoon baking powder: Helps the crust puff up beautifully.
- 1 teaspoon onion powder: Gives a savory note.
- ⅛ teaspoon black pepper: For subtle heat.
- 3 tablespoons water: To bind it all together.
With these ingredients prepped, you’ll be well on your way to making delightful Soy Garlic Korean Fried Chicken that’s bound to impress!
Step-by-step Preparation of Soy Garlic Korean Fried Chicken
Making the perfect Soy Garlic Korean Fried Chicken is a delightful journey that combines flavors, textures, and a bit of culinary creativity. Let’s break this down into manageable steps so you can impress your friends or just indulge in some fantastic chicken at home!
Marinate the Chicken
Start with 3 pounds of chicken wings, which are fantastic for this recipe. In a large bowl or airtight container, combine the wings with the marinade ingredients: minced garlic, grated ginger, soy sauce, mirin, and a touch of black pepper. Give everything a good mix—don’t be shy; massage that marinade into the chicken! Once coated, cover and let it marinate in the fridge for at least 30 minutes, or up to overnight for deeper flavor absorption.
Prepare the Sauce
While the chicken marinates, whip up the sauce. In a small bowl, whisk together 3 ½ tablespoons each of soy sauce and mirin, along with brown sugar, honey, water, rice vinegar, and sesame oil. This mixture will become your irresistibly sticky glaze, so set it aside for later. Pro tip: taste it cautiously as the sugars can get molten hot!
Create the Dredge Mixture
Next, let’s get that crispy coating going. In a large bowl, combine 1 ¼ cups of potato starch, garlic powder, baking powder, onion powder, and a pinch of black pepper. Drizzle in a little water and mix with your fingers until you form crumbles. The potato starch is key to the ultimate crunch you expect from Korean fried chicken!
Dredge the Marinated Chicken
Time to coat the chicken! Mix in an egg and a bit of all-purpose flour or cornstarch into the marinated chicken until just combined. Carefully add a few pieces into the dredge, pressing those crumbles into the chicken to ensure they stick. Repeat until all your chicken is coated, and let it rest for 10-15 minutes. This step is essential—let that dredge solidify a bit!
Fry the Chicken to Perfection
In a wok or a deep pot, heat enough oil for deep frying over medium-high heat. You’ll know it’s ready when a wooden chopstick sizzles upon contact. Take care not to overcrowd the pan. Fry the chicken in batches for about 3-5 minutes, or until golden brown. Remove it and let it drain on a wire rack or paper towel-lined plate.
Coat the Chicken in Sauce
Finally, let’s bring everything together! Heat a clean wok or skillet with about a tablespoon of oil. Sauté your minced garlic and ginger until fragrant, then pour in that sauce you prepared earlier. Simmer until it thickens, then toss in the fried chicken until it’s fully coated in that sticky goodness. Don’t be afraid to really mix it up! If desired, garnish with toasted sesame seeds for an extra touch.
And there you have it—the deliciously crunchy, sweet, and savory Soy Garlic Korean Fried Chicken that’s sure to become a family favorite! Enjoy every flavorful bite!

Variations of Soy Garlic Korean Fried Chicken
Spicy Soy Garlic Korean Fried Chicken
If you’re looking to kick things up a notch, try adding some heat to your Soy Garlic Korean Fried Chicken. Simply incorporate gochugaru (Korean red pepper flakes) or gochujang (Korean chili paste) into your marinade or sauce. Adjust the quantity based on your spice tolerance to create the perfect fiery glaze that complements the sweet and savory elements of the dish.
Soy Garlic Chicken Thighs for a Richer Flavor
Opting for chicken thighs instead of wings can be a game changer. The additional fat in soy garlic chicken thighs brings richness and moisture, making each bite more flavorful. Simply follow the same marinating and frying methods as the wings, and you’ll discover a deliciously tender twist on this classic. Add your favorite sides like pickled radish for a well-rounded meal!
For more ways to explore Korean flavors, consider checking out Korean Cooking Essentials for insightful tips and ingredient lists!
Cooking Tips and Notes for Soy Garlic Korean Fried Chicken
Maximizing Crispiness
For the ultimate Soy Garlic Korean Fried Chicken, focus on achieving that irresistible crunch. Start by ensuring your chicken pieces are evenly coated in the dredge; this helps create a thicker crust. Avoid overcrowding the frying pan—this can lower the oil temperature and result in soggy chicken. Remember to double fry the chicken; the first fry cooks it through, and the second fry gives it that coveted golden crispiness.
Cleanup Tips for Frying
Frying can be a bit messy, but don’t worry! Use a splatter screen to catch oil, making cleanup much easier. After frying, let the oil cool before disposing of it properly—check out resources like Earth911 for recycling options. Keeping your workspace tidy as you cook not only saves time but makes the whole experience more enjoyable!
Serving Suggestions for Soy Garlic Korean Fried Chicken
Pairing with sides for a complete meal
To elevate your Soy Garlic Korean Fried Chicken to a full feast, consider serving it alongside some tasty sides. Think about including:
- Steamed rice drizzled with a bit of sesame oil for a fragrant touch.
- Kimchi or pickled vegetables to add a tangy crunch that balances the savory chicken.
- Korean-style coleslaw featuring cabbage and carrots, adding freshness and texture.
These sides will help create a delightful harmony of flavors, transforming your meal into a satisfying experience.
Creative serving ideas for entertaining
Planning a gathering? Make your Soy Garlic Korean Fried Chicken the star of the show! Here are a few fun ideas to impress your guests:
- Chicken sliders: Serve smaller pieces in buns with lettuce and a drizzle of extra sauce for a unique twist.
- Korean chicken tacos: Create a fusion experience by using soft taco shells and topping them with the fried chicken, spicy mayo, and crunchy slaw.
- DIY chicken platter: Arrange your chicken with a variety of dipping sauces like sweet chili or spicy mayo, along with fresh veggies for a fun appetizer station.
These creative serving options are sure to wow your friends while showcasing your incredible culinary skills!
Time Breakdown for Soy Garlic Korean Fried Chicken
Preparation time
Get ready to dive into this deliciousness! You’ll need about 30 minutes to prepare the chicken, combine the marinade, and dredge the wings. If you can, let the chicken marinate overnight for even better flavor.
Cooking time
The actual cooking takes about 15-20 minutes. This includes frying twice—once for that perfect golden brown and crispy exterior and again for extra crunch.
Total time
In total, you’re looking at about 1 hour (including marinating time) to create your Soy Garlic Korean Fried Chicken. This tasty recipe is well worth the wait! For quicker options, check out frozen versions of chicken wings available online here.
Don't forget to enjoy this dish with friends or family—it’s just too good to keep to yourself!
Nutritional Facts on Soy Garlic Korean Fried Chicken
Calories per serving
Indulging in Soy Garlic Korean Fried Chicken? Each serving packs around 649 calories—perfect for a delightful treat without going overboard.
Protein content
On the protein front, this dish delivers a hearty 33 grams per serving, making it a fulfilling option for your post-workout meal or a satisfying dinner.
Sodium levels
However, be mindful of the seasoning; it contains 1,407 mg of sodium. Balancing this with low-sodium sides or fresh veggies can keep your meal healthy and delicious.
For more insights, check out this article on the nutritional aspects of soy sauce and similar condiments!
FAQ about Soy Garlic Korean Fried Chicken
How can I make my chicken more crispy?
To achieve that iconic crunch in your Soy Garlic Korean Fried Chicken, consider double frying. After your first fry, let the chicken rest for a few minutes, and then fry it again at a higher temperature. This technique promotes a golden, crispy exterior while keeping the interior juicy. Remember, using potato starch in your dredge is also essential for that delightful crunch!
What are some good substitutes for soy sauce?
If you're out of soy sauce or need a gluten-free alternative, try using tamari, coconut aminos, or liquid aminos. These substitutes can offer a similar flavor profile without sacrificing the essence of your Soy Garlic Korean Fried Chicken.
Can I bake instead of frying?
While frying gives you that crispy delight, you can certainly bake the chicken for a healthier option. Coat the chicken well with your seasoning, then place it on a wire rack in a preheated oven at 400°F (200°C). Bake for about 40-45 minutes, flipping halfway through for even browning. Just keep in mind, the texture may be a bit different!
Conclusion on Soy Garlic Korean Fried Chicken
In conclusion, Soy Garlic Korean Fried Chicken is a showstopper suitable for any occasion. The perfect balance of savory flavors and crispy texture makes this dish a delightful treat. Whether enjoyed solo or shared with friends, this recipe promises to impress and satisfy! Dive in and savor every bite!
Soy Garlic Korean Fried Chicken
Equipment
- Wok
- Large Bowl
- Airtight container
- Whisk
- measuring cups
- measuring spoons
Ingredients
MARINADE
- 3 pounds chicken wings
- 5 cloves garlic, minced
- 1 teaspoon ginger, grated
- 2 tablespoons soy sauce
- 2 tablespoons mirin
- ¼ teaspoon black pepper
SAUCE
- 3 ½ tablespoons soy sauce
- 3 ½ tablespoons mirin
- 3 ½ tablespoons brown sugar
- 3 ½ tablespoons honey
- 3 tablespoons water
- 2 tablespoons rice vinegar
- 3 ½ teaspoons sesame oil
DREDGE
- 1 ¼ cup potato starch
- 1 tablespoon garlic powder
- ¼ teaspoon baking powder
- 1 teaspoon onion powder
- ⅛ teaspoon black pepper
- 3 tablespoons water
INGREDIENTS
- 3 tablespoons all-purpose flour or cornstarch
- 10 cloves garlic, minced
- 2 teaspoons ginger, grated
Instructions
Preparation
- In a large bowl or airtight container, combine the chicken and marinade ingredients – chicken, minced garlic, grated ginger, soy sauce, mirin, & black pepper. Massage the marinade into the chicken until it’s fully absorbed. Cover & marinate in the fridge for at least 30 minutes or up to overnight. Keep the chicken cold in the fridge until dredge is ready.
- In a small bowl, whisk together the sauce ingredients – soy sauce, mirin, brown sugar, honey, water, rice vinegar, & sesame oil. Set aside.
- In a large bowl, prep the dredge by combining potato starch, garlic powder, baking powder, onion powder, & black pepper. Drizzle in water then use your fingers to mix and create crumbles in the starch.
- To the marinated chicken, mix in egg and all-purpose flour until just combined. Add a few pieces of chicken to the dry dredge, pressing or scrunching the dredge & its crumbles into the chicken so it really sticks. Repeat for remaining chicken & let chicken rest for 10-15 minutes while preheating your frying oil.
- In a wok, heat enough oil to deep fry on medium-high heat. You’ll know it’s hot enough if you stick a wooden chopstick or spoon in the oil & it starts to sizzle. Add chicken in the oil, working in batches to avoid overcrowding. Gently stir the chicken so they don’t get stuck together while cooking. Cook for about 3-5 minutes, or until chicken is golden brown and oil is producing small bubbles instead of large violent bubbles. Remove and drain on a wire rack or paper towel-lined plate. Repeat for remaining chicken then rest for 5-10 minutes.
- Allow oil to re-heat up to medium-high, then once hot, add chicken back in batches. Again, don’t overcrowd otherwise your chicken won’t get to maximum crispiness! Cook for 1-2 minutes, or until a slightly darker brown & only small bubbles are showing in the oil. Remove, drain on a wire rack or paper towel-lined plate.
- Heat a cleaned wok or large skillet on medium heat with about a tablespoon of oil. Add the garlic and ginger & cook for a few seconds, just until they soften and become fragrant – keep a close eye so they don’t burn. Pour in the sauce and simmer for 3-5 minutes, or until it turns into a thick sticky glaze. If it’s thickened too much or turned too salty, you can add a splash of water. When tasting, be VERY careful because the sugars make the sauce molten hot. Once the glaze is your desired consistency, turn off the heat & combine with chicken until fully coated. It may look like it’s not enough, but keep tossing! Remove & garnish with toasted sesame seeds if you’re feeling fancy. Enjoy!

Leave a Reply