
Introduction to Cheesy Breadsticks
When you think of comfort food, cheesy breadsticks should top the list! These warm, buttery snacks are perfect for young professionals who need a quick pick-me-up after a long day at the office. There's something undeniably satisfying about pulling apart a gooey, cheesy breadstick, especially when it's paired with your favorite dipping sauce.
Why do cheesy breadsticks resonate so much with busy lifestyles? For one, they are incredibly easy to make at home, allowing you to skip the takeout line and enjoy a homemade treat. The aroma of freshly baked breadsticks filling your kitchen is a delightful reminder that comfort can be created right at home. This makes them an ideal choice for winding down at the end of the week or entertaining friends during casual get-togethers.
Moreover, cheesy breadsticks are versatile! You can easily customize them with your favorite toppings—think fresh herbs, spices, or even a sprinkle of red pepper flakes for a kick! Whether you’re looking for a quick snack, a side dish for your homemade pizza night, or a delightful treat during movie marathons, cheesy breadsticks are always a crowd-pleaser. They’re not just food; they're a ticket to relaxation and indulgence in your busy life.
Ingredients for Cheesy Breadsticks
Dough Ingredients
To whip up the perfect cheesy breadsticks, you’ll need a few essential dough ingredients. Here’s what to gather:
- 1 ⅛ teaspoons active dry yeast
- 1 teaspoon granulated sugar
- ¾ cup warm water
- 1 ½ tablespoons olive oil
- ¾ teaspoon salt
- ½ teaspoon white vinegar
- 1 ½ - 2 cups bread flour, or all-purpose flour
These simple ingredients form the backbone of your breadsticks, leading to a delightful base that is soft and pliable. Keep them handy to ensure a seamless baking experience!
Topping Ingredients
Now, onto the good stuff—the topping ingredients that make these cheesy breadsticks irresistible:
- 1 ½ tablespoons salted butter, melted
- 2 cloves garlic, minced
- ⅓ cup freshly grated parmesan cheese
- 1 ¼ cups shredded mozzarella cheese
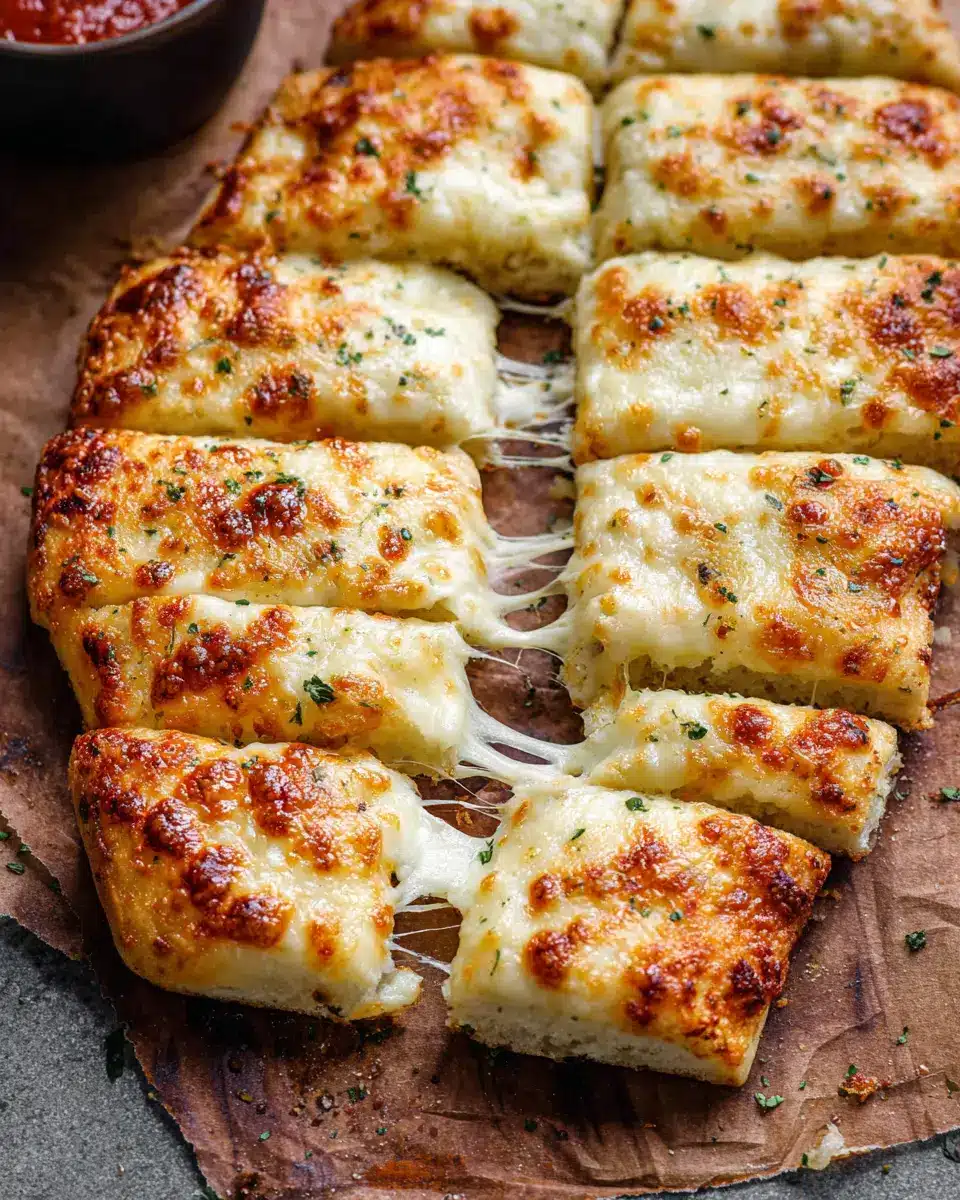
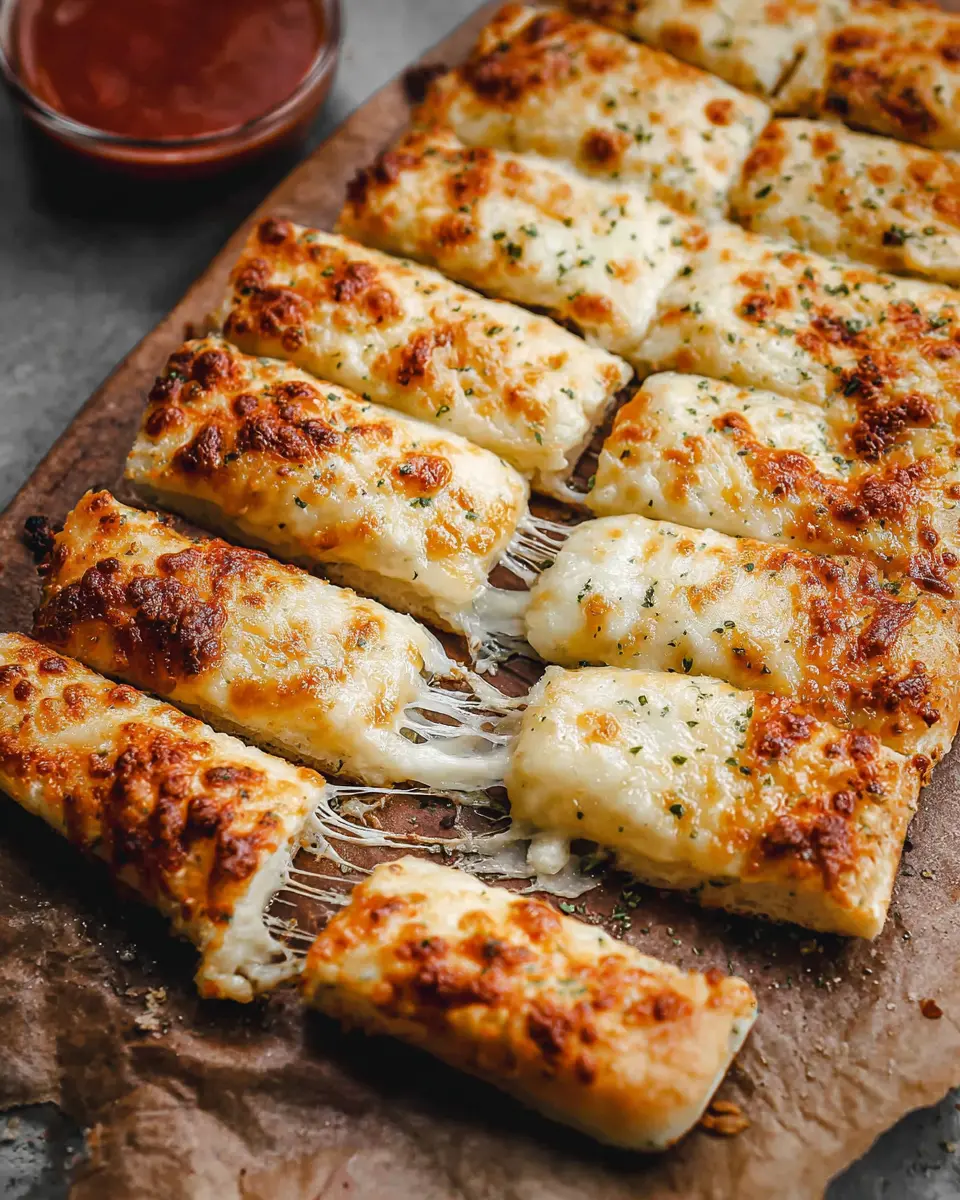
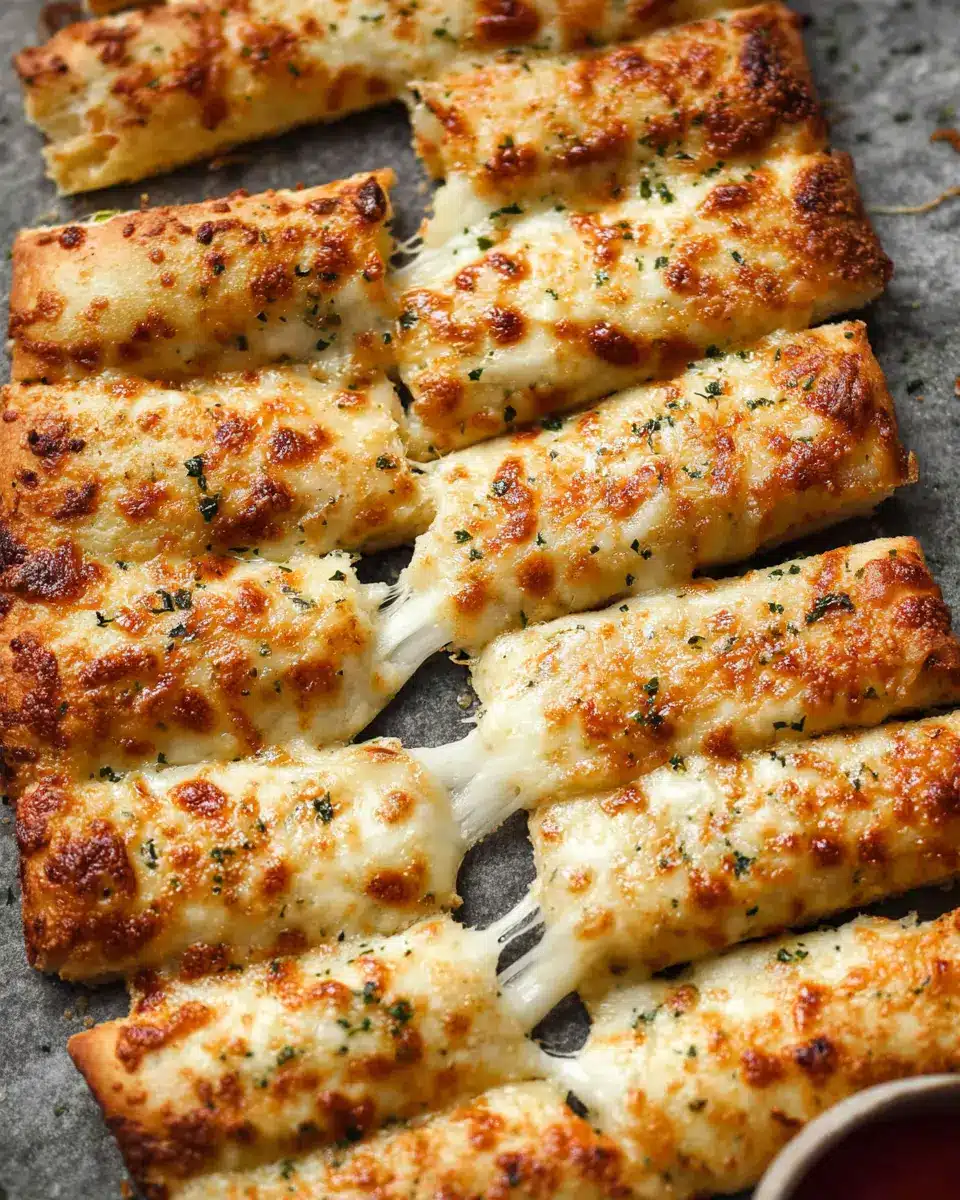
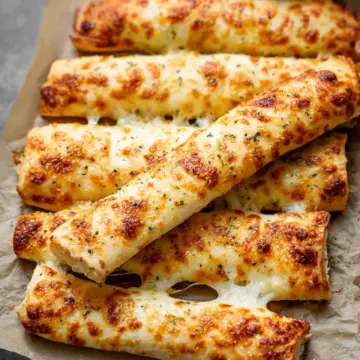
These toppings add a delightful layer of flavor and richness to your cheesy breadsticks. You’ll want to make sure to evenly distribute them for a cheesy crust that will have everyone reaching for seconds!
Preparing Cheesy Breadsticks
Making cheesy breadsticks at home is a delightful experience that can elevate any meal or serve as a perfect snack. With just a few simple steps, you can create a batch of warm, cheesy, and mouthwatering breadsticks that everyone will love. Let’s dive into the process of preparing your very own cheesy breadsticks!
Activate the yeast
The first step to achieving soft and fluffy breadsticks is to activate the yeast. In a large bowl or stand mixer, combine ½ cup of warm water (not too hot!) with 1 teaspoon of granulated sugar and 1 ⅛ teaspoons of active dry yeast. Give it a gentle stir and let it sit for about 5 minutes until bubbly and fragrant. This is where the magic happens—yeast thrives on sugar and warmth, creating the perfect environment for your breadsticks to rise!
Mix the dough
Once your yeast is frothy, it’s time to mix the dough. Add in the remaining ¼ cup of warm water, 1 ½ tablespoons of olive oil, ¾ teaspoon of salt, and ½ teaspoon of white vinegar. Begin mixing on medium-low speed, gradually adding 1 ½ to 2 cups of bread flour or all-purpose flour. Knead the dough for a few minutes until it’s smooth and elastic. It should be slightly sticky but not so much that it clings to your fingers. You want the dough to be manageable and perfect for shaping.
Let the dough rise
Now comes the waiting game! Cover the bowl with a dry towel and place it in a warm spot to rise for about an hour. During this time, the dough will double in size, creating those wonderful airy pockets we all love in cheesy breadsticks. You could use this time to prep any dipping sauces like marinara or ranch—both are fantastic companions!
Shape the dough
Once your dough has risen beautifully, it’s time to shape it. Gently punch it down to release the air, then place a large piece of parchment paper on your counter. Using your hands, stretch or roll the dough into a rectangular shape about ⅓ inch thick. This part is fun! Feel free to get creative with the size and thickness of your breadsticks; just remember that the thicker they are, the longer they’ll take to bake.
Prepare the topping and bake
Finally, let's add some deliciousness! In a small bowl, mix together melted butter and minced garlic. Spread this mixture evenly over the dough, reaching all the way to the edges. Top it off with grated parmesan cheese and shredded mozzarella cheese for that gooey, cheesy goodness. Carefully transfer the dough (still on the parchment paper) onto a preheated pizza stone or upside-down cookie sheet in your oven set to 475°F. Bake for 8-12 minutes, or until golden and bubbly.
And there you have it! A batch of irresistible cheesy breadsticks perfect for sharing (or not!). Enjoy them warm and pair them with your favorite sauces—trust me, they’ll disappear in no time!
Variations on Cheesy Breadsticks
Herb-infused Cheesy Breadsticks
If you’re a fan of herbs, these herb-infused cheesy breadsticks are a delightful twist! Simply mix dried or fresh herbs like oregano, basil, or rosemary into your dough or top them with a sprinkle before baking. Not only do they add flavor, but they also bring a beautiful aroma that fills your kitchen. Pair these with your favorite homemade marinara sauce for an elevated snack you won't forget.
Cheesy Breadsticks with Jalapeños
For those who crave a kick, consider spicy cheesy breadsticks with jalapeños. Slice fresh or pickled jalapeños and spread them over the cheese topping before baking. This variation adds a delicious heat that complements the creamy mozzarella and tangy parmesan perfectly. Whether you're gearing up for a movie night or hosting friends, these spicy breadsticks are sure to impress.
Cooking tips and notes for Cheesy Breadsticks
Common mistakes to avoid
When making cheesy breadsticks, be careful not to over-knead the dough. It should be smooth and slightly sticky, but not overly so. Always let it rest in a warm spot for a proper rise; this enhances the texture. Lastly, don't skip the garlic butter topping—it adds a flavorful touch that complements the cheesy goodness.
Making ahead and freezing tips
Planning ahead? You can make the dough 3-4 hours in advance and refrigerate it to rise. For longer storage, make your dough, coat it in non-stick spray, and store it in a freezer-safe bag. It’ll be good for 2-3 months. Just remember to thaw it overnight in the fridge and let it sit on the counter for 30 minutes before shaping your cheesy breadsticks.
Serving suggestions for Cheesy Breadsticks
Best dips to accompany cheesy breadsticks
Cheesy breadsticks are a delightful treat on their own, but why not elevate the experience with the perfect dips? Consider these creamy options:
- Marinara Sauce: A classic pairing that balances the richness of cheese with tangy tomato goodness.
- Ranch Dressing: The cool, herby flavor complements the warmth of the breadsticks beautifully.
- Spinach Artichoke Dip: For a creamy twist, try serving your breadsticks with this savory dip that packs a flavor punch.
Pairings for a complete meal
Ready to make your cheesy breadsticks the star of a full meal? Here are some great pairings to consider:
- Salad: A light Caesar or garden salad provides a refreshing counterpoint to the rich flavors.
- Soup: Pairing with a hearty tomato basil or creamy potato soup makes for a cozy, filling dinner.
- Charcuterie Board: Incorporate your cheesy breadsticks alongside meats like turkey bacon and cheeses for a fun appetizer spread.
With these suggestions, your cheesy breadsticks can shine bright at any meal!
Time Breakdown for Cheesy Breadsticks
Preparation Time
Getting your cheesy breadsticks ready is a breeze, taking just about 15 to 20 minutes. This includes mixing up your ingredients and letting the dough rise.
Baking Time
Once your dough is prepped, pop those breadsticks in the oven. They’ll bake for around 8 to 12 minutes—perfect for when you’re craving a cheesy snack!
Total Time
In total, you’re looking at about 1 hour and 30 minutes from start to finish, most of which is just letting that dough rise. So, grab a friend and get ready to indulge in cheesy goodness!
Nutritional Facts for Cheesy Breadsticks
When it comes to enjoying cheesy breadsticks, understanding their nutritional value can help you make mindful choices. Here's a quick look at the essential numbers:
Calories: Each cheesy breadstick packs approximately 182 calories.
Protein: You’ll get around 7 grams of protein per serving, making it a delightful treat that can provide some energy boost.
Sodium: These delicious breadsticks contain about 236 mg of sodium, so it’s good to be aware, especially if you're watching your salt intake.
For more details on the nutritional breakdown, feel free to check resources like the USDA FoodData Central or Healthline. These sites offer extensive insights into the nutrients found in various foods, aiding in balanced, informed eating.
FAQs about Cheesy Breadsticks
Can I use whole wheat flour for the dough?
Absolutely! Using whole wheat flour is a fantastic option for your cheesy breadsticks. It will add a nuttier flavor and a bit more fiber to your dish. Just keep in mind that whole wheat flour can yield a denser dough, so you might need to adjust the liquid slightly for the perfect consistency.
How do I store leftover cheesy breadsticks?
To keep your cheesy breadsticks fresh, allow them to cool completely, then wrap them tightly in plastic wrap or aluminum foil. Store them in the refrigerator for up to 3 days. If you want to keep them longer, consider freezing them. Just place cooled breadsticks in a freezer-safe bag, sealing out as much air as possible.
Can I make cheesy breadsticks without yeast?
Yes, you can! If you prefer a quicker option, try using baking powder instead of yeast. You won’t get the same chewy texture, but it’s a great alternative. Just combine your dry ingredients and wet ingredients, mix them, then shape them into sticks and bake. It’s simple and still delicious!
Conclusion on Cheesy Breadsticks
The joy of homemade cheesy breadsticks extends beyond their delightful taste. Crafting these savory treats together can ignite your next kitchen adventure, whether it's a casual family dinner or a cozy night in with friends. Dive into this rewarding experience and elevate your snacking game with cheesy goodness.
Cheesy Breadsticks
Equipment
- stand mixer
- Pizza Stone
- parchment paper
Ingredients
Dough
- 1 teaspoon active dry yeast
- 1 teaspoon granulated sugar
- ¾ cup warm water
- 1 ½ Tablespoons olive oil
- ¾ teaspoon salt
- ½ teaspoon white vinegar
- 1 ½ - 2 cups bread flour or all-purpose flour
Topping
- 1 ½ Tablespoons salted butter
- 2 cloves garlic minced
- ⅓ cup freshly grated parmesan cheese
- 1 ¼ cups shredded mozzarella cheese
Instructions
Preparation
- In a large bowl or stand mixer combine ½ cup of the warm water with the sugar and yeast. Stir to combine and let rest for 5 minutes. Add the remaining ¼ cup warm water, olive oil, salt and vinegar.
- Begin mixing on medium-low speed and gradually add the flour --knead for a few minutes, or until the dough is smooth and elastic (it should be slightly sticky, but not so sticky that it sticks to your clean fingertip). Cover the bowl with a dry towel and allow to rest in a warm place for 1 hour.
- Preheat oven to 475 degrees F with a pizza stone inside or upside down cookie sheet inside.
- Gently punch the dough down. Place a large piece of parchment paper on your counter and use your hands to spread the dough into a rectangle about ⅓ inch thick.
- Mix melted butter and garlic in a small bowl then spread mixture evenly over dough, all the way to the edges. Top with parmesan and mozzarella cheeses.
- Transfer the dough (still on the parchment paper) onto the hot pizza stone in the oven. Bake for 8-12 minutes or until golden and bubbly.
- Serve with dipping sauces like marinara sauce or ranch.


Leave a Reply