
Introduction to No-Bake Pumpkin Pie
Are you looking for an effortless dessert that captures the essence of fall? Look no further than this delightful no-bake pumpkin pie! Perfect for Thanksgiving or any autumn gathering, this creamy treat is all about simple ingredients and minimal fuss.
Why Choose a No-Bake Dessert?
There are plenty of reasons to opt for a no-bake dessert, particularly a classic like this pumpkin pie:
-
Time-Saving: With just 10 minutes of prep time, it's the perfect solution for busy hosts. No need to worry about heating up the oven (which is a huge bonus when you’re juggling multiple dishes).
-
Consistency: Achieving that velvety-smooth texture is simple when you don’t have to worry about baking. The gelatin sets it perfectly without the fuss of baking temperatures or times.
-
Cool and Refreshing: Especially during warmer days, a chilled dessert feels revitalizing. Who doesn’t crave a slice of that smooth pumpkin goodness after a hearty meal?
By choosing a no-bake pumpkin pie, you’re crafting a dessert that’s not only easy to whip up but also deliciously satisfying. Plus, you can spend more time with friends and family, making memories instead of stuck in the kitchen! For more recipe ideas, explore The Spruce Eats or Taste of Home.
With such a simple recipe, let’s dive into creating your own masterpiece!
Ingredients for No-Bake Pumpkin Pie
Essential Ingredients for a Perfect Pie
Creating an effortless yet delicious no-bake pumpkin pie starts with the right ingredients. Here’s what you’ll need for our delightful Thanksgiving treat:
- Unflavored gelatin: This is the secret behind that smooth, creamy texture.
- Spices: Ground cinnamon, ginger, and nutmeg infuse the pie with classic autumn flavors. Don’t underestimate their importance!
- Salt: Just a pinch enhances the sweetness of the pie.
- Sweetened condensed milk: This ingredient not only sweetens the pie but also adds richness.
- Eggs: Beaten eggs help bind the mixture and give it a light, fluffy quality.
- Pumpkin puree: Use pure, canned pumpkin for convenience and a genuine pumpkin flavor.
- Graham cracker crust: A pre-made crust saves time and provides a delightful crunch.
Selecting high-quality ingredients can transform your no-bake pumpkin pie from good to unforgettable! For a deeper dive into the benefits of using fresh ingredients, check out sources like Healthline or WebMD.
Preparing No-Bake Pumpkin Pie
Creating a stunning no-bake pumpkin pie is simpler than you might think, and it’s a perfect addition to your Thanksgiving table. With its creamy texture and a delightful graham cracker crust, this dessert is bound to impress your family and friends. Let’s dive into the preparation steps!
Gather your ingredients
Before you start your culinary adventure, gather all the ingredients you’ll need. Here’s what you’ll need for this delectable pie:
- 1 (.25 ounce) package unflavored gelatin
- 1 teaspoon ground cinnamon
- ½ teaspoon ground ginger
- ½ teaspoon ground nutmeg
- ½ teaspoon salt
- 1 (14 ounce) can sweetened condensed milk
- 2 eggs, beaten
- 1 (15 ounce) can pumpkin puree
- 1 (9 inch) prepared graham cracker crust
Having everything ready will make the process smooth and enjoyable!
Mix the gelatin and spices
In a heavy saucepan, combine the gelatin, cinnamon, ginger, nutmeg, and salt. These spices are the essence of your no-bake pumpkin pie, providing that warm, autumnal flavor that we all cherish this time of year. Now, stir in the sweetened condensed milk and beaten eggs. Mix it well and let the mixture sit for a minute.
Combine the base ingredients
Place the saucepan on the burner over low heat, stirring constantly. This is where the magic happens! You want the gelatin to dissolve and the mixture to thicken, which will take about 10 minutes. Be patient—the end result will be worth it! If you’re curious about gelatin, you can find more information about it here.
Stir in the pumpkin puree
Once your base has thickened, remove it from the heat and gently fold in the pumpkin puree. Stir until everything is thoroughly combined. This is the moment when your kitchen starts to fill with that irresistible pumpkin aroma!
Pour into the graham cracker crust
Now that your filling is ready, it’s time to pour it into the prepared graham cracker crust. Use a spatula to get an even layer. You can already visualize how beautiful this dessert is going to look once set!
Chill to perfection
The final step is to refrigerate your pie for at least three hours. This chilling time allows the no-bake pumpkin pie to firm up and develop its flavors. It’s almost like having a little time machine; you put it in the fridge, and when you take it out, you’re transported to pumpkin pie paradise!
Now you’re ready to serve a delightful piece of your homemade no-bake pumpkin pie. Remember, dessert is the grand finale to any meal, and this one is sure to leave a lasting impression!
Variations on No-Bake Pumpkin Pie
Add Some Chocolate
If you're a chocolate lover, consider mixing chocolate into your no-bake pumpkin pie for an indulgent twist. Try folding in melted dark chocolate or even incorporating cocoa powder into the filling. This pairing not only enhances the flavor but also adds an appealing contrast to the pumpkin's warmth. Don't forget to drizzle some chocolate sauce over the top before serving—it's a sure showstopper!
Experiment with Spices
The classic spices of pumpkin pie are delightful, but don’t shy away from experimentation! Try adding a pinch of cardamom or allspice for a unique flavor profile. You could also swap standard cinnamon for cinnamon sugar for a sweeter touch. Each spice brings its own character to the pie, ensuring every bite is a delicious surprise. For some inspiration on spice combinations, check out The Kitchn's guide to spices.
These variations not only make the dessert more exciting but also let you tailor the pie to your taste preferences. Happy pie-making!
Cooking Tips and Notes for No-Bake Pumpkin Pie
Perfecting the texture
To achieve a creamy no-bake pumpkin pie, ensure that your gelatin is fully dissolved in the milk mixture for a silky smooth filling. Regularly stir the mixture while heating to prevent any lumps. If you're looking for a lighter texture, consider whipping some heavy cream separately and folding it into the pumpkin filling before pouring it into the crust. This little trick can elevate the pie's mouthfeel dramatically!
Tips for garnishing
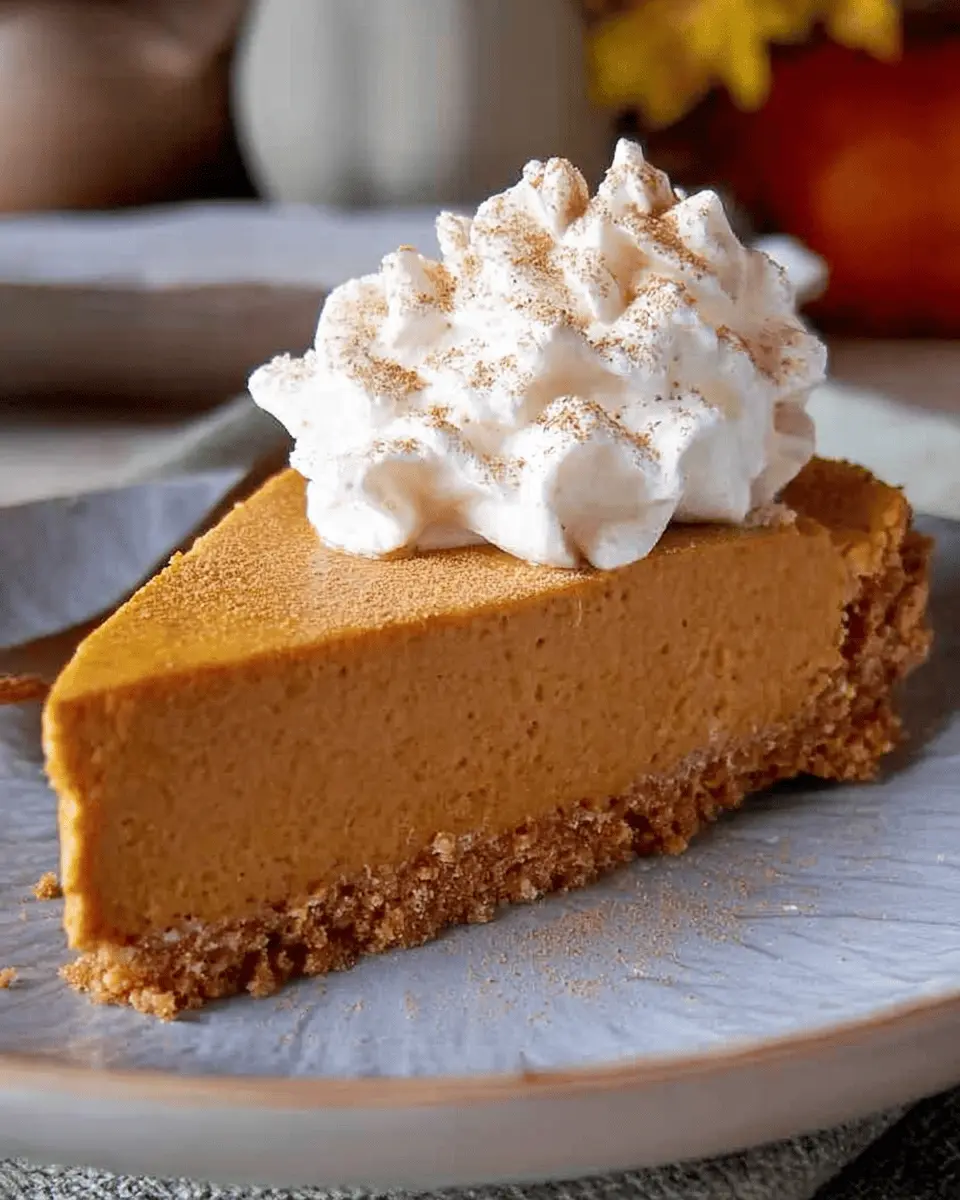
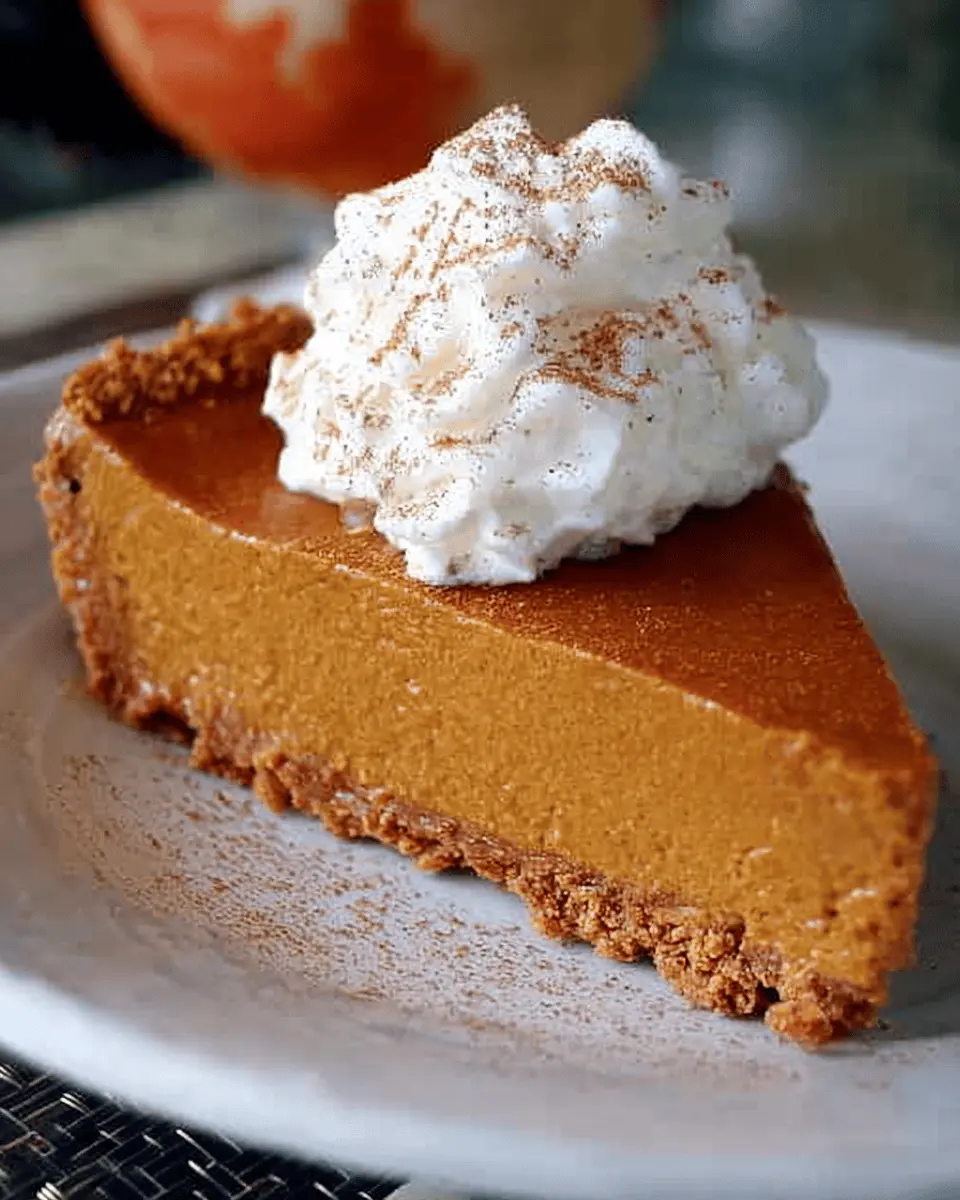
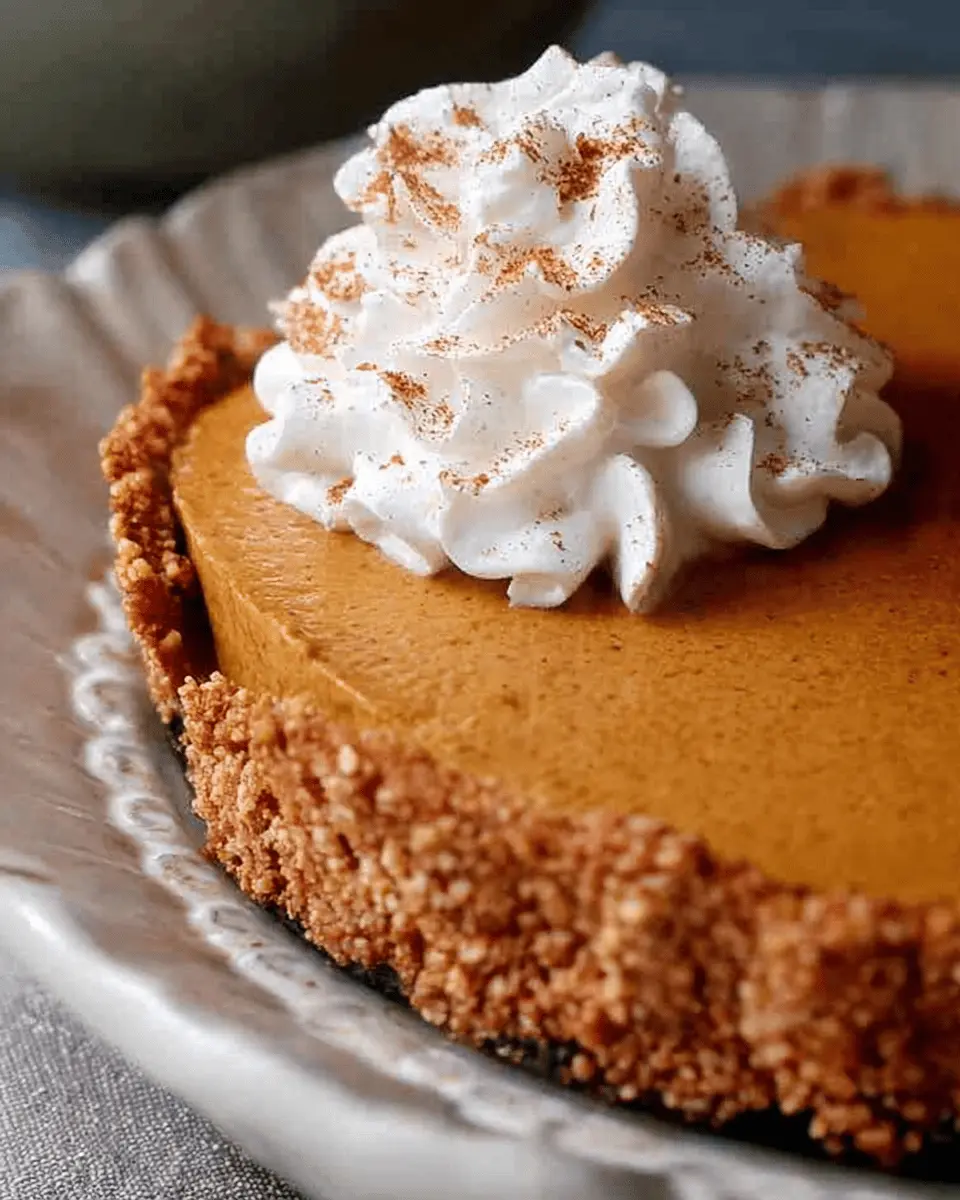
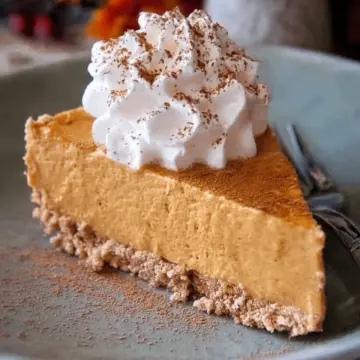
Presentation is key for your no-bake pumpkin pie! Whipped cream is the classic choice, but you can spice it up by adding a sprinkle of cinnamon or nutmeg on top. For a twist, consider carving out some pecans or candied ginger for added texture and flavor. Fresh mint leaves can also add a pop of color. Remember, a visually appealing pie can excite your guests before they even take a bite!
For more tips on pie presentation, check out The Spruce Eats.
Serving Suggestions for No-Bake Pumpkin Pie
Ideal Accompaniments
To elevate your no-bake pumpkin pie, consider pairing it with classic flavors. A dollop of freshly whipped cream is always a crowd-pleaser, adding a lightness that contrasts beautifully with the rich filling. For a twist, drizzle some caramel sauce on top or sprinkle with toasted pecans for added texture. A scoop of vanilla ice cream can turn your pie into an indulgent treat—imagine the melty goodness!
Festive Serving Ideas
Make your presentation special by serving slices on decorative plates. Add a sprinkle of cinnamon and a few cranberries around the pie for that festive look. If you’re hosting a gathering, try creating a pumpkin pie bar where guests can add their favorite toppings, like chocolate shavings or crushed graham crackers. This not only makes it interactive but also adds a personalized touch to each slice! For detailed decorating tips, check out Taste of Home.
With these suggestions, your no-bake pumpkin pie will shine at any holiday table!
Time Breakdown for No-Bake Pumpkin Pie
Preparation Time
Getting started on your no-bake pumpkin pie is a breeze, taking just 10 minutes to mix your ingredients and whip up a delicious filling.
Chilling Time
After pouring the creamy mixture into the graham cracker crust, let it chill for at least 3 hours. This step is crucial for allowing the pie to set properly, enhancing its flavors!
Total Time
In total, you’ll be looking at about 3 hours and 20 minutes from start to finish. Most of that time is hands-off, so you can relax while your pie becomes the star of your dessert table!
If you’re eager for some tips on savory Thanksgiving side dishes to pair this with, check out this resource. You’ll be hosting with confidence in no time!
Nutritional Facts for No-Bake Pumpkin Pie
Calories
This delectable no-bake pumpkin pie holds approximately 346 calories per slice. This makes it a lighter option for your Thanksgiving dessert table, allowing you to indulge without too much guilt.
Protein
Each serving provides about 8 grams of protein, primarily from the eggs and sweetened condensed milk. This helps balance the pie's sweetness, contributing to a satisfying bite that feels comforting and nourishing.
Sodium
With around 526 mg of sodium per slice, it's important to consider if you're watching your salt intake. While this isn't excessive, being mindful of the sodium levels can help keep your overall dietary choices aligned with your health goals.
For more detailed statistics on food and health, you can always refer to reputable sources like the USDA FoodData Central. Ready to enjoy this creamy delight? Dive into the recipe and make your no-bake pumpkin pie as sweet as your family gatherings!
FAQs about No-Bake Pumpkin Pie
Can I use fresh pumpkin?
Absolutely! While this no-bake pumpkin pie recipe calls for canned pumpkin puree for convenience, you can use fresh pumpkin. Just be sure to roast your pumpkin, scoop out the flesh, and blend it until smooth. Fresh pumpkin may slightly change the texture, but it adds a delicious and wholesome flavor.
How do I store leftovers?
If you have any pie left after serving (which is rare, but it happens!), cover it with plastic wrap or store it in an airtight container. Keep it in the refrigerator for up to 3 days. To enjoy the best taste and texture, serve it chilled.
Is there a dairy-free version?
Of course! To create a dairy-free no-bake pumpkin pie, substitute the sweetened condensed milk with a dairy-free alternative like coconut cream or a non-dairy condensed milk option. Just make sure to double-check the labels for any added sugars or preservatives! For more tips on substitutions, check out Nourished Kitchen.
Feel free to adapt the recipe to suit your dietary needs and enjoy this delightful dessert!
Conclusion on No-Bake Pumpkin Pie
In summary, this no-bake pumpkin pie is the perfect solution for your Thanksgiving dessert table. With just a few simple ingredients and minimal prep time, you'll create a delightful and creamy indulgence that friends and family will adore. Try it this season, and enjoy the compliments!
No-Bake Pumpkin Pie: Easy, Irresistibly Creamy Delight
Equipment
- Heavy saucepan
- Whisk
- measuring cups
- measuring spoons
- 9-inch pie plate
Ingredients
Gelatin and Spices
- 1 .25 ounce package unflavored gelatin
- 1 teaspoon ground cinnamon
- 0.5 teaspoon ground ginger
- 0.5 teaspoon ground nutmeg
- 0.5 teaspoon salt
Filling
- 1 14 ounce can sweetened condensed milk
- 2 large eggs, beaten
- 1 15 ounce can pumpkin puree
Crust
- 1 9 inch prepared graham cracker crust
Instructions
Preparation
- Combine gelatin, cinnamon, ginger, nutmeg, and salt in a heavy saucepan; stir in condensed milk and beaten eggs, mixing well. Let stand one minute, then place on burner over low heat, stirring constantly until gelatin dissolves and mixture thickens, about 10 minutes. Remove from heat.
- Stir in pumpkin until thoroughly combined; pour mixture into graham cracker crust. Chill for at least 3 hours before serving.
Leave a Reply