
Introduction to The Joy of Christmas Fudge
There's something undeniably magical about the Joy of Christmas Fudge. As the holiday season rolls around, this delightful treat becomes a staple in many households. But why exactly is Christmas fudge such a beloved favorite?
First and foremost, it’s all about tradition and nostalgia. Many of us grew up watching our parents or grandparents whip up batches of fudge, filling the home with sweet aromas. Almost every gathering during the holidays featured a lovingly prepared platter of fudge, inviting heartfelt conversations and laughter. This emotional connection adds to its charm—food has an incredible power to evoke memories.
Moreover, fudge is incredibly versatile! You can customize it with various flavors, colors, and toppings, making it the perfect canvas for your creativity. Whether you prefer the classic chocolate version or something more adventurous like mint or peanut butter, there’s a fudge recipe to suit every palate.
Not to mention, fudge makes for excellent holiday gifts. A beautifully packaged box of homemade fudge can convey thoughtfulness and care, perfect for neighbors, coworkers, or friends. If you're eager to capture that holiday spirit and sweeten your celebrations, crafting a batch of fudgy goodness is surely the way to go.
Ready to dive into a festive experience? Let’s get started!
What You'll Need for a Delicious Fudge
When it comes to creating the joy of Christmas fudge, having the right ingredients is essential for that rich, creamy flavor and festive touch. Let’s gather our supplies!
- 3 cups white chocolate chips: These are the foundation of your fudge, providing a smooth and sweet base.
- 1 (14-ounce) can sweetened condensed milk: This helps bind everything together and adds a creamy texture.
- ½ teaspoon vanilla extract: A splash of vanilla enhances the overall flavor, making it even more delightful.
- Red and green food coloring: These vibrant colors not only capture the holiday spirit but also make your fudge visually appealing.
- Optional: ¼ cup holiday sprinkles for decoration: These add the final festive touch and make your fudge a standout dessert.
With these simple ingredients, you’ll be on your way to creating a truly festive treat that captures the essence of holiday joy. For more tips on choosing quality chocolate, check out resources from The Chocolate Alchemist.
Preparing The Joy of Christmas Fudge
The holiday season is a time for warmth, laughter, and, of course, delightful treats. One of those magical goodies is the joy of Christmas fudge. It's wonderfully creamy, sweet, and so easy to prepare that even those who claim they can't cook will be able to impress family and friends. Let’s break down the steps to create this festive delight.
Prepare the Pan
First things first: you need a good base! Take an 8×8-inch baking dish and line it with parchment paper. Make sure to leave some extra paper hanging over the sides. This little tip will allow you to lift the fudge out easily once it’s chilled and ready to be cut into squares. Plus, it saves a lot of cleanup time. Who doesn’t love that?
Melt the Chocolate and Condensed Milk
Next, grab a medium saucepan and combine the white chocolate chips with the sweetened condensed milk. Stir this mixture over low heat until it becomes completely smooth and melted. It’s crucial to keep the heat low; otherwise, you risk scorching the chocolate. Once everything is nicely melted and mixed, take it off the heat and stir in the vanilla extract.
Add a Splash of Color to the Fudge Mixtures
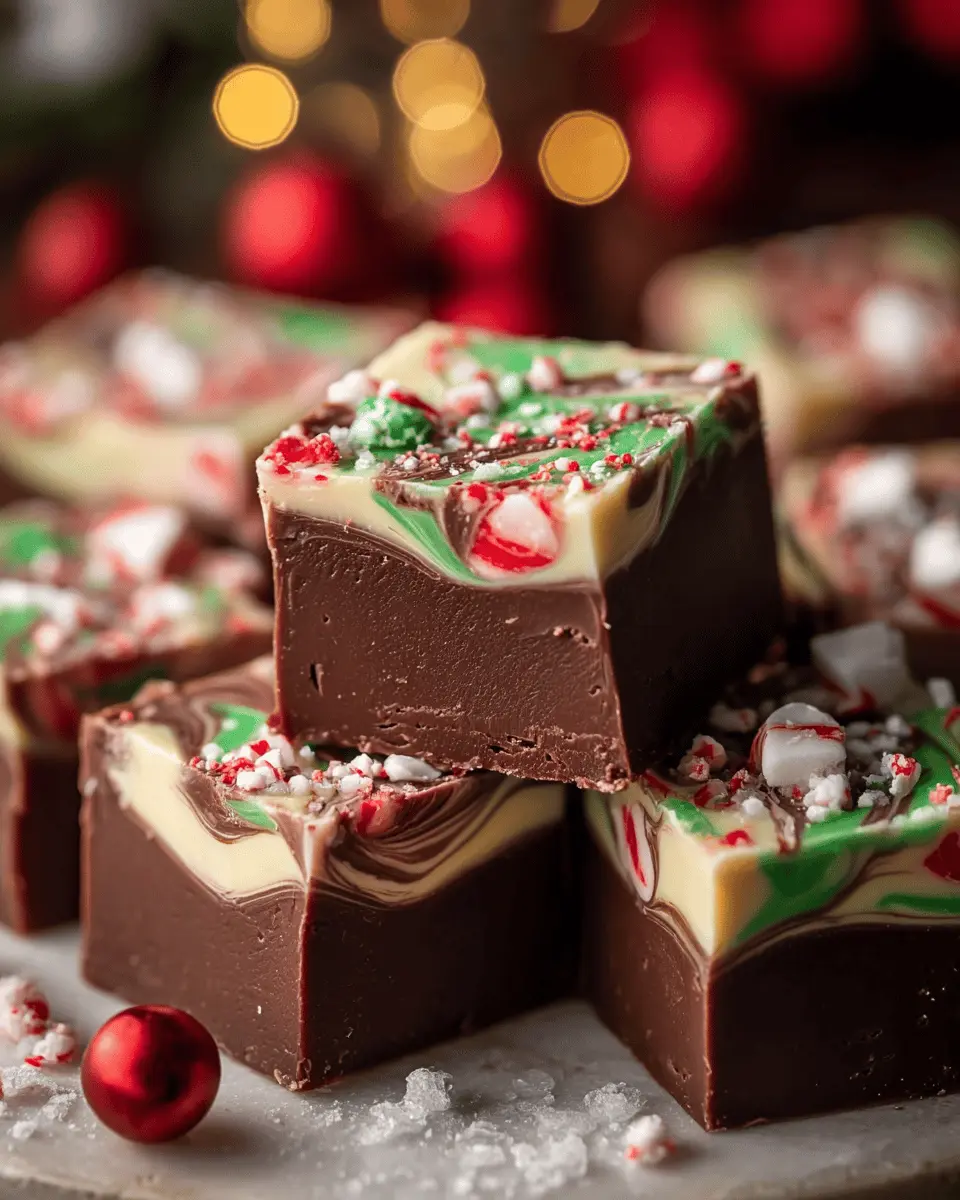
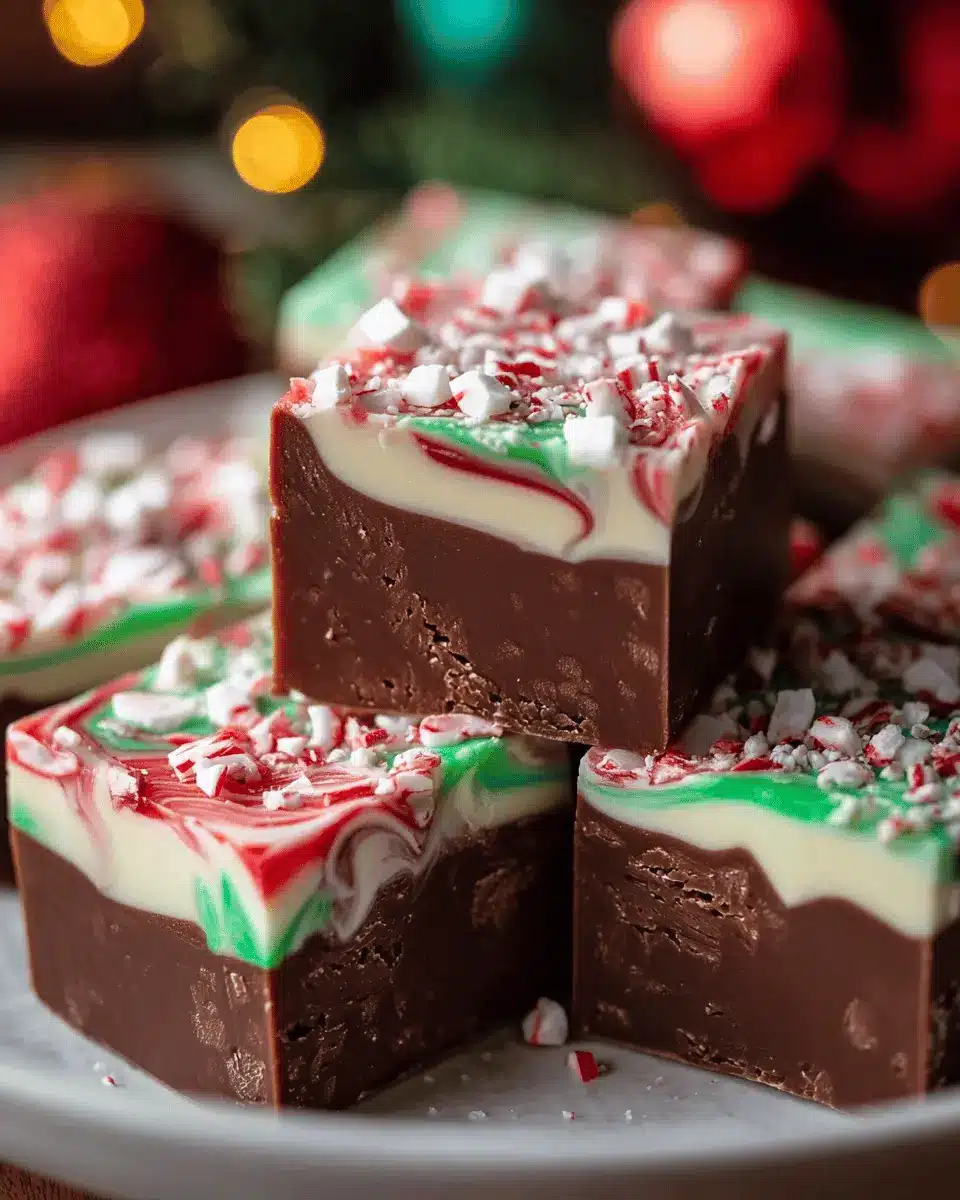
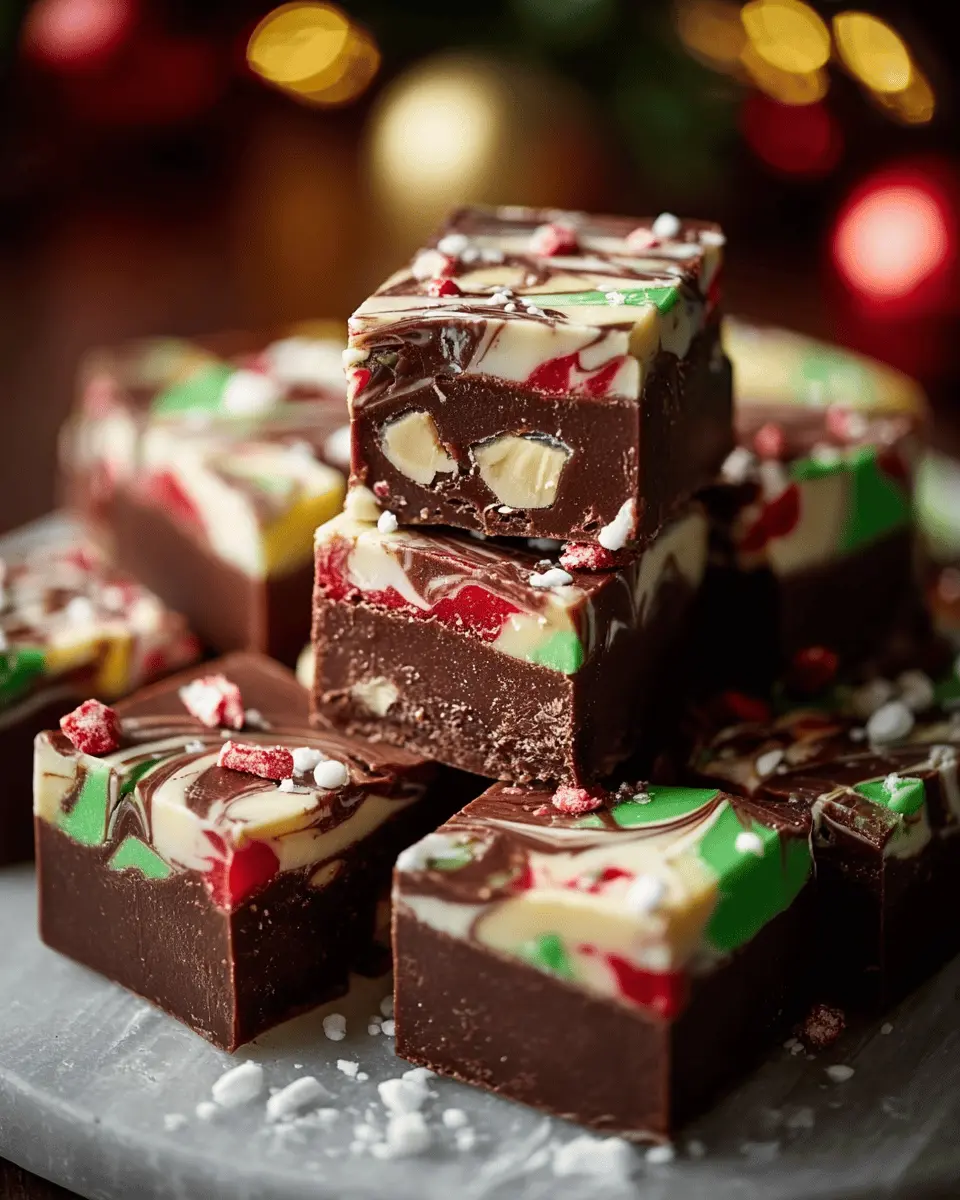
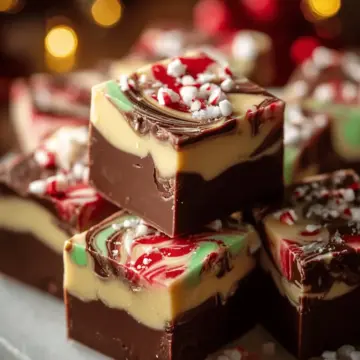
Here’s where the fun part comes in. Divide the melted mixture into three separate bowls. This is your chance to get creative! Use red food coloring to tint one bowl, green for another, and leave the third bowl plain. Not only does this add a festive touch, but it also makes for a beautiful, eye-catching presentation.
Layering the Fudge in the Pan
Now comes the layering! Start by pouring the red fudge mixture into your prepared baking dish, spreading it evenly across the bottom. Follow with the plain fudge, smoothing it out gently, and then top it with the green fudge. To add a whimsical twist, take a knife and gently swirl the layers together for a beautiful marbled effect. Don’t forget to have fun with this step!
Chill and Cut the Fudge
Finally, it’s time for the fudge to chill out! Place the pan in the refrigerator for at least 2 hours, allowing the fudge to firm up nicely. Once it’s set, use the parchment paper to lift it out of the pan and place it on a cutting board. Cut it into small squares and, if you like, sprinkle holiday-themed decorations on top to give it that extra festive flair.
Now that you've mastered the joy of Christmas fudge, you’ll have a delightful treat to share or keep for yourself during the hustle and bustle of the season. Happy cooking!
Variations on The Joy of Christmas Fudge
Peppermint fudge for a refreshing twist
Why not add a festive flair to the joy of Christmas fudge with a touch of peppermint? Simply mix a few drops of peppermint extract into your melted chocolate mixture. This minty addition not only enhances the flavor but also brings a refreshing note that pairs beautifully with the creamy sweetness of white chocolate. For added fun, crush some candy canes and sprinkle them on top before chilling.
Nutty fudge for added texture
If you enjoy a bit of crunch, consider incorporating nuts into your fudge. Chopped pecans or walnuts add a delightful texture that contrasts with the smoothness of the fudge. Simply fold in about ½ cup of your chosen nuts after melting the chocolate, ensuring they’re evenly distributed. This variation elevates the joy of Christmas fudge into a gourmet treat that your friends and family will rave about!
For more holiday inspiration, check out this article on different fudge flavors to explore even more delightful variations.
Cooking tips and notes for The Joy of Christmas Fudge
Avoiding common fudge-making mistakes
Making the Joy of Christmas Fudge can be a delightful experience, but it's easy to run into mishaps. One common mistake is overheating the chocolate, which can lead to a gritty texture. Always melt over low heat and stir constantly. Also, ensure your ingredients are measured correctly; even a slight variation in sweetened condensed milk can affect the outcome!
Storing your fudge properly
To keep your fudge fresh, store it in an airtight container in the refrigerator. It will stay good for up to a week—perfect for those holiday gatherings! For longer storage, consider freezing it. Just wrap individual squares in plastic wrap, then place them in a freezer bag for up to three months. Let it thaw at room temperature before enjoying. Happy fudging!
Serving suggestions for The Joy of Christmas Fudge
Perfect pairings for your festive fudge
The joy of Christmas fudge is truly enhanced when paired with complementary treats. Consider serving it alongside freshly brewed coffee, hot chocolate, or even tea for a delightful afternoon treat. It also makes a fantastic addition to a festive platter with turkey bacon, chicken ham, and assorted fruits. Want some zing? A side of peppermint bark or spiced nuts can elevate your dessert experience!
Gift ideas featuring fudge
Gift-giving just got sweeter with the joy of Christmas fudge. Pack pieces in colorful boxes or mason jars and tie them up with festive ribbon for a charming gift. Consider creating a fudge sampler that includes different flavors or layering fudge with other homemade treats, like cookies or homemade candies. Don't forget to attach a personal note—those thoughtful touches can turn simple gifts into cherished memories.
For great packaging ideas, check out sites like Martha Stewart for inspiration!
Time details for The Joy of Christmas Fudge
Preparation time
Getting started on The Joy of Christmas Fudge is a breeze, with just 10 minutes needed for preparation. Gather your ingredients, line your baking dish, and you’ll be well on your way to a festive treat in no time!
Chill time
After layering your colorful fudge, it’s important to let it chill for at least 2 hours. This ensures that your fudge firms up beautifully, making it easy to cut into those perfect squares.
Total time
In total, you’re looking at about 2 hours and 10 minutes to create this delightful holiday treat. That’s just a small investment for a sweet gift or a delicious addition to your holiday spread! For additional chocolate recipes, check out this site for inspiration.
Nutritional Information for The Joy of Christmas Fudge
Calories per Piece
Indulging in The Joy of Christmas Fudge comes with delightfully manageable calories. Each piece contains approximately 100 calories, making it a sweet treat that won't derail your holiday plans.
Sugar and Fat Content
Packed with flavor, this fudge has 15g of sugar and 5g of fat, including 3g of saturated fat. While it's a festive indulgence, moderation is key. Enjoy a piece during your holiday celebrations without the guilt!
For more insights into dessert nutrition, check out Nutrition Data for comprehensive details on various ingredients.
FAQs about The Joy of Christmas Fudge
Can I use dark chocolate instead?
Absolutely! While the classic version of the joy of Christmas fudge features white chocolate, feel free to swap in dark chocolate if that suits your palate. Just remember that dark chocolate has a richer flavor, which can create a delightful contrast when paired with the sweet condensed milk.
How long will the fudge last?
When stored properly in an airtight container in your refrigerator, your fudge can last up to a week! It can even be frozen for up to three months for those times you want to save some for a special occasion or future cravings.
What can I do with leftover fudge?
If you find yourself with leftover fudge, there are plenty of fantastic options! Crumble it over ice cream for a sweet topping, mix it into your morning oatmeal for a decadent twist, or even incorporate it into cookies for an exciting flavor upgrade. The possibilities are endless! For more creative dessert ideas, check out FoodNetwork or Serious Eats.
Conclusion on The Joy of Christmas Fudge
In summary, the joy of Christmas fudge lies not only in its delicious flavors but also in the cherished memories it creates. Share this delightful treat with loved ones, and let each bite evoke the spirit of the season. Embrace the warmth of the holidays with this easy and festive fudge recipe!
The Joy of Christmas Fudge: An Easy Indulgence for the Holidays
Equipment
- 8×8-inch baking dish
- medium saucepan
Ingredients
Chocolate Fudge Ingredients
- 3 cups white chocolate chips
- 1 14-ounce can sweetened condensed milk
- ½ teaspoon vanilla extract
- red food coloring
- green food coloring
- ¼ cup holiday sprinkles optional, for decoration
Instructions
Fudge Preparation Steps
- Line an 8×8-inch baking dish with parchment paper, allowing extra paper to hang over the sides for easy removal.
- In a medium saucepan, combine white chocolate chips and sweetened condensed milk. Stir over low heat until completely melted and smooth. Remove from heat and stir in vanilla extract.
- Divide the melted mixture into three bowls. Tint one with red food coloring and another with green, leaving the third bowl plain.
- Pour the red fudge mixture into the prepared pan, spreading it evenly. Layer the plain fudge on top, followed by the green fudge. Gently swirl the layers together with a knife for a marbled effect.
- Sprinkle holiday-themed sprinkles on top while the fudge is still warm, if desired.
- Refrigerate for at least 2 hours, or until firm. Lift the fudge out using the parchment paper and cut into small squares.
Leave a Reply